Best Mold for Adamantine Forge BG3: Expert Guide
Discover how to pick the best mold for adamantine forge BG3. This guide covers criteria, acquisition, and step-by-step use to optimize your crafting outcomes.

According to Mold Removal Lab, the best mold for adamantine forge BG3 balances rarity, compatibility with the forge, and its impact on crafting results. In Baldur's Gate 3, choosing the right mold can influence material yield, durability, and success rate. This quick answer outlines the key steps to identify, acquire, and apply the ideal mold for your forge runs.
BG3 Crafting Context: mold and the adamantine forge
In Baldur's Gate 3, forging adamantine items hinges on selecting a mold that aligns with the forge's mechanics. The term mold here refers to a needed tool that shapes the alloy outcome, similar to how real-world molds influence metalwork. The choice matters: some molds enhance material yield, others improve surface quality or durability, and a rare few unlock unique traits. For players chasing the best mold for adamantine forge bg3, the decision should balance availability, in-game cost, and the desired result. According to Mold Removal Lab, the most effective molds tend to offer a strong compatibility profile with the forge system and a favorable risk-to-reward ratio, especially when you are aiming for high-quality adamantine items. Keep in mind that your forge runs will vary based on your character’s skills, the mold type you possess, and the resources you bring to the table, so plan accordingly.
These guiding principles help you stay focused:
- Understand how molds interact with your forge session
- Prioritize molds that offer predictable results
- Don’t overvalue rarity if it compromises practicality
- Test molds on safer, lower-cost materials before committing to rare draws
What a mold does in the forge
A mold acts as a shaping template during the forging process. It determines the geometry of the final piece and can subtly influence durability, weight, and the surface finish. In BG3, molds also influence the efficiency of the forging run—some molds reduce resource consumption, others speed up crafting, and a few unlock special visual effects. Because mold effects can vary, the widely applicable approach is to look for molds that consistently improve core metrics like yield and quality when used with adamantine ore. While exact numerical values are game-specific and change with patches, the underlying principle remains: a good mold should fit the forge’s rules and your crafting goals. As you explore, you’ll notice certain molds pair well with higher-grade ores and others with specific weapon types, which is why comprehensive evaluation matters.
From a practical standpoint:
- Favor molds that match your intended item class (weapons, armor, or components)
- Check for any in-game notes about mold compatibility with adamantine
- Track your results to identify patterns across multiple forging attempts
Key criteria to evaluate mold quality
Evaluating mold quality requires looking at several core criteria. First, compatibility: the mold must be usable at your forge location and supported by the current crafting rules. Second, stability: molds should yield consistent results across multiple trials rather than wildly varying outcomes. Third, rarity vs. utility: a mold’s scarcity is only valuable if it meaningfully improves end results. Fourth, synergy with your build: some molds reward specific skill trees or class features, which can tilt the odds in your favor if you plan around them. In practice, this means listing the top candidate molds by how reliably they improve yield, how often they produce a high-durability item, and how easy they are to obtain. The Mold Removal Lab approach emphasizes documenting the results of each mold you try so you can compare performance over time and avoid chasing an elusive, underperforming option.
To apply these criteria, create a simple matrix: rate each mold on compatibility, impact, ease of acquisition, and risk. This helps you avoid bias toward flashy but impractical choices and keeps you focused on real, repeatable gains.
Sourcing and acquiring molds in BG3
Finding the right mold often means exploring multiple game regions, completing side quests, or visiting specialized vendors. Prioritize molds that are documented by the community as reliable, because patch notes can shift mold behavior over time. When you scout locations, bring a small set of base materials to test a mold’s effect quickly without depleting your premium resources. If a mold feels lengthy to obtain or requires several steps to unlock, weigh the time investment against the potential gains in forging outcomes. Remember that some molds are tied to specific companions or factions, so your progress with those factions can influence access.
A practical plan:
- Map out locations known for forging components
- Slot test runs for each mold you acquire on inexpensive alloy samples
- Keep a log of which molds yielded the best results for adamantine items
How to use the mold with the adamantine forge
Using a mold properly means aligning it with your current materials and the intended item. Start by ensuring you have the correct forge setup and that you’ve chosen the mold from your inventory. Place the mold and the base material into the forge, then initiate the crafting sequence. If the forge offers multiple settings or modes, pick the option that best leverages the mold’s strengths—this often means selecting stability or yield-focused configurations. After forging, inspect the item’s quality, durability, and any special traits. If the result is unsatisfactory, adjust your mold choice for the next attempt and note the difference in outcomes. The goal is to converge on a mold that consistently produces the best overall results for adamantine items.
Important practice:
- Always run a test on a non-critical piece before committing to a valuable one
- When outcomes are ambiguous, switch to a different mold and compare side-by-side
- Document the scenario, materials used, and the final result for future reference
Practical scenarios: build path examples
Scenario A: You aim for a high-durability adamantine blade. You choose a mold known to enhance durability with base metal, then perform two test runs using common ore types. After comparing results, you settle on a mold that delivers a balanced durability boost with acceptable material cost. Scenario B: You want a faster crafting cycle for a large batch of components. You select a mold with quick-turn settings, run several short forge sessions, and accumulate a batch of items that meet your quality threshold while preserving rare resources. In both cases, the mold selection is guided by your target outcome and resource management. Across these scenarios, the best mold for adamantine forge bg3 is the one that consistently aligns with your goals and reduces wasted runs.
A practical practice is to maintain a simple ledger of molds tested, outcomes achieved, and resource costs. This helps you refine your approach over time and avoid repeating suboptimal paths.
Common mistakes and how to avoid them
Common mistakes include chasing the rarest mold without confirming compatibility, neglecting to test molds on affordable materials, and assuming one mold will work universally for all adamantine items. To avoid these pitfalls, establish a routine: test each mold on a low-cost sample, record the results, and compare across different item classes. If you encounter a failed run, analyze whether the issue was mold-incompatibility, material quality, or forge settings, and adjust accordingly. Another frequent error is overvaluing aesthetics or special effects at the expense of reliable performance. In BG3 crafting, reliability yields long-term gains over flashy but inconsistent outcomes. Finally, don’t overlook safety-like guidelines: if a mold seems to cause an unstable forge session, back off and revert to a proven mold until steady results are achieved.
Before you forge: balancing risk and reward
Balancing risk and reward means weighing the potential gain from a mold against its acquisition cost, time to obtain, and resource expenditure. Start with a baseline mold known to be dependable, then diversify your tests with two or three alternative molds to map out the delta in outcomes. If you’re running low on rare materials, prioritize molds with moderate effects that still improve overall quality rather than pursuing oversized gains that require heavy investments. In practice, approach each forge session with a clear goal, a test plan, and a method to capture results so you can iteratively improve your approach for adamantine items.
Summary: choosing the mold for your BG3 build
Your choice of mold should be guided by the item type you’re forging, how often you craft that item, and the resource economy of your playthrough. The best mold for adamantine forge bg3 is not a single universal pick but the option that consistently delivers the best balance of yield, durability, and reliability in your specific playstyle. Maintain a short log of molds tested, outcomes achieved, and any notable interactions with other upgrades or companion traits. With disciplined testing and a preference for reliability, you’ll optimize forge sessions and create superior adamantine gear more efficiently.
Tools & Materials
- Mold type (in-game item)(Essential to shape the forge output; choose based on your target item class)
- Adamantine ore(Base material for forging; keep a reserve for testing)
- Forge station / Blacksmith bench(Must be accessible at your current location)
- Crafting materials reserve(Have safe backups in case of failed attempts)
- Skill access (smithing or equivalent)(Ensure your character has the needed proficiency)
- Notebook or crafting log(Record results to compare mold performance)
Steps
Estimated time: 30-45 minutes
- 1
Gather molds and forge prerequisites
Collect the mold options you plan to test, along with a small stash of adamantine ore and any other base materials. Confirm you have access to a forge bench and the necessary crafting skill to operate it. This setup minimizes wasted runs and ensures you can perform controlled tests.
Tip: Before starting, save your game to preserve test results and prevent backtracking. - 2
Check mold compatibility with adamantine forging
Review each mold’s known compatibility with adamantine forging. If possible, consult in-game notes or community guidance to identify any constraints or synergies for the forge. Only proceed with molds that are officially supported in your current patch.
Tip: If in doubt, start with a baseline mold that has broad compatibility. - 3
Prepare the base material and setup
Set up the forge with your chosen mold and place a small amount of base material. Ensure your character meets the skill requirements to operate the forge. This step is about controlling variables for a fair comparison.
Tip: Keep your test batch small to conserve rare resources. - 4
Run the forge and evaluate output
Initiate the forging process and observe the result. Note yield, durability, and any special traits. Repeat with a second mold for a direct comparison, keeping all other variables constant.
Tip: Document both outcomes in a crafting log for later review. - 5
Analyze results and choose the best mold
Review your notes to determine which mold provided the best balance of quality and resource efficiency. Consider whether the mold consistently outperforms others across multiple trials and item types.
Tip: Prioritize reliability over occasional high-damage or flashy results. - 6
Finalize your choice and plan future tests
Select the mold that best fits your playstyle and item goals, then schedule follow-up tests to verify long-term reliability. Update your mold strategy as you acquire new molds or patch notes.
Tip: Keep your mold collection organized to quickly switch for future projects.
FAQ
What is the best mold for adamantine forge BG3?
There isn't a universal best mold; the optimal choice depends on your forge goals, resource availability, and item class. Prioritize compatibility and predictable results over rarity, then test for reliability in your playthrough.
There isn't a universal best mold; pick one that reliably improves your forge results and test it in practice.
How do I find molds for BG3 craft?
Molds are typically found through exploration, vendor purchases, or quest rewards. Start with widely available molds to build a baseline, then seek rarer options if they align with your long-term crafting plan.
Find molds by exploring and checking vendors; start with common ones and work toward rarer options as needed.
Can I use multiple molds in one forge run?
Molds are usually used one at a time per forging run. To compare, perform separate runs with different molds and compare results to determine the best option.
Typically you use one mold per run; test different molds in separate runs to compare outcomes.
Does mold choice affect durability or only appearance?
Mold choice can influence durability and other true performance traits, not just aesthetics. Always verify the impact by testing results across multiple trials.
Yes, mold choice can affect durability and performance, so test and compare outcomes.
Are there any risks or costs to experimenting with molds?
Testing molds may require extra resources and may reduce your overall supply if trials fail. Plan tests carefully and conserve rare materials for high-value projects.
Testing molds costs resources; plan carefully and reserve rare materials for important builds.
Watch Video
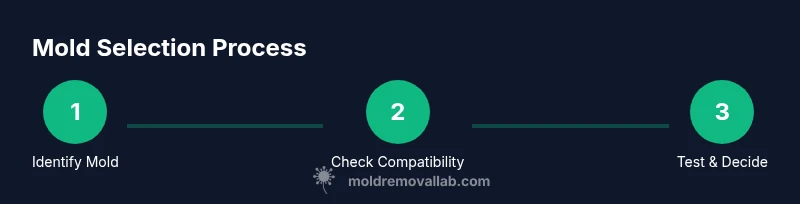
The Essentials
- Identify mold compatibility with adamantine forging.
- Balance rarity with expected improvement in outcomes.
- Test molds on affordable materials before committing.
- Document results to guide future mold choices.