Mold Silicone: A Practical How-To Guide for Preventing Mold
Learn to choose,Prep, apply, and cure mold silicone sealant to prevent mold growth in damp spaces like bathrooms and kitchens with practical, safety-focused steps.

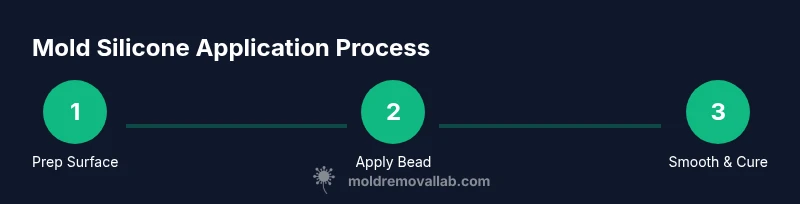
This guide teaches you how to choose mold silicone, prepare surfaces, apply a smooth bead, and ensure proper curing to prevent mold growth in wet spaces. You’ll learn surface prep, nozzle sizing, bead technique, smoothing, and maintenance, plus essential safety practices. Follow these steps to seal joints effectively and extend the life of your bathroom, kitchen, or other damp areas.
What mold silicone is and where to use it
Mold silicone refers to silicone sealants formulated with mold-and mildew-resistant properties designed for damp environments. Unlike ordinary caulk, these products contain additives that help inhibit mildew growth on the sealant surface and in joint areas. In real-world homes, mold silicone is most commonly used around baths, sinks, showers, backsplashes, and exterior gaps where moisture accumulates regularly. According to Mold Removal Lab, selecting a silicone formulated for wet areas can improve longevity and simplify cleanup, especially in kitchens and bathrooms where humidity fluctuates between use and rest. This section will help you understand the key terms, such as neutral cure versus acetoxy silicone, and why a mold-resistant formula matters for long-term health and home maintenance. When you see “mold silicone” on the label, read the data sheet for cure times, surface prep requirements, and substrate compatibility to avoid adhesion failures that invite moisture and mold.
How silicone works in damp spaces
Silicone sealants cure into a flexible elastomer that resists moisture and temperature swings. Mold inhibitors are often incorporated into the formulation, reducing the potential for mildew to take hold on the sealant surface. The result is a durable, wipe-clean joint that can withstand routine cleaning without cracking. For homeowners, this translates into fewer re-sealing cycles and easier maintenance over years of use. While silicone resists moisture, proper surface preparation and curing under appropriate conditions remain crucial. Mold Removal Lab emphasizes that even the best sealant cannot overcome persistent moisture, so addressing leaks and ventilation is part of the overall mold prevention strategy.
Common use cases and space considerations
Bathroom corners, shower stalls, kitchen countertops, and laundry areas are typical spots for mold silicone. In these settings, you want a product that remains flexible through temperature changes (hot showers, cold water exposure) and resists mildew growth. Exterior joints with high humidity or coastal salt spray also benefit from specialized silicone that offers UV resistance and weatherproofing. If you’re sealing gaps around windows or doors, choose a product labeled for exterior use and check its adhesion on painted or PVC substrates. Remember that mold silicone is not a fix for existing mold growth; it protects surfaces going forward and, when paired with moisture control, reduces reoccurrence. Mold Removal Lab recommends treating any visible mold growth separately before sealing to prevent trapped moisture beneath the sealant.
Surface preparation basics that matter
Before applying mold silicone, ensure the joint and adjacent surfaces are clean, dry, and free of old sealant. Remove old caulk with a utility knife or specialized tool, then clean the joint with isopropyl alcohol or a mild detergent solution. Dry the area completely; moisture left behind can compromise adhesion and reduce the seal’s effectiveness. If you notice mold or mildew on the substrate itself, treat it with an appropriate cleaner and allow it to dry fully. Use a lint-free cloth to wipe away residue and avoid leaving fibers that can interfere with a smooth bead.
Safety considerations and air quality
Ventilation is essential when applying sealants, as fumes from solvents can irritate eyes and lungs. Wear nitrile gloves to protect skin, and use eye protection in dusty or windy conditions. If you are sealing a high-traffic bathroom or a kitchen area, keep windows open or run a fan during application. Read the product’s safety data sheet for ventilation, first aid, and disposal instructions. Do not mix silicone with other sealants unless the label explicitly allows it, as chemical reactions can compromise cure and odor control. If anyone in your household has chemical sensitivities, consider performing the work with a temporary alternative and plan resealing during a low-usage period.
Step-by-step planning for a successful seal
Plan the joint length, select the correct nozzle size, and consider masking tape for clean edges. Create a dry-run by laying out the path and ensuring you can maintain constant pressure with a steady hand. Gather all tools and materials before starting to minimize disruptions and keep the work area tidy. A well-planned approach reduces the risk of a sagging bead, gaps, or excessive sealant buildup that can trap moisture and compromise durability.
Maintenance and long-term care
After curing, inspect joints regularly for cracks, discoloration, or gaps where moisture could ingress. Clean seals with a mild, non-abrasive cleaner to avoid scratching the silicone surface. Re-seal every few years or sooner if you notice wear, and address underlying moisture sources to prevent repeated mold growth. While mold silicone extends the interval between resealing, it is not a substitute for good ventilation, leak repair, and regular cleaning. The Mold Removal Lab team recommends including sealant maintenance as part of your home-winterization and bathroom-cleaning routines.
Tools & Materials
- Mold-resistant silicone sealant(Choose a formula labeled for wet areas (bathrooms/kitchens) with mold resistance.)
- Caulk gun (standard 10 oz cartridge)(Ensure the nozzle size fits your tube.)
- Masking tape or painting tape(Used to create clean edges along the joint.)
- Utility knife or sharp razor(To remove old sealant without damaging surfaces.)
- Isopropyl alcohol (70% or higher)(For surface cleaning and prep.)
- Lint-free cloths or paper towels(For wiping and drying surfaces.)
- Nitrile gloves(Protect hands from chemicals.)
- Caulk smoothing tool or damp finger(To achieve a smooth finish.)
- Vacuum or compressed air (optional)(For debris removal before sealing.)
- Mineral spirits or solvent cleaner (optional)(For stubborn residues, use with ventilation.)
Steps
Estimated time: 1-2 hours active work; 24 hours cure time
- 1
Prepare the area
Remove old sealant with a utility knife, clean the joint with isopropyl alcohol, and dry thoroughly. Clearing the area ensures the new silicone adheres properly and won’t trap moisture beneath the bead.
Tip: Wear gloves and work in a well-ventilated area; avoid applying on damp substrates. - 2
Protect adjacent surfaces
Apply painter’s tape along the edges to create crisp lines and protect tile, glass, or painted surfaces from excess sealant. This keeps the final line neat and reduces cleanup time.
Tip: Run the tape slightly past the joint edge for a clean outer edge once you remove the tape. - 3
Load the nozzle and cut at angle
Cut the silicone nozzle at a 45-degree angle to create a controlled bead and ensure accurate spacing. Load the tube into the caulk gun and prime the flow by gently squeezing a small amount on a test surface.
Tip: Start with a narrow bead and adjust as needed to avoid waste and sagging. - 4
Apply the silicone bead
Apply a continuous, even bead along the joint with steady pressure and a smooth motion. Move the gun at a consistent speed to avoid gaps and voids.
Tip: If you stop mid-bead, pause with the gun off to prevent air pockets; resume where you left off. - 5
Smooth and shape the bead
Use a damp finger or smoothing tool to shape the bead immediately after application. Smoothing reduces air pockets and creates a uniform finish.
Tip: Keep your finger and tool moist; excess moisture helps prevent sticking to the surface. - 6
Cure and inspect
Allow the sealant to cure fully according to the product label, typically 24 hours or more before exposure to moisture. Remove masking tape carefully after the initial set to reveal clean edges.
Tip: Do not scrub or moisture-expose joints during cure; plan around showers or sinks until the seal is solid.
FAQ
What is mold silicone and how is it different from regular silicone?
Mold silicone is a silicone sealant formulated with mold-resistant properties for damp spaces. It resists mildew growth on the surface and in joints and generally offers better adhesion in bathrooms and kitchens than standard caulk. Always check the label for cure times and substrate compatibility.
Mold silicone is a damp-space sealant that resists mildew. Check the label for cure times and surfaces it sticks to.
Can I use mold silicone on wet surfaces?
For best adhesion, apply on clean, dry surfaces. If moisture is present, fix the moisture issue first and allow the surface to dry completely before sealing. Some products are designed for damp conditions, but dry surfaces ensure a stronger bond.
Usually better to seal dry surfaces; if moisture is present, fix it first and wait for it to dry before sealing.
How long does mold silicone take to cure?
Most mold silicone cures within a day or two, depending on humidity and temperature. Do not expose the seal to moisture until the product label confirms full cure. Read the label for precise curing time.
Cure time varies by product and conditions; avoid moisture until fully cured per the label.
Can I paint over mold silicone?
Some mold silicone formulations are paintable; others are not. If you plan to paint, choose a paintable silicone and follow the manufacturer’s guidance. Not all surfaces will accept paint well after curing.
Some are paintable; check the label and follow it. Not all sealants take paint well after curing.
Is mold silicone safe for food-contact surfaces?
Most silicone sealants are not intended for direct contact with food. If sealing areas near food preparation zones, use a product labeled as safe for food-contact surfaces or designate a non-contact zone to avoid contamination.
Don’t use standard mold silicone for food-contact areas unless labeled safe; avoid cross-contact with food.
Can silicone be used outdoors?
Outdoor use is possible with weather-rated silicone that resists UV exposure and temperature fluctuations. Ensure you select a product designed for exterior use on the substrate you’re sealing. Outdoor conditions can accelerate wear if the wrong formula is used.
Yes, but only with exterior-grade silicone suitable for the climate and substrate.
Watch Video
The Essentials
- Choose mold silicone designed for damp spaces.
- Prepare surfaces thoroughly for optimal adhesion.
- Apply a uniform bead and smooth immediately for best results.
- Cure fully before exposing to moisture and re-seal as needed.
- Maintain joints and address moisture sources to prevent mold recurrence.