How to Get Mold Off of Silicone
Learn proven, safe techniques to remove mold from silicone caulk in bathrooms and kitchens, plus prevention tips to keep silicone mold-free, extend seal life, and protect indoor air quality.

To answer how to get mold off of silicone, you can start with a gentle cleaning routine using household cleaners and proper ventilation. This quick guide covers prep, safe cleaners, and when to replace silicone caulk. You’ll learn step-by-step methods that protect silicone while removing surface mold and preventing regrowth.
What mold is on silicone and why it grows
Mold on silicone caulk is a common issue in moist bathrooms and kitchens. Silicone itself is non-porous, but mold often grows on the surface where soap scum, mineral deposits, and dirt accumulate. Over time, persistent moisture exposure allows mold spores to colonize these residues. The Mold Removal Lab team notes that silicone sealants can trap moisture in tiny gaps if joints aren’t properly maintained, creating microhabitats for fungi. Regular cleaning reduces grime and moisture pockets, significantly slowing regrowth. In many homes, improving ventilation and drying surfaces after showers dramatically lowers mold incidence. For homeowners and renters, understanding that the issue is usually moisture-driven helps tailor a safe cleaning approach instead of jumping straight to replacement. By focusing on surface cleaning and maintaining dry conditions, you can often extend the life of existing silicone seals while improving indoor air quality. According to Mold Removal Lab, the most effective approach combines mechanical cleaning with a mild disinfectant and thorough drying.
How to get mold off of silicone: a quick surface check
If you notice dark or greenish spots along the silicone seams, inspect whether the mold is surface-only or has penetrated the seal. Surface mold is typically removable with cleaning; deeper penetration may indicate damaged caulk. The brand, Mold Removal Lab, emphasizes that an easy, non-destructive test is to wipe a small area with a cleaning solution and rinse. If mold returns after a few days, that is a strong signal that moisture control or seal replacement is needed. This process aligns with general guidance from health and safety resources on mold and damp environments, and it helps homeowners decide whether to proceed with cleaning or resealing. Remember, this article covers how to get mold off of silicone without unnecessary removal of the surrounding fixtures when feasible.
Why silicone needs careful handling
Silicone caulk seals gaps to prevent water intrusion, but mold growth often thrives on soap scum and mineral residues left along the seam. Harsh scrubbing or abrasive cleaners can damage the silicone bead, creating more gaps where moisture can hide. The goal is to remove visible mold while preserving the silicone’s integrity. Mold on silicone is usually a sign of ongoing moisture, not a failing material, so addressing moisture sources—like leaky faucets or poor ventilation—will prevent future issues. Mold Removal Lab’s findings indicate that combining gentle cleaning with monitoring moisture levels is more effective than aggressive scrubbing alone.
The safety mindset: preparing the workspace
Before you begin, gather PPE (gloves, goggles, and a mask), ensure ventilation, and place towels to catch drips. Working with cleaners in a well-ventilated area reduces exposure to fumes. Mold can cause skin and eye irritation, so protective gear is important. If you’re dealing with large mold-covered areas or recurring dampness, consult professional guidance. The goal here is to manage surface mold on silicone with safe cleaning methods and to decide whether replacement is necessary based on the extent of damage.
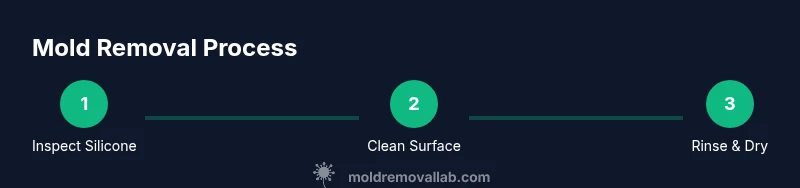
How to get mold off of silicone across rooms
Bathrooms are the most common spots for silicone mold, but kitchen backsplashes and shower enclosures can harbor it too. Start with a mild cleaner, scrub along the bead, then rinse and dry thoroughly. For stubborn spots, alternate between cleaners like white vinegar or hydrogen peroxide and a soft brush. Always test a small patch first to confirm that silicone color and flexibility aren’t affected. The essential takeaway is consistency: regular cleaning and drying prevent mold from taking hold again. Mold Removal Lab notes that routine maintenance is more effective than periodic, heavy-duty cleaning.
Tools & Materials
- Protective gloves (nitrile)(To protect skin from cleaners and residues)
- Safety goggles(Eye protection during cleaning)
- Face mask or respirator(Protect lungs from fumes and spores)
- Soft brush or old toothbrush(Gentle scrubbing along caulk line)
- Non-abrasive sponge(For gentle wiping and rinsing)
- White vinegar(Natural cleaner and mild disinfectant)
- Hydrogen peroxide (3%)(Disinfectant to kill remaining spores)
- Baking soda(Forms a gentle abrasive paste with water)
- Mild dish soap(Cuts through soap scum)
- Isopropyl alcohol(Rinse and wipe residue)
- Silicone caulk (bathroom-grade)(For re-sealing if needed)
- Caulk gun(Apply even bead of new caulk)
- Masking tape(Create clean edges while sealing)
- Cleaning cloths or towels(Drying and wiping)
- Bucket and water(Rinse and dilute cleaners as needed)
Steps
Estimated time: 60-90 minutes
- 1
Prepare and protect the area
Ventilate the space, remove nearby items, and lay towels to catch drips. Put on gloves, goggles, and a mask to protect skin and lungs. This step reduces exposure to cleaners and mold particles and helps you work more comfortably.
Tip: Test a small patch of cleaner on a hidden area of silicone to ensure it won’t discolor. - 2
Choose your cleaning method
Decide between a vinegar-based approach or a disinfectant like hydrogen peroxide. For stubborn mold, switch between cleaners in a gentle sequence rather than mixing harsh chemicals. Apply the cleaner to the moldy seam with a soft brush or sponge.
Tip: Avoid mixing cleaners; this can create harmful fumes. - 3
Scrub the silicone
Gently scrub along the silicone bead using a non-abrasive brush. Focus on edges where soap scum accumulates. Use circular motions to lift mold without chipping or deforming the silicone.
Tip: Let the paste or solution sit briefly on tough spots before scrubbing again. - 4
Rinse and dry completely
Rinse away cleaner with clean water and wipe dry with a microfiber cloth. Drying completely is critical to prevent regrowth; moisture remaining along the seam invites new mold.
Tip: Open a window or run a fan to speed drying and improve air circulation. - 5
Disinfect and verify
Apply hydrogen peroxide or a chosen disinfectant to the seam, then rinse once more and dry. Inspect the area under good lighting to ensure all spots are clean and no residue remains.
Tip: If a musty odor persists, re-clean or repeat disinfecting cycle on the affected area. - 6
Decide on sealing
If the silicone is intact and mold-free after cleaning, re-seal with bathroom-grade silicone for a fresh barrier. If the bead shows cracking or peeling, remove it and replace with a fresh sealant.
Tip: Use masking tape to create a neat bead line and smooth quickly for a professional finish.
FAQ
Can mold on silicone be cleaned without replacing the silicone?
Yes, surface mold on intact silicone can often be cleaned without replacement. If mold keeps returning or the silicone is cracked, replacement is usually necessary.
Yes, you can usually clean surface mold off silicone if the seal is intact; replacement may be needed if it keeps returning.
Is bleach safe to use on silicone caulk?
Bleach can disinfect, but it may degrade silicone over time and can discolor some colors. If used, dilute and ensure proper ventilation, never mix with ammonia or other cleaners.
Bleach can disinfect silicone, but use with caution and ventilation. Don’t mix with other cleaners.
What if mold returns after cleaning?
Persistent mold usually signals ongoing moisture problems or damaged silicone. Reassess leaks, ventilation, and consider resealing or professional help if it recurs.
If mold comes back, you likely have a moisture issue or damaged seal; reseal or seek professional help.
How can I prevent mold growth on silicone?
Reduce moisture by fixing leaks, running exhaust fans, and drying surfaces after use. Regular cleaning with mild cleaners also helps keep mold at bay.
Prevent mold by reducing moisture and regularly cleaning the silicone seal.
How long does re-sealing take?
After cleaning, allow surfaces to dry completely per product instructions, then apply a fresh bead of silicone and smooth for a neat seal.
Let it dry, then apply new silicone for a clean seal.
When should I call a professional?
If mold covers a large area, if you’re dealing with a persistent moisture problem, or if you’re unsure how to remove old caulk safely, consider professional remediation.
Call a pro if the mold is widespread or moisture issues persist.
Is mold on silicone dangerous?
Mold exposure can irritate eyes, skin, and lungs for sensitive individuals. Address mold promptly and ensure good ventilation during cleaning.
Mold can irritate lungs and skin; address it promptly and stay ventilated.
Watch Video
The Essentials
- Inspect silicone for mold and damage before cleaning.
- Use gentle cleaners and thorough drying to prevent regrowth.
- Replace silicone if mold recurs or seal is damaged.
- Improve bathroom ventilation to keep silicone mold-free.
- Document and follow a re-sealing routine for durability.