Caulk Mold Guide: Identification, Removal, and Prevention
Learn to spot caulk mold, safely remove it, and prevent future growth with practical steps, tools, and maintenance tips from Mold Removal Lab.

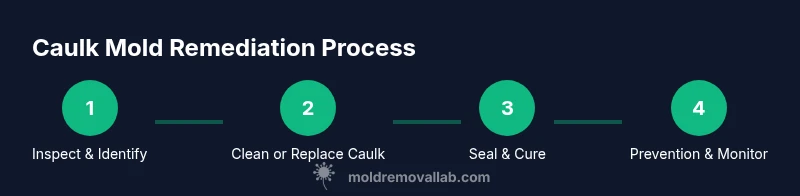
This guide shows you how to identify caulk mold in bathrooms, safely remove it, and prevent future growth. You’ll learn where mold hides in silicone and acrylic sealants, how to clean or replace affected caulk, and practical maintenance steps to reduce moisture and humidity. Following these actions helps restore a healthier, mold-free bathroom and protects adjacent surfaces.
What is caulk mold and why it grows
Caulk mold is mold growth that thrives in bathroom sealants where moisture lingers. It commonly hides behind silicone or acrylic caulk along tub surrounds, shower stalls, sinks, and around windows in damp rooms. The sealant itself is not a hard surface; it can contain tiny gaps that trap moisture and provide hiding places for mold spores, which is why you often notice discoloration at the edges rather than on the flat surface.
The main factors that create a livelihood for caulk mold are persistent dampness, warm temperatures, and poor air flow. Condensation after hot showers raises humidity, and if the space is not vented, moisture stays longer. Over time, mildew and mold colonies exploit micro-crevices, turning the caulk into a visible or hidden contamination source that can spread to surrounding grout or tile.
According to Mold Removal Lab, moisture control is the key to preventing caulk mold behind bathroom seals. Regular inspection and prompt remediation are essential because once mold establishes itself behind caulk, simply cleaning the surface rarely eliminates the root cause. In most cases, you’ll find signs like discoloration, a musty smell, or a gritty feel along the caulk line. These cues indicate you should intervene before growth penetrates the wall materials.
Safety first: protect yourself and your home
Mold exposure can irritate lungs and trigger allergic reactions, especially for children and people with asthma. Before you start any cleaning or removal, wear appropriate PPE: nitrile gloves, protective eyewear, and a respirator or at least a damp mask. Ventilate the area by turning on an exhaust fan or opening a window, and contain the work area with plastic sheeting to protect adjacent surfaces. If mold growth is extensive or you have health concerns, consider professional help. Never mix cleaning agents; this can release harmful gases and irritants. After finishing, wash contaminated tools separately and seal waste in a bag before disposal.
Inspecting caulk for mold signs
Begin with a close inspection of the caulked joints around showers, tubs, and sinks. Look for discoloration that ranges from pink to black to gray, a crumbly texture, or a musty odor that persists after cleaning. Use a bright flashlight to check the seam’s edges and pinch test: gently press along the caulk with a finger to see if mold has penetrated the caulk or if there are soft, spongy spots. For a definitive check, gently remove a small section of caulk at a corner to reveal whether the mold growth is behind or within the sealant. If you discover mold behind the caulk or if the sealant shows peeling or gaps, plan replacement rather than only cleaning. Based on Mold Removal Lab analysis, improving bathroom ventilation reduces mold recurrence.
Cleaning methods: DIY vs professional
Surface mold on cleanable, intact caulk can often be addressed with household cleaners. Start with a detergent solution to scrub the caulk line, then apply a mold-killing agent such as hydrogen peroxide or a product containing sodium hypochlorite, following label directions and ensuring proper ventilation. Do not use bleach on porous silicone in all cases; test on a small area first and avoid mixing cleaners. If the caulk is cracked, peeling, or mold has penetrated beyond the caulk into the substrate, cleaning alone won’t help. In such cases, remove the damaged caulk entirely and prepare the joint for resealing. For extensive contamination or if you have immunocompromised individuals, consult a mold remediation professional, who can assess moisture sources, treat the area, and ensure safe, thorough cleanup.
Replacing caulk: materials and technique
When replacement is necessary, select a bathroom-rated caulk—silicone or polyurethane caulk offers the best water resistance and mildew resistance. Remove the old caulk completely using a utility knife or caulk remover tool, then wipe the joint clean and dry it thoroughly. Apply masking tape on either side of the seam to achieve a neat line, then run a steady bead of caulk along the joint. Use a caulk smoothing tool or your finger dipped in water to create a smooth, even finish. Allow the caulk to cure fully according to the manufacturer’s guidance before exposing it to moisture. After curing, test for leaks by running water along the seam for a short period. Recheck periodically to ensure the grout and caulk remain intact. Consider applying a moisture barrier paint or a mold-resistant sealant on adjacent surfaces for added protection.
Prevention strategies: moisture control and maintenance
Prevention is easier than remediation. Maintain bathroom humidity at comfortable levels by using an exhaust fan during showers and for 20-30 minutes afterward, and fix any leaks promptly. Improve airflow by opening doors or windows when possible and consider a dehumidifier in damp bathrooms. Regularly inspect caulk joints every 6-12 months and reseal when you notice cracks or peeling. Use a higher-quality, mold-resistant caulk in damp areas and ensure proper curing after installation. Clean regularly with non-abrasive cleaners that don’t degrade caulk and avoid abrasive scrubbing that can wear away the sealant. If you replace caulk, choose products labeled for bathrooms and ensure you maintain a clean and dry surface before applying. Consider using breathable grout or tile sealant as an additional barrier in high-moisture zones.
Common mistakes to avoid
Avoid skipping the cleaning step before resealing, as trapped mold can continue to grow behind the new caulk. Don’t apply caulk over dirty surfaces or over peeling edges. Don’t seal long-term moisture sources without addressing leaks; you’ll only get temporary relief. And avoid using the wrong type of caulk in wet areas—some caulks aren’t designed for bathrooms and may deteriorate quickly under moisture exposure.
Tools & Materials
- Nitrile gloves(Powder-free, disposable, at least size L)
- Protective eyewear(Goggles or safety glasses)
- Respirator or dust mask(P100 or N95 if available)
- Plastic sheeting / drop cloth(To contain area)
- Utility knife / caulk remover(For removing old caulk)
- Caulk remover (optional)(Chemical softeners designed for caulk removal)
- Putty knife or scraper(Loosen and lift old caulk)
- Soft-bristled brush(Scrub residue from joints)
- Mild detergent(Non-abrasive cleaner)
- Hydrogen peroxide or bleach(Choose safer option first; test area)
- Mold-resistant bathroom caulk(Silicone or polyurethane sealant)
- Caulk gun(For application)
- Masking tape(To create neat line)
- Lint-free rags(Drying and cleanup)
- Ventilation options(Exhaust fan or open window)
Steps
Estimated time: 90-120 minutes (plus cure time for the caulk, typically 24 hours)
- 1
Identify moisture sources
Inspect bathroom ventilation, leaks, and humidity sources. Check around showers and sinks for active drips, condensation, or standing moisture. Document high-risk areas to target during replacement.
Tip: Take before-and-after photos to guide replacement decisions. - 2
Prepare the work area
Clear the space and lay down plastic sheeting. Remove items from the shower or sink area, and ensure good ventilation by turning on the exhaust fan. Stop water supply if needed for safety.
Tip: Open a window or run the fan to vent fumes during cleaning. - 3
Remove old caulk
Carefully cut along the seam with a utility knife and peel away the old bead. Avoid gouging adjacent tile or drywall. Remove all compromised caulk for a clean base.
Tip: Keep the blade shallow and steady to prevent damage. - 4
Clean and dry the seam
Scrub the joint with detergent, then rinse and dry thoroughly. Use a fan or hair dryer on low heat to ensure complete dryness before resealing.
Tip: Ensure no moisture remains—mold can recur if the joint remains damp. - 5
Apply new caulk
Load the caulk gun and apply a continuous bead along the seam. Smooth with a caulk tool or moistened finger to create a neat line.
Tip: Wipe away excess caulk immediately for a clean edge. - 6
Cure and test
Let the caulk cure per the manufacturer’s guidance before moisture exposure. After curing, run water over the joint to test for leaks and inspect for gaps.
Tip: Recheck joints after 24 hours of exposure to moisture.
FAQ
What is caulk mold and why does it grow in bathrooms?
Caulk mold is mold growth that takes hold in bathroom sealants where moisture persists. It grows in damp environments like showers and around sinks, especially when ventilation is poor. Prompt inspection and remediation are essential to prevent spread.
Caulk mold grows where moisture stays, often behind bathroom sealants. Inspect and remediate quickly to prevent spread.
Can caulk mold be cleaned without replacing caulk?
Surface mold on a sound caulk can sometimes be cleaned with detergent and a mold-killing solution. If the caulk is cracked, peeling, or mold has penetrated, replacement is usually necessary for a lasting fix.
You can clean some mold off if the caulk is intact, but replace it if it’s damaged or mold has penetrated.
Is bleach effective against mold on caulk?
Bleach can kill surface mold but may not fully eradicate mold in porous caulk. It can also degrade some caulk types. Always test first and consider safer alternatives like hydrogen peroxide or professional remediation for persistent growth.
Bleach can kill surface mold but may damage caulk and isn’t always effective for porous sealants.
How often should I replace caulk to prevent mold?
Re sealing every 1-2 years helps prevent mold buildup, especially in high-moisture zones. Replace immediately if you notice cracks, peeling, or visible mold behind the sealant.
Seal every 1-2 years and replace if you see cracks or mold behind the sealant.
Can vinegar remove caulk mold?
White vinegar has mild antifungal properties and can help with light surface mold, but it may not remove mold embedded in porous caulk. For persistent growth, use proven cleaners or replace the caulk.
Vinegar can help with light surface mold but may not remove embedded mold in caulk.
When should I hire a professional for mold behind caulk?
If mold covers extensive areas, reappears after cleaning, or you have health concerns, hire a mold remediation professional. They can identify moisture sources, treat the space, and ensure safe, thorough cleanup.
If mold is widespread or keeps coming back, consider a professional mold remediation service.
Watch Video
The Essentials
- Identify moisture sources and target them first.
- Replace moldy caulk when damage is evident.
- Use bathroom-rated caulk and allow full cure time.
- Ventilate during cleaning and sealing to reduce risk.
- Regularly inspect joints to prevent recurrence.