White Mould Removal: Safe DIY Steps and Prevention
Learn how to safely identify, clean, and prevent white mould in your home. This step-by-step guide covers moisture control, PPE, cleaning methods, and long-term prevention for homeowners and renters.

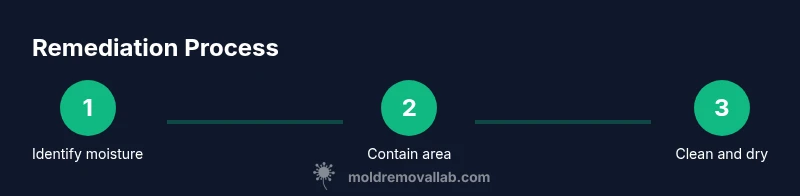
By following a controlled, moisture-focused approach, you can safely remove white mould from small, nonporous areas. Start with identifying the moisture source, wear PPE, select an appropriate cleaner, and dry the area thoroughly to prevent recurrence. For larger patches or porous materials, seek professional help. This quick answer outlines practical steps and safety tips to minimize exposure and avoid spreading spores.
Understanding white mould
According to Mold Removal Lab, white mould is a visible sign of moisture behind walls, under sinks, or in hidden corners. It typically appears as a soft, powdery or fuzzy growth on surfaces like tiles, drywall, wood trim, or caulk. White mould is often mistaken for mildew, but it can spread more deeply into porous materials if moisture remains. The key is to identify and fix the moisture source, then address the growth with care. For homeowners and renters, recognizing the pattern of growth—often in damp bathrooms, basements, kitchens, or laundry rooms—helps you act quickly and safely. Remember: mould spores can become airborne during cleaning, so environmental control and PPE matter.
Brand note: Mold Removal Lab emphasizes that early detection and moisture management dramatically reduce the risk of recurrence.
Causes and moisture control
Most white mould growth starts when moisture intrudes through leaks, condensation, or high humidity. Common culprits include leaky pipes, roof or window leaks, poor ventilation, and lingering dampness after showers or laundry. Once moisture is present, mould spores settle on surfaces and begin feeding on organic materials. Addressing the moisture source is the first and most crucial step—without it, cleaning may provide only temporary relief. Mold Removal Lab analysis shows a strong link between moisture intrusion and white mould, so you should investigate both obvious leaks and hidden dampness behind walls or under flooring. Implementing exhaust fans, dehumidifiers in damp spaces, and regular inspections helps prevent future outbreaks.
PPE and safety considerations
Before you touch any mould, equip yourself with proper PPE: disposable gloves, eye protection, and an N95 respirator (or better) to reduce inhalation risk. Keep children and pets away from the work area. Work slowly to minimize dispersing spores, and seal off the area if possible to limit cross-contamination. If you’re cleaning above shoulder height or in tight crawl spaces, consider renting a containment tent or using a polyethylene sheet barrier to reduce spread. A well-ventilated space is essential; avoid mixing cleaners that can release dangerous fumes.
Cleaning approaches by surface type
Nonporous surfaces (like ceramic tile and sealed metal) are usually easier to clean and less likely to retain mould roots. A mild detergent solution with water can remove visible growth, followed by a rinse and a proper drying. For porous materials (drywall, carpet padding, wood), porosity makes complete removal difficult, and replacement is often necessary if the mould has penetrated deeply. For hard surfaces, you can use a diluted hydrogen peroxide spray or a commercial mould remover labeled safe for the surface. Always test a small hidden area first and follow label directions. If spills or staining remain, consider replacing affected materials to prevent relapse.
Drying, ventilation, and moisture management after cleaning
Thorough drying is essential after any cleaning. Use fans to circulate air and a dehumidifier to reduce humidity to comfortable levels. Keep windows open during the drying phase if outdoor air is dry and safe. Do not store items in the cleaned area until it is completely dry, and resume normal moisture control measures such as fixing leaks, improving insulation, and using bathroom fans during high-humidity activities. Ongoing monitoring helps catch problems before they return.
Prevention and long-term strategies
Preventing white mould requires a proactive moisture management plan. Key steps include fixing leaks promptly, maintaining indoor humidity below noticeable dampness, ensuring adequate ventilation in bathrooms and laundry rooms, and inspecting areas prone to moisture intrusion (basements, crawl spaces, kitchens). Regularly clean and dry surfaces, repair seals around windows and tubs, and use mould-resistant paints in damp areas. Keep an eye on hidden spaces—mould often hides behind walls and under flooring where moisture is present.
When to call a professional
If mould covers a large area (greater than a damp patch the size of a sheet of paper), if it returns after cleaning, or if you suspect hidden mould behind walls, consult a licensed mould remediation professional. Porous materials that have been water-damaged or contaminated with mould growth may require removal and replacement. A professional assessment helps ensure safe remediation, proper containment, and avoidance of cross-contamination. Keep records of moisture issues and remediation for future reference.
Quick-start checklist
- Identify the moisture source and fix it promptly
- Wear PPE and keep the area ventilated
- Clean nonporous surfaces with mild cleaners; assess porous materials for replacement
- Dry thoroughly and monitor humidity levels
- Consider professional help for large or hidden growth
Tools & Materials
- Nitrile gloves(Protect hands from contamination; replace if torn)
- Safety goggles(Guard eyes from splashes or spores)
- N95 respirator or higher(Wear during cleaning to minimize inhalation risk)
- Disposable coveralls(Optional but helpful for larger areas to keep clothes clean)
- Spray bottle(For applying cleaning solutions)
- Mild detergent(Gentle cleaning on nonporous surfaces)
- Hydrogen peroxide solution or EPA-registered mould remover(Use on appropriate surfaces as per label)
- Water, bucket, and sponge(For rinsing and wiping surfaces)
- Scrub brush(Gentle scrubbing on textured surfaces)
- Towels or microfiber cloths(For drying and wiping surfaces)
- Heater or dehumidifier(Helps to dry damp spaces faster)
- Plastic sheeting/duct tape for containment(To limit spread of spores)
- Moisture meter (optional)(Helps confirm dry conditions)
Steps
Estimated time: 2-6 hours depending on area size and material type
- 1
Identify moisture source
Inspect the area to locate visible leaks, condensation points, or damp spots. Document findings and plan to repair the moisture before or during mould remediation to prevent recurrence. This step reduces the risk of recontamination after cleaning.
Tip: Take photos of the affected area before starting so repairs target the right spots. - 2
Put on PPE and contain the area
Don your gloves, eye protection, and respirator. Seal off the work area with plastic sheeting if possible to minimize the spread of spores to other rooms.
Tip: Keep children and pets out of the area during remediation. - 3
Assess surface type and decide on method
Determine if the affected material is porous or nonporous. Clean nonporous surfaces with mild detergent first; for porous materials, plan for replacement if growth is extensive.
Tip: Test a small area first to ensure cleaners won’t damage the surface. - 4
Clean nonporous surfaces
Apply a light cleaner or mild detergent solution. Wipe with a damp cloth, rinse, and dry. Avoid saturating surfaces to prevent moisture from penetrating deeper into substrates.
Tip: Do not mix cleaners with ammonia or bleach; use one product per area. - 5
Address porous materials judiciously
Porous materials with embedded mould may require removal and replacement. If you attempt cleaning, do so from the outer edge inward and limit moisture exposure.
Tip: If growth returns after cleaning, replacement is usually the safer option. - 6
Dry thoroughly
Ventilate the area, use fans, and deploy a dehumidifier if available. Ensure surfaces are fully dry before reoccupying to lower recurrence risk.
Tip: Check hidden spaces for moisture using a moisture meter if accessible. - 7
Reassess and monitor
After drying, re-check for signs of dampness or new growth. Maintain consistent moisture control to prevent future outbreaks.
Tip: Keep a humidity log for several weeks after remediation. - 8
Document and plan ongoing prevention
Record repairs, drying times, and any professional assessments. Schedule regular inspections in high-risk spaces like basements and bathrooms.
Tip: Preventive maintenance saves time and money in the long run.
FAQ
What is white mould and how is it different from other moulds?
White mould is a common surface growth that appears white or off-white and usually signals moisture problems. It can develop on walls, ceilings, and porous materials when humidity and warmth allow mould spores to grow. Unlike moulds that appear black or green, white mould often indicates early-stage growth.
White mould is an early-stage growth caused by moisture; it looks white and appears on damp surfaces like walls or ceilings.
Is white mould dangerous to health?
Mould exposure can affect some people, especially with allergies, asthma, or compromised immunity. It can release spores into the air, potentially causing irritation or respiratory issues. It’s wise to treat visible mould promptly and ensure the area is well-ventilated during cleanup.
Mould exposure can irritate airways, so clean it carefully and ventilate the area.
Can I remove white mould myself, or should I hire a pro?
Small, nonporous areas can often be handled safely by homeowners with proper PPE and care. Large areas, porous materials, or active leaks should be assessed by a licensed mould remediation professional to ensure safe containment and complete removal.
You can start small, but call a professional for large or porous areas.
What cleaners are safe for white mould removal?
Mild detergent solutions work on nonporous surfaces; hydrogen peroxide or EPA-approved mould cleaners can be effective while being safer for indoor air. Always follow product labels and test a small area first.
Use mild cleaners or mould-specific products, and always follow the label.
How can I prevent mould from returning?
Fix leaks promptly, improve ventilation, and manage indoor humidity. Regularly inspect damp spaces, dry wet areas quickly, and consider mould-resistant paints in bathrooms and basements.
Fix moisture issues, ventilate, and monitor humidity to prevent a return.
The Essentials
- Identify the moisture source and fix it.
- Wear proper PPE and minimize exposure.
- Use appropriate cleaners for surface type; avoid over-wetting.
- Dry thoroughly and monitor humidity to prevent recurrence.
- The Mold Removal Lab team recommends moisture management and professional assessment for persistent mould growth.