Is It Safe to Clean Mold Without a Mask? A Practical Guide for Homeowners
Learn safe, practical steps for mold cleanup at home. This guide covers when a mask is essential, PPE, containment, cleaning methods, disposal, and prevention to protect your health.

Not typically safe. Guidance from Mold Removal Lab emphasizes wearing a respirator and proper PPE, isolating the area, and using proven cleaning methods. Even small mold growth can release spores; skipping a mask raises exposure risk. This quick guide shows how to proceed safely and when to call a professional.
Is it safe to clean mold without a mask?
Is it safe to clean mold without a mask? The short answer is: usually not. When mold spores become airborne, they can irritate the nose, throat, and lungs, and long-term exposure can be more problematic for people with allergies, asthma, or compromised immune systems. The Mold Removal Lab team consistently stresses that protective equipment matters. Before you grab a sponge or spray bottle, consider whether you truly need to clean, or if the safest option is to pause and call a professional.
In many homes, small, isolated patches on nonporous surfaces can be cleaned with careful technique when you’re wearing appropriate PPE. However, this is not a green light to bypass PPE. Masks are part of a protective system that also includes gloves, eye protection, and long sleeves, plus proper room containment and ventilation. Even when you think the amount is tiny, the risk of dispersing spores increases with agitation—scrubbing, wiping, or blasting air can lift particles into the air. Mold Removal Lab's guidance emphasizes treating every mold clean-up as an exposure event and planning accordingly. If you’re ever unsure about the extent, materials involved, or whether moisture is ongoing, step back and consult a professional.
Mold exposure risks aren’t limited to visibly dramatic growths. Invisible dampness behind walls, hidden mold colonies, or seasonal humidity can create conditions where spores are more likely to become airborne during cleaning. This is why PPE, proper containment, and a calm approach are essential. Remember: the goal is not to eliminate all odors or a surface stain, but to reduce exposure and prevent recontamination as you restore a healthier indoor environment.
According to Mold Removal Lab, the best practice is to treat mold cleanup as a controlled process rather than a quick home fix. This means planning protective gear, setting expectations about time, and acknowledging when a professional is the safer option for your family’s health. By taking a cautious, informed approach, you can minimize risk while you address the moisture source that spawned the mold in the first place.
PPE and respiratory protection basics
Protective equipment isn’t optional when dealing with mold; it’s the first line of defense. The key question for many homeowners is not whether to wear a mask, but which mask and what level of protection is appropriate for the task. At a minimum, a properly fitted respirator rated for organic vapors and particulates, such as an N95, is recommended for non‑hazardous mold cleanup. For larger jobs or mold that may involve woods, drywall, or unseen growth, consider a higher‑level respirator (e.g., P100, elastomeric half‑face or full‑face respirator).
In addition to a respirator, you should wear: disposable gloves (nitrile or latex), eye protection or goggles, and long sleeves with long pants to reduce skin contact. Cloth masks are not sufficient for mold cleanup because they don’t seal against your face to prevent leakage of spores. A respirator should be properly fitted—facial hair can interfere with seal, so ensure a snug fit. If you can’t get a proper fit or you have a history of respiratory issues, opting out of DIY cleanup and hiring a professional is a prudent choice. The Mold Removal Lab team emphasizes that PPE is only effective when used consistently and combined with containment and drying strategies.
When you’re unsure whether your PPE is adequate, err on the side of caution. If you wake up with watery eyes, coughing, or throat irritation after a cleanup attempt, this can be a signal that your protection isn’t enough or that residual moisture remains. In such cases, pause cleanup and reassess or bring in a professional. By using the right PPE and maintaining awareness of symptoms, you can significantly reduce the health risks associated with mold exposure.
Assessing mold growth and the decision to DIY or hire a pro
Before you jump into a cleanup project, assess the scope of growth and the surfaces involved. Small, clearly visible patches on nonporous surfaces (like glass or sealed metal) may be manageable with proper PPE and containment. Porous materials such as drywall, ceiling tiles, or insulation often trap mold within their fibers and may require removal and disposal rather than cleaning. The decision to DIY or hire a professional hinges on factors such as the area affected, location (behind walls, under floors), moisture sources, and the presence of visible growth on porous materials.
If the mold covers a large area, continues to reappear after cleaning, or involves potentially hazardous materials such as insulation, it’s best to contact a licensed professional. Mold Removal Lab’s approach is to identify moisture sources first and establish containment, because moisture drives mold regrowth. DIY can be appropriate for limited, accessible, nonporous surfaces, but if you’re uncertain about extent, leaks, or the structural integrity of the space, expert remediation reduces the risk of recurrence and exposure.
The guiding principle is moisture control: address the source (leaks, humidity, condensation) before cleaning, and keep fans or purifiers from circulating contaminated air to other rooms. When moisture problems persist, the mold may return, negating the effort and posing ongoing health risks. In these situations, a professional remediation plan tailored to your home is the safer choice. Mold Removal Lab’s guidance underscores that responding to mold with a deliberate plan—rather than a quick DIY effort—protects health and property.
Containment and ventilation to minimize spread
Containment is critical to prevent mold spores from moving to other rooms during cleaning. Start by sealing off the work zone with heavy plastic sheeting and painter’s tape, creating a simple containment barrier that reduces cross-contamination. The goal is to keep spores within the affected area while cleaning, rather than letting them drift through HVAC systems or into living spaces. If possible, run an exhaust fan or place a temporary air extraction system that vents to the outdoors, but avoid placing the exhaust indoors where spores can settle elsewhere.
Ventilation should be balanced: you want to introduce fresh air without pushing contaminated air into living spaces. A dehumidifier can help reduce humidity levels, making mold less likely to flourish after cleanup. If you have central heating or cooling, consider temporarily adjusting settings to prevent air from circulating through other rooms. Always remove and bag contaminated porous materials carefully, sealing them in sturdy trash bags before disposal. This step is essential to prevent spores from escaping the work zone and recontaminating other areas of the home. Mold Removal Lab’s approach emphasizes controlled airflow and moisture management as the foundation of safe cleanup.
Cleaning methods for small, nonporous surfaces
For small, nonporous surfaces, basic cleaning with detergent and water can remove visible mold, followed by thorough drying. Use a mild detergent solution and a clean cloth or sponge to scrub the surface gently, then rinse with clean water and dry completely. Avoid using household bleach on porous materials or unfinished wood, as it can damage the surface and release additional spores without fully eliminating mold inside the material. After cleaning, wipe surfaces dry and monitor for any signs of remaining growth. If you’re unsure about the surface’s porosity or finish, test a small inconspicuous area first to check for adverse reactions.
When you need a deeper clean on nonporous surfaces, you can use an EPA‑recommended mold cleaner or a solution of water and detergent. Always follow label directions and wear PPE. If you notice persistent staining, a musty odor, or renewed growth within a few days, pause and reevaluate moisture control and containment. The Mold Removal Lab team notes that the success of DIY cleaning often hinges on meticulous drying and moisture control after cleaning, not merely the removal of visible mold. With careful technique, you can reduce spores and limit recontamination, but you must maintain vigilance for moisture and ongoing indoor humidity.
Aftercare: drying, disposal, and prevention
Once cleanup is complete, drying is the next critical step. Use a dehumidifier or multiple fans to circulate air and promote evaporation. Keep relative humidity below 50-60% if possible, and continue to monitor the area for several days to ensure that moisture does not rebound. Remove any disposable PPE carefully to avoid spreading spores, and clean or replace disposable gloves after use. Contaminated materials such as porous drywall or insulation should be sealed in moisture‑proof bags before disposal, and the area should be re-cleaned to remove any residual spores that might have settled.
Prevention is the best defense against mold recurrence. Address moisture sources promptly: fix leaks, improve ventilation in bathrooms and kitchens, and use exhaust fans during showers or cooking. Regularly inspect areas prone to dampness, such as basements, crawl spaces, and around windows. Consider using mold‑resistant coatings or paints on susceptible surfaces and keeping stored items away from damp walls. By combining containment, thorough drying, and proactive moisture control, you reduce the likelihood of mold returning and protect the health of occupants. Mold Removal Lab emphasizes that prevention, not just cleanup, is essential for long‑term safety.
Common myths and quick checks
There are several common myths about mold cleanup that can lead homeowners astray. For example, some people believe bleach alone can eradicate mold permanently on porous materials; others think painting over mold solves the problem. In reality, these shortcuts often fail to address the underlying moisture issue and can even spread spores if misused. Quick checks include verifying moisture sources, confirming that the area is dry before re‑occupying, and ensuring that you’re using appropriate PPE for the job. If you’re unsure about the material’s condition or whether a surface is safe to clean, it’s wise to pause and seek professional guidance. The Mold Removal Lab approach centers on moisture management, proper containment, and cautious cleaning to minimize health risks and prevent recurrence.
Tools & Materials
- N95 respirator or higher(Fit-tested if possible; replace if soiled)
- Disposable gloves(Nitrile recommended)
- Eye protection or goggles(Splash protection)
- Long-sleeved shirt and pants(Minimize skin exposure)
- Plastic sheeting and painter’s tape(Create containment zones)
- Trash bags(Seal and dispose carefully)
- Detergent or mild cleaning solution(Avoid bleach on porous materials)
- Bucket, scrub brush, sponge(Non-abrasive tools)
- Dehumidifier or fans(Dry area promptly)
- HEPA vacuum (optional)(Use only with proper PPE)
Steps
Estimated time: 2-6 hours
- 1
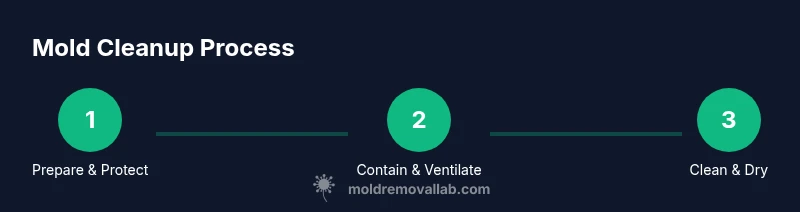
Prepare and protect
Put on all PPE before entering the mold area. Inspect the space for moisture sources and switch on ventilation where safe. Gather tools and materials so you don’t have to leave the area mid-cleaning. A prepared start minimizes accidental exposure and ensures a smoother workflow.
Tip: Double-check your respirator seal and eye protection before touching any moldy surface. - 2
Contain the work area
Seal off the affected zone with plastic sheeting to prevent spores from spreading. If possible, shut doors to adjacent rooms and keep HVAC systems off in the immediate area. Establish clear entry and exit points so you can minimize disturbance and maintain containment throughout the job.
Tip: Keep a small trash bag inside the containment to collect disposable items without stepping out of the zone. - 3
Clean nonporous surfaces
Mix a mild cleaning solution with water and scrub nonporous surfaces (glass, metal, sealed surfaces) using a cloth or sponge. Rinse with clean water and dry completely. Avoid over-wetting to prevent moisture migration to hidden spaces. After cleaning, inspect for remaining mold and repeat only if surface is fully dry.
Tip: Always use fresh cloths; reusing a damp cloth can redeposit spores. - 4
Address porous materials
Porous materials (drywall, insulation) may harbor mold growth inside the material. If contamination is extensive or if the material is structurally compromised, plan for removal and proper disposal rather than mere cleaning. If you choose to attempt surface cleaning on porous items, treat with caution and consider professional input.
Tip: Do not tear or pry into porous materials; removal should be careful and sealed to prevent dispersion. - 5
Dry thoroughly and monitor
After cleaning, dry the area quickly using dehumidifiers and fans directed toward exterior exhaust. Keep humidity low and monitor the space for several days. Inadequate drying is a leading cause of mold recurrence, so ensure the space remains dry before deeming the job complete.
Tip: Use moisture meters if available to confirm sustained dryness over time. - 6
Disposal and final checks
Seal contaminated materials in labeled bags and dispose of them according to local guidelines. Clean tools and surfaces that touched mold with a fresh solution, then remove PPE safely—from the face outward and from the skin inward. Do a final walk-through to verify no new moisture sources or damp areas remain.
Tip: Remove PPE carefully to avoid spreading spores; wash hands immediately after removal.
FAQ
Is it safe to clean mold without a mask?
Generally not safe. A mask or respirator helps protect your lungs from mold spores. If you must proceed, ensure proper PPE and containment, and be prepared to stop if symptoms arise.
Not safe to clean mold without a mask. Always use a respirator and PPE, and stop if you experience irritation.
What type of mask should I use for mold cleanup?
Use an N95 or higher-rated respirator. For larger jobs or uncertain conditions, consider a full-face respirator. Fit is crucial for effectiveness.
Choose an N95 or better and ensure a proper seal; consider a full-face respirator for bigger jobs.
Can I clean mold on porous materials like drywall?
Mold on porous materials is often embedded and difficult to remove completely. In many cases, contaminated porous materials should be removed and disposed of.
Porous materials are tricky; removal is often safer than deep cleaning.
When should I hire a professional?
Consider professional remediation when mold covers a large area, recurs after cleaning, or involves structural materials, hidden moisture, or potential health risks.
If it’s large, persistent, or affects structure, hire a pro.
Are there health risks from small mold exposure?
Even small exposure can irritate sensitive individuals. People with allergies or asthma are more likely to react. Monitor for symptoms and seek medical advice if concerns persist.
Small exposure can still cause irritation; seek advice if symptoms appear.
Watch Video
The Essentials
- Wear proper PPE before cleaning mold.
- Containment and drying are as important as cleaning.
- Porous materials may require disposal, not cleaning.
- For large areas or persistent growth, hire a professional.
- Prevent future mold by fixing moisture sources.