Shower Mold Removal: A Practical Guide for Homeowners
Practical, step-by-step shower mold removal guidance for homeowners and renters. Learn safe PPE, cleaners, remediation steps, and moisture-control strategies to prevent future growth.

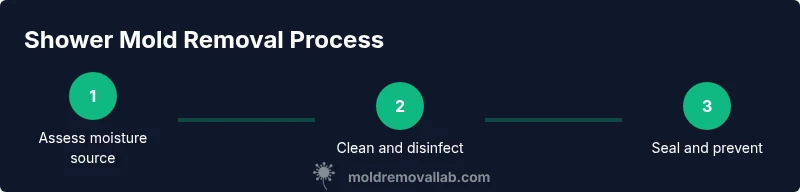
You will learn how to remove shower mold safely and effectively, plus how to prevent it from returning. This guide covers PPE, cleaners, step-by-step remediation, and moisture-control strategies for bathrooms. You’ll start by assessing moisture sources, improving ventilation, and choosing the right cleaners. By following these steps, you can restore a healthier shower environment. The process prioritizes safety, minimizes spread of spores, and reduces future mold risk through maintenance routines and timely inspections.
Why shower mold removal matters for health and homes
Mold in the shower area is more than an eyesore; it signals excess moisture in the bathroom environment. When people repeatedly expose themselves to mold spores, indoor air quality can decline and irritation of the eyes, skin, and lungs may occur. For renters and homeowners alike, addressing shower mold promptly helps protect family health and preserves the bathroom’s surface integrity. This guide on shower mold removal emphasizes practical, non-technical steps that you can implement safely in your own home, with an eye toward long-term moisture management. Mold Removal Lab’s analysis shows that moisture control and timely remediation are the most impactful actions for reducing mold recurrence.
note_dangerous_content_headline_hits_post_processing_bypass_1_1_instance_ignored
Tools & Materials
- N95 respirator or P100 respirator(Prevent inhalation of mold spores during cleaning.)
- Protective gloves (nitrile or rubber)(Keep skin protected from cleaners and mold.)
- Goggles or eye protection(Shield eyes from splashes and spores.)
- Plastic sheeting or drop cloths(Contain the work area to prevent fungal spread.)
- Scrub brush with stiff bristles(Dislodge effloresced mold from grout and surfaces.)
- Non-ammonia household cleaner or white vinegar(First-line cleaners for mild mold and soap scum.)
- Hydrogen peroxide 3% or baking soda paste(Effective for additional cleaning and sanitizing.)
- Bleach (sodium hypochlorite) with caution(Only for non-porous surfaces; never mix with ammonia.)
- Spray bottle(For applying cleaners evenly.)
- Cotton rags or microfiber towels(Wipe surfaces clean and dry them thoroughly.)
- Dehumidifier or fan(Helps dry the area faster after cleaning.)
- Sealant or caulk for re-sealing grout(Needed if grout is damaged and needs sealing.)
Steps
Estimated time: 2-6 hours
- 1
Assess moisture sources
Begin by inspecting the shower area for leaks, poor ventilation, or standing water. Note damp spots on walls, grout, sealant, and behind shower doors. Understanding the moisture source is essential to prevent recurrence after removal.
Tip: Document any leaks with photos and check bathroom vent fan function before you start. - 2
Prepare the area and PPE
Protect yourself with an appropriately fitted respirator, gloves, and eye protection. Use plastic sheeting to isolate the shower area and prevent mold spores from spreading to adjacent rooms.
Tip: Open a window or run a vent fan to keep air moving; good airflow reduces spore concentration. - 3
Clean non-porous surfaces first
For fiberglass, ceramic tile, and glazed surfaces, start with a mild cleaner or white vinegar. Apply with a spray bottle, scrub gently, and rinse with clean water. Dry thoroughly before moving to grout.
Tip: Avoid mixing cleaners; never combine vinegar with bleach. - 4
Treat grout and porous surfaces
Mold on grout or caulk requires a paste of baking soda and water or a hydrogen peroxide spray. Let it sit for a few minutes, then scrub and wipe. Rinse and dry completely.
Tip: If grout is heavily cracked, plan for resealing or regrouting to prevent re-growth. - 5
Disinfect with a second pass
After cleaning, use a mild hydrogen peroxide spray or a diluted bleach solution only on non-porous areas to disinfect. Allow contact time per product instructions, then rinse and dry.
Tip: Do not mix hydrogen peroxide with ammonia-based cleaners. - 6
Address moisture sources
Fix leaks, seal gaps, and improve ventilation to reduce humidity. Repainting or resealing areas can be considered once mold is removed.
Tip: Install or improve a bathroom exhaust vent or dehumidifier for ongoing control. - 7
Monitor and recheck
Over the next weeks, check for new mold growth or dampness. If you notice recurring mold, consider professional assessment for hidden moisture or structural issues.
Tip: Set a reminder to inspect grout lines monthly for the first 6 months. - 8
Decide on prevention plan
Choose a maintenance routine: periodic cleaning, humidity control, and timely repairs. Document your plan for future reference and checklist use.
Tip: Create a simple annual schedule to keep moisture in check and prevent recurrence.
FAQ
What is the most effective cleaner for shower mold removal?
There isn’t a single universal cleaner; many homeowners start with white vinegar or hydrogen peroxide on non-porous surfaces. For tougher grout mold, a baking soda paste or a diluted hydrogen peroxide solution can help. Always avoid mixing cleaners and follow product labels.
White vinegar or hydrogen peroxide are common starting cleaners for shower mold, but you should avoid mixing chemicals and follow label directions.
Is shower mold dangerous to health?
Mold in damp indoor spaces can cause irritation for some people and may worsen asthma or allergies. Visible mold should be removed, and the area dried to reduce exposure. If you have persistent symptoms, consider professional evaluation.
Mold in damp spaces can irritate eyes, nose, and lungs and may affect allergy or asthma sufferers; remove it and dry the area.
When should I hire a professional?
If mold covers large areas, has penetrated behind walls, or returns after DIY cleaning, professional remediation is advised. Hidden water damage or persistent humidity issues may require structural assessment.
If mold is widespread or keeps coming back after DIY cleaning, it’s time to call a pro for a thorough assessment.
How long does shower mold removal take?
DIY remediation typically takes a few hours to a day depending on area size and severity. More extensive jobs with hidden moisture may require longer and professional equipment.
Most DIY removal takes several hours; bigger jobs or hidden moisture may take longer and require professionals.
How can I prevent mold after cleaning?
Control moisture with ventilation, reduce humidity, fix leaks, and seal grout. Regular cleaning with mold-resistant products and prompt attention to damp spots helps prevent recurrence.
Keep humidity low with ventilation, clean regularly, and seal vulnerable areas to stop mold from returning.
What safety precautions should I take?
Wear PPE, ventilate the room, and avoid mixing cleaners. Test cleaners on small areas first and follow all product directions to minimize exposure. If you’re pregnant or have health concerns, consult a professional.
Protect yourself with PPE, keep the area ventilated, and don’t mix cleaners. If health concerns exist, consult a pro.
Watch Video
The Essentials
- Identify moisture sources and fix them first.
- Use safe cleaners and don’t mix chemicals.
- Seal grout and improve ventilation to prevent recurrence.
- Dry surfaces completely to stop new mold growth.
- Monitor bathroom humidity and schedule routine checks.