Vinegar Shower Mold: DIY Guide for Safe Remediation
Learn how to tackle vinegar shower mold safely with practical steps, when vinegar works, and what to do if mold persists. This guide covers surfaces, safety, prevention, and when to call a professional.

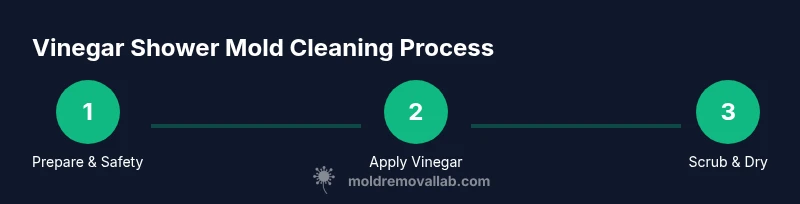
You can tackle vinegar shower mold by applying white distilled vinegar directly to affected areas, allowing it to sit, then scrubbing and drying thoroughly. This method is best for non-porous surfaces and light mold growth in bathrooms. Always ventilate, wear PPE, and recheck after a day to ensure the mold doesn’t return.
What is vinegar shower mold and why vinegar is popular
Vinegar shower mold refers to mold growth in bathrooms, particularly on tile grout, shower doors, caulk, and behind fixtures. White distilled vinegar is commonly used because it's affordable, widely available, and acidic enough to slow many common bathroom molds. The Mold Removal Lab team notes that for light, non-porous surface growth, vinegar can be an effective first step before stronger cleaners or professional help. That said, vinegar is not a universal cure; porous materials like grout and certain wallpapers may allow mold to embed below the surface, where vinegar has limited reach. In this article we explain how to evaluate your mold, how to apply vinegar safely, and how to decide when to escalate to more thorough remediation. By understanding the limits of vinegar shower mold control, homeowners can act quickly without unnecessary risk.
Safety considerations when tackling shower mold with vinegar
Safety always comes first with any mold remediation project. Ensure good ventilation by opening a window or using a fan, and wear eye protection, nitrile gloves, and a respirator or well-fitting mask if the area is damp and moldy. Do not mix vinegar with bleach or products containing ammonia, as harmful vapors can form. Keep children and pets away from the work area, and wash any clothing or rags used during cleanup separately from other laundry. If you have severe asthma, allergies, or a compromised immune system, consider contacting a professional from the outset. This approach minimizes exposure and reduces the risk of spreading spores to other rooms. According to Mold Removal Lab, safe handling and proper drying are essential to prevent recurrent growth.
How vinegar works on mold and its limitations
Vinegar is mildly acidic (typically around 5% acetic acid) and can kill many household molds on non-porous surfaces. It disrupts the mold’s adhesion to smooth materials like porcelain, glass, enamel, and sealed tiles. However, vinegar struggles with embedded or porous mold—especially in grout, caulk, or drywall behind the shower wall—where fungal colonies can hide below the surface. The Mold Removal Lab Analysis, 2026, indicates that while vinegar can reduce surface contamination, it does not replace professional remediation for moisture-damaged porous substrates or large infestations. Expect surface cleaning rather than a guaranteed eradication when mold has penetrated porosity or moisture remains present.
Prep and surface assessment: which surfaces are suitable for vinegar
Before applying vinegar, inspect the affected surfaces. Smooth, non-porous materials like ceramic tiles, glazed porcelain, glass doors, and sealed metal fixtures respond best to vinegar treatments. Avoid unsealed natural stone (like granite or marble) and porous grout without sealing, since acid can etch, dull, or worsen damage over time. Perform a small test patch on a hidden edge first and look for color change or surface roughness. If the area dries cleanly with no smearing, you can proceed with a full application. For shower stalls with heavy soap scum or mineral deposits, a two-step approach (vinegar first, then a compatible cleaner) can improve results while reducing the risk of surface damage.
Cleaning strategy for different shower surfaces
For ceramic tile and enamel surfaces, spray undiluted white distilled vinegar directly onto the moldy area and let it sit for 15–60 minutes. Then scrub with a non-abrasive sponge or brush and rinse with warm water. Dry the surface with a microfiber cloth to prevent new mold growth from residual moisture. For grout lines, apply vinegar to a small brush (toothbrush size) and work along the lines, repeating as needed. If soap scum is thick, you may first soften deposits with warm water, then follow with vinegar. Do not rely on vinegar alone for large grout repairs; if the grout is cracked or mold has penetrated, replace or reseal the grout after cleaning.
When vinegar isn’t enough: signs to stop and escalate
If you notice mold reappearing within 48 hours, or if it penetrates beyond the surface into porous materials, consider additional treatments or professional remediation. Persistent black or green mold on drywall, wallpaper, or behind tiles may indicate hidden growth and moisture problems that vinegar cannot address. In such cases, address moisture sources (leaks, poor ventilation) and consult a licensed mold professional. For safety, do not use bleach on porous materials in a finished bathroom where you’re using vinegar, as combining products can create toxic fumes.
Maintenance and prevention in a mold-prone bathroom
Prevention is more effective than repeated cleaning. Keep the bathroom dry after use by squeegeeing showers and wiping down walls, doors, and fixtures. Improve ventilation with a fan set to run after showers for at least 15–30 minutes. Repair any leaks promptly, seal grout where needed, and consider a tall moisture barrier or bathroom exhaust fan upgrades if humidity remains high. Regular cleaning with a mild cleaner and periodic vinegar treatments can help counter surface mold growth, but lasting results depend on eliminating moisture sources and maintaining low humidity levels in the bathroom.
Realistic expectations and alternatives
Vinegar can be a useful, low-cost first step for light, surface mold on non-porous bathroom surfaces, but it is not a cure-all. For stubborn growth, mold on porous materials, or structural damage, hydrogen peroxide, baking soda, or professional remediation may be necessary. If you ever doubt the extent of mold or the building’s moisture dynamics, consult a pro. This approach aligns with practical, evidence-based mold remediation guidance that prioritizes safety and long-term prevention.
Documentation and follow-up: tracking mold after treatment
After cleaning, keep a simple log of the areas treated, moisture measurements (if you have a hygrometer), and any recurring damp spots. Revisit the cleaned zones after 24–72 hours and again after one week to confirm that growth has not returned. If you see new mold growth or persistent dampness, re-evaluate moisture sources and consider more thorough remediation or professional help. Maintaining a clean, dry bathroom environment is the best defense against future mold.
Tools & Materials
- White distilled vinegar (5% acidity)(Store-bought, undiluted for best results on non-porous surfaces)
- Spray bottle(Empty and clean before use)
- Non-abrasive scrub brush(Soft bristles to avoid scratching surfaces)
- Microfiber cloths(Drying cloths to prevent residual moisture)
- Gloves (nitrile)(Protect hands from moisture and mold)
- Eye protection(Safety glasses or goggles)
- Optional: baking soda(For stubborn residue after vinegar treatment)
Steps
Estimated time: 30-60 minutes
- 1
Prepare materials and safety gear
Assemble vinegar, spray bottle, brush, microfiber cloths, gloves, and eye protection. Ensure the bathroom is well-ventilated before starting to reduce mold spore exposure.
Tip: Test a small hidden patch first to ensure surface safety. - 2
Ventilate and isolate the area
Open a window or run a bathroom fan. Keep doors closed to prevent spreading spores to adjacent rooms. If possible, place towels under the door to minimize airflow.
Tip: Run ventilation for the entire cleaning cycle. - 3
Apply vinegar to affected surfaces
Spray undiluted white vinegar onto moldy spots and let sit for 15–60 minutes. Avoid diluting vinegar, as higher acidity improves efficacy on non-porous surfaces.
Tip: Do not mix vinegar with other cleaners. - 4
Scrub and rinse
Scrub with a non-abrasive brush, focusing on grout lines and corners. Rinse with warm water and wipe dry with microfiber cloths to remove moisture.
Tip: Pay extra attention to grout where mold tends to hide. - 5
Inspect and repeat if needed
Check the cleaned area for remaining mold. Repeat treatment on small patches if necessary and dry thoroughly after the second pass.
Tip: If mold returns within a day, reassess moisture sources. - 6
Dry thoroughly and monitor
Use a dry cloth to remove moisture and ensure the area is completely dry. Monitor the area over the next few days for signs of regrowth.
Tip: A fan/dehumidifier can help accelerate drying in damp bathrooms.
FAQ
Is vinegar effective for mold in showers?
Vinegar can reduce surface mold on non-porous bathroom surfaces, but it may not eliminate mold embedded in porous materials or behind walls. For persistent growth, professional remediation may be required.
Vinegar helps with surface mold on non-porous surfaces, but hidden mold or growth inside porous materials may require more thorough remediation.
Can I use vinegar on grout and caulk?
Yes, vinegar can help with mold on grout and caulk in many cases, but persistent mold or damaged grout may need replacement and sealing after cleaning.
Vinegar can help grout, but if the grout is damaged, you may need to replace or reseal it.
Should I rinse after applying vinegar?
Rinsing helps remove loosened mold and vinegar residue. Dry the area thoroughly to minimize residual moisture that could encourage regrowth.
Rinse after applying vinegar and dry the area completely to prevent new mold growth.
What if mold returns after cleaning?
If mold reappears within a day or two, reassess moisture sources, consider sealing grout, and, if necessary, seek professional assessment for hidden mold.
If it comes back quickly, check moisture sources and consider a professional assessment.
Is vinegar harmful to bathroom surfaces?
Vinegar is acidic and can etch certain materials like natural stone or unsealed grout. Test in a small area first and avoid using on marble or limestone.
Be careful with acidic vinegar on stone surfaces and test first.
What about alternatives like hydrogen peroxide?
Hydrogen peroxide and baking soda can be used as complementary or alternative options, especially for stubborn mold, but follow safety guidelines and surface compatibility.
Hydrogen peroxide and baking soda can help when vinegar isn’t enough; follow safety steps.
Watch Video
The Essentials
- Vinegar is effective on non-porous surfaces for light mold.
- Ventilate and dry thoroughly after cleaning to prevent re-growth.
- Assess moisture sources and consider professional help for porous materials.
- Avoid mixing cleaners with vinegar to prevent toxic fumes.
- Monitor cleaned areas and maintain regular bathroom maintenance.