Best Way to Clean Shower Mold: A Practical Guide
Discover the best way to clean shower mold with a practical, step-by-step approach, safety tips, and prevention strategies to keep your bathroom healthy. Mold Removal Lab explains how to remove mold safely and prevent recurrence.

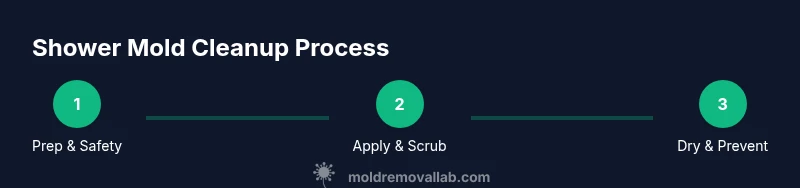
To effectively remove shower mold, start with safety-first steps, then use proven cleaners, thorough scrubbing, and complete drying to prevent recurrence. According to Mold Removal Lab, the best approach combines protective PPE, a non-bleach cleaner for delicate surfaces, and moisture control to keep mold from returning. This quick method sets you up for a deeper, step-by-step remediation that homeowners can perform without expensive equipment at home.
Why shower mold is a warning sign
Mold in the shower is more than an unsightly stain. It signals ongoing moisture and possible organic growth that can spread beyond visible areas. The Mold Removal Lab team notes that shower environments trap moisture due to steam, reduced airflow, and porous grout, creating an ideal ecosystem for mold spores to thrive. Left unchecked, these spores can trigger allergic responses, aggravate asthma, and contribute to damp odors that undermine comfort and safety. In most homes, a combination of consistent cleaning, improved ventilation, and timely remediation stops mold from becoming a long-term problem. The goal is not only to remove visible colonies but to address the moisture source and prevent new colonies from forming. For a practical homeowner approach, think of mold control as a cycle: identify, clean, dry, and protect.
If you notice recurring staining after cleaning, this is a sign that underlying moisture or hidden growth behind tiles, drywall, or caulk may exist. Even small patches of mold can signal a larger issue that merits a systematic plan. When you tackle shower mold, plan for a two-pronged strategy: immediate surface cleanup and longer-term moisture management. This ensures you reduce health risks while preserving bathroom aesthetics. Mold Removal Lab’s approach emphasizes that prevention is as important as remediation.
Safety first: PPE and precautions
Before you start any cleanup, equip yourself with appropriate PPE to minimize exposure to mold spores. Wear impermeable gloves, a respirator or N95 mask, and safety goggles to protect eyes and airways. If you have allergies or asthma, consider higher-grade respiratory protection and work in a well-ventilated area. Keep children and pets away from the workspace during cleaning. Use disposable towels and sealable bags to contain waste so spores don’t spread to other parts of the home. Moisture control is part of safety: avoid mixing cleaners that create hazardous fumes and never use a heat source or open flame near damp areas. If you feel lightheaded or short of breath, stop work and seek medical advice. With the right PPE and precautions, you can clean safely while reducing the risk of inhaling mold spores.
Assessing the scope: surface mold vs hidden growth
Shower mold can be surface-level or hide behind tiles, grout, or caulk. Surface mold is usually a thin, powdery layer that can be scrubbed away with basic cleaners; hidden mold, however, may indicate moisture behind walls or within structural materials. Start with a visual inspection: check grout lines, caulk beads, and shower niches. If you see persistent staining after cleaning or notice musty odors, it may indicate hidden growth. In those cases, it’s wise to break the plan into two phases: phase one cleans visible areas, phase two investigates moisture sources, leaks, or deteriorating grout that could harbor unseen colonies. The Mold Removal Lab team stresses the importance of stopping leaks and improving airflow as soon as mold appears to prevent deep-seated growth from taking root.
Cleaning options: safe cleaners and when to avoid them
Effective mold cleaning doesn’t rely on a single product. Safer cleaners like white vinegar, hydrogen peroxide, and baking soda pastes can kill or disrupt many mold species on nonporous surfaces such as ceramic tile and enamel. For stubborn patches on grout, a paste of baking soda and water can act as a mild abrasive. Tea tree oil or dedicated bathroom cleaners can be helpful options for ongoing maintenance. Bleach is sometimes used for surface mold on nonporous surfaces but is less effective on porous materials like grout that may absorb mold roots. Always ventilate and wear PPE. Never mix cleaners, especially chlorine bleach with ammonia or vinegar, as dangerous fumes can form. The goal is to select a cleaner that suits the surface and mold extent while minimizing chemical exposure.
Working with grout, caulk, and porous materials
Grout and caulk are common hiding places for mold because they are porous and retain moisture. Cleaning grout may require a toothbrush or grout brush to reach into the grooves. After cleaning, evaluate whether grout needs resealing or replacement to prevent future mold growth. For porous materials such as drywall behind shower walls, cleaning alone is often insufficient; those components may require professional removal and replacement. When replacing, ensure new grout or caulk is mold-resistant and fully cured before reintroducing moisture. The goal is to restore a clean, water-resistant barrier that resists future mold colonization.
Drying and moisture control: key to prevention
Mold growth is closely tied to moisture, so drying is essential. After cleaning, dry surfaces thoroughly using towels, a squeegee, or a wet-dry vacuum for larger areas. Increase airflow with a fan or dehumidifier and keep humidity below standard comfort levels. If your bathroom lacks a vent fan, consider installing or upgrading one and always run it during and after showers. Regularly drying the area for a period after cleaning reduces the chance that spores will re-adhere and regrow. Consistent moisture management is the single most effective way to prevent mold from returning.
Maintenance and prevention: keep it from returning
Establish a routine that includes quick daily wipe-downs, prompt repair of leaks, and periodic re-grouting or caulking where needed. Use a mold-inhibiting sealant on grout lines and consider ongoing maintenance with a mild cleaner designed for bathrooms. Keep a moisture-absorbing product in the room to reduce ambient humidity. Finally, monitor for any signs of new growth after long, hot showers, and respond quickly with the cleaning steps outlined above. The Mold Removal Lab approach centers on prevention as a continuous practice, not a one-time fix.
When to call a professional: signs it’s beyond DIY
If mold covers larger areas than you can safely reach, reappears after cleaning, or you notice mold behind walls or under fixtures, professional remediation is warranted. Health concerns or chronic symptoms related to mold exposure also warrant professional evaluation. A licensed mold remediation contractor can assess structural moisture, identify hidden growth, and use equipment to contain and treat affected regions. Delaying professional help in these situations can lead to more extensive damage and higher costs later.
Authoritative sources and references
For additional guidance, consult these trusted sources:
- CDC Mold: https://www.cdc.gov/mold/
- EPA Mold: https://www.epa.gov/mold
- OSHA Mold: https://www.osha.gov/mold These sources provide foundational information on health risks, remediation practices, and safety considerations for mold in indoor environments.
Tools & Materials
- Protective gloves(Nitrile or rubber; avoid latex if you have sensitivities)
- N95 respirator or equivalent(Fit-tested if possible; ensures good seal against spores)
- Safety goggles(Wraparound style preferred; protect eyes from splashes)
- Non-slip shoes(Water-resistant and slip-resistant for wet floors)
- Sponge or microfiber cloth(For wiping surfaces and applying cleaners)
- Scrub brush with stiff bristles(Select one with a comfortable grip; reaches grout lines)
- Spray bottle(Label clearly and keep cleaners separate if mixing)
- Bucket(For rinsing and holding cleaning solution)
- Mild household cleaner (e.g., white vinegar or castile soap)(Use non-ammoniated products when possible)
- Bleach (chlorine-based cleaner)(Only for nonporous surfaces and with ventilation; never mix with ammonia)
- Sealable plastic bags for disposal(Contain used towels and rags to prevent spore spread)
Steps
Estimated time: 60-120 minutes
- 1
Prepare safely and ventilate
Put on PPE (gloves, respirator, goggles) and ensure good airflow by opening a window or turning on a fan. Move fragile items away from the cleaning zone and lay down a drop cloth to catch drips. This preparation reduces exposure and keeps cleanup contained.
Tip: Keep a trash bag nearby for disposable wipes and to isolate contaminated materials. - 2
Identify affected areas and protect surroundings
Scan the shower area for visible mold colonies and check grout lines, caulk, and any behind-wall seams near the shower. Isolate the workspace with barrier towels if possible to prevent spores from migrating to other rooms.
Tip: Take a quick photo to compare before and after cleanup for future reference. - 3
Apply cleaner to moldy surfaces
Spray the affected areas with your chosen cleaner and let it sit for a few minutes to penetrate mold. Work from top to bottom to minimize dripping onto cleaned regions. Rinse or wipe after dwell time is complete.
Tip: Avoid mixing cleaners; keep cleaners separate to prevent chemical reactions. - 4
Scrub mold from surfaces
Use a stiff-bristled brush to scrub grout lines, tile margins, and other crevices until visible mold is removed. For stubborn patches, apply more cleaner and repeat the scrubbing motion with steady pressure.
Tip: Rinse the brush frequently to prevent re-depositing mold. - 5
Rinse and dry thoroughly
Rinse surfaces with clean water and wipe dry with towels. Run a fan or dehumidifier to accelerate drying. Ensure all porous materials are completely dry before reassembling items back in place.
Tip: Keep the bathroom dry for at least 24-48 hours after cleaning to prevent recurrence. - 6
Verify and maintain to prevent recurrence
Inspect again after 24-48 hours for any remaining mold or damp spots. Re-clean as needed and address moisture sources such as leaks or poor ventilation. Establish a routine to wipe down surfaces after showers and monitor humidity.
Tip: Set a monthly reminder to recheck grout lines and caulk for signs of moisture.
FAQ
What is the best cleaner for shower mold?
Safer cleaners like white vinegar, hydrogen peroxide, and baking soda can be effective on many surfaces. For stubborn grout, a paste and gentle scrubbing work well. Bleach can help on nonporous surfaces but won’t fix porous grout.
Vinegar or hydrogen peroxide often works well on bathroom mold, with scrubbing for stubborn grout. Bleach is an option for nonporous surfaces but not a cure-all.
Is shower mold dangerous to health?
Mold exposure can trigger allergies and asthma in sensitive individuals. If you have persistent symptoms, consult a healthcare professional and address moisture and ventilation in your bathroom.
Mold can affect health, especially for sensitive people. If symptoms persist, seek medical advice and fix the moisture issues.
Can I use bleach to remove mold on tile?
Bleach can kill surface mold on nonporous surfaces but may not reach mold embedded in porous grout. It also requires good ventilation and proper handling.
Bleach can help on tiles, but it may not reach mold inside grout. Ventilate well when using it.
How long does it take for cleaned areas to dry?
Drying time depends on humidity and airflow. In a well-ventilated bathroom, surfaces often dry within a few hours; humidity can extend this.
Most areas dry in a few hours with good airflow, but humid spaces can take longer.
When should I call a professional?
If mold recurs after cleaning, spreads behind walls, or you have health concerns, a licensed pro can assess moisture, inspect hidden growth, and conduct remediation.
Call a pro if mold keeps coming back or you suspect hidden growth.
Should I replace grout after cleaning?
If grout is cracked or mold persists within the pores, resealing or replacing grout may be necessary to restore a water-resistant seal.
Deteriorated grout often needs resealing or replacement for long-term mold prevention.
Can daily cleaning prevent mold growth?
Regularly wiping down surfaces after showers and maintaining low humidity reduces mold-friendly conditions and helps prevent recurrence.
Wiping down after showers and keeping humidity down helps prevent mold.
Watch Video
The Essentials
- Identify and address moisture to prevent mold.
- Use safer cleaners and avoid dangerous chemical mixes.
- Thorough drying is essential to stopping recurrence.
- Protect porous materials and reseal grout after cleaning.
- Call a pro if mold returns or spreads behind walls.