Mold Over Shower: Practical Remediation Guide
Step-by-step guidance to identify, clean, and prevent mold over shower areas in bathrooms. Learn practical techniques, PPE, ventilation tips, and when to hire a professional for healthier homes.

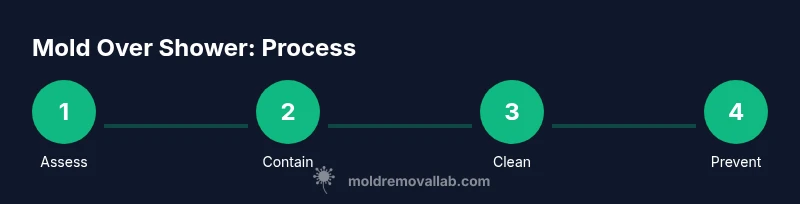
Goal: safely eradicate mold over shower and stop it from returning. You’ll learn to inspect moisture sources, clean using proven methods, and reseal vulnerable surfaces. This guide outlines a step-by-step remediation plan, essential PPE, ventilation practices, and preventive strategies. For stubborn growth or suspected toxic mold, the plan includes clear safety boundaries and when to call a pro.
Understanding the Problem: Mold Over Shower
Mold over shower is a common bathroom challenge driven by a consistent moisture cycle: hot water, steam, and imperfect ventilation. In many homes, shower enclosures, grout lines, and ceiling corners stay damp long enough for mold spores to settle and grow. The difference between surface mildew and deeper mold growth matters because it affects cleaning choices and containment needs. According to Mold Removal Lab, mold growth in bathrooms often starts with minor leaks or chronic condensation, then expands if not addressed promptly. The Mold Removal Lab team found that ongoing moisture and poor airflow are primary contributors to this issue, especially in smaller bathrooms with limited exhaust capability. By understanding the specific mold type and whether it’s cosmetic mildew or structural growth behind tiles, you can tailor your remediation plan. Always treat any mold growth over shower as a potential moisture problem first, then address the hygiene concerns to prevent recurrence.
Assessing Moisture Sources and Contamination
Moisture sources in shower areas typically come from leaks, plumbing issues, condensation, and inadequate ventilation. Start by inspecting grout lines, caulk, shower pans, and any seals around doors or benches. Check for water staining on walls adjacent to the shower, soft spots in backing boards, or paint peeling that could indicate hidden moisture intrusion. A quick humidity reading in the bathroom should be above 60% during use but should drop below 50% within 30 minutes of drying. If you notice persistent damp spots, ask a professional to perform a moisture survey. Keep a simple log of when the mold is most visible and whether it worsens after hot showers; this helps pinpoint the moisture source. Documenting mold over shower with photos helps you track changes over time and supports decisions about when to escalate.
Safe Cleaning Techniques for Shower Mold
Always start with containment and PPE. Put on nitrile gloves, a tightly fitting mask, and eye protection, then seal off the bathroom with plastic sheeting to prevent spores from spreading to adjacent rooms. For mold over shower, a combination of mechanical cleaning and chemical treatment is often effective. Begin by removing loose mold with a disposable scrub brush and a damp cloth, discarding cloths in sealed bags. Wipe down surfaces with a non-abrasive cleaner to avoid scratching grout or tile. Rinse with clean water and dry thoroughly. Re-inspect for any remaining growth after 24 hours; small patches can reappear if moisture persists. If the mold has penetrated porous materials, replacement may be required rather than cleaning.
Cleaning Agents: Bleach, Hydrogen Peroxide, Vinegar—What Works
Bleach can be effective for non-porous surfaces to kill surface mold, but it won’t fix underlying moisture or porous materials. Hydrogen peroxide at 3% is a safer option for some shower substrates and leaves no residue; apply and let sit for 10–15 minutes before scrubbing. White vinegar is a mild disinfectant that helps inhibit growth but may be less effective on dense mold colonies. Do not mix cleaners; never combine bleach with ammonia or acids like vinegar, as dangerous gases can form. For stubborn grout or stone, consider a grout saw for mechanical removal and reseal the area with a silicone sealant designed for bathrooms. Always test a small, inconspicuous area first to ensure the cleaner won’t damage the surface. When using chemical cleaners, ensure the space is well-ventilated and avoid skin contact by wearing gloves.
Preventing Reoccurrence: Ventilation, Sealing, and Maintenance
Prevention hinges on drying surfaces quickly after use and improving airflow. Install or upgrade the bathroom exhaust fan to vent to the outside, aiming for at least 50–100 CFM in small bathrooms and more in larger rooms. Run the fan for 20–30 minutes after showering, and consider a dehumidifier if humidity remains high. Re-caulk or re-seal all edges where water can harbor behind tiles; silicone is typically more water-resistant than latex paints. Regularly inspect and replace weathered grout and caulk every 1–2 years, and address leaks promptly—wet walls are mold’s best friend. Maintain a routine cleaning schedule that focuses on corners, shelves, and door frames where moisture accumulates. By controlling moisture, you reduce the likelihood of mold over shower returning.
When to Call a Pro: Limits of DIY Remediation
DIY remediation is appropriate for small, surface-level outbreaks with good access and no signs of water damage behind walls. If you notice persistent moisture, hidden mold behind tiles, efflorescence on backing boards, or a musty odor that won’t fade, a licensed mold remediation professional is warranted. Structural damage or contamination in plumbing lines requires a pro to assess and repair. If you experience symptoms like persistent coughing, headaches, or respiratory irritation after mold exposure, seek medical advice and consider a professional assessment. For many homeowners, a two-step approach works well: address moisture sources and perform safe surface cleaning; if mold recurs within 1–3 months, professional remediation is advised to ensure thorough containment and remediation.
Authority Sources and Practical Resources
For further guidance, consult established authorities on mold and indoor air quality. External resources provide essential context for DIY projects and professional remediation decisions. The following sources offer authoritative, evidence-based information about mold prevention and safe remediation practices.
Practical Guidance from Reputable Sources (External References)
- Environmental Protection Agency (EPA): Mold and Dampness in Buildings: https://www.epa.gov/mold/mold-basics
- Centers for Disease Control and Prevention (CDC): Damp Indoor Environments and Mold (Health considerations): https://www.cdc.gov/mold/dampness.html
- Occupational Safety and Health Administration (OSHA): Mold in the Workplace and Home: https://www.osha.gov/mold
Mold Removal Lab Analysis shows that regular moisture control and proper ventilation dramatically reduce the frequency of mold over shower occurrences, especially in bathrooms with limited airflow. Based on Mold Removal Lab research, homeowners who install a dedicated bathroom vent and maintain a weekly cleaning routine report fewer mold setbacks over a 12-month period.
Authority Sources and Practical Resources (External References)
- EPA: Mold Basics - https://www.epa.gov/mold/mold-basics
- CDC Dampness and Mold - https://www.cdc.gov/mold/dampness.html
- OSHA Mold Awareness - https://www.osha.gov/mold
The Mold Removal Lab team emphasizes that ongoing moisture management and proper cleaning protocols are the most reliable defenses against mold over shower.
Closing Notes and Next Steps
This guide outlines practical steps for dealing with mold over shower and emphasizes the critical role of moisture control. If you’ve followed the steps but still notice growth, revisit moisture sources and ventilation or contact a Mold Removal Lab professional for a thorough assessment. Remember, consistent monitoring and timely actions protect your bathroom and your health over the long term.
Tools & Materials
- Nitrile gloves(Protect hands from cleaning agents)
- Safety goggles(Prevent splashes from reaching eyes)
- N95 mask or respirator(Filter spores and aerosols)
- Protective coveralls(Optional for full-body protection)
- Spray bottle (trigger)(Mix and apply cleaners)
- Grout brush or stiff scrub brush(Reach grout lines and corners)
- Microfiber cloths(Wipe and dry surfaces)
- Bucket(Contain waste and rinse water)
- Sponges(Gentle scrubbing without scratching)
- Plastic sheeting & painter's tape(Contain spores during cleaning)
- Ventilation device (exhaust fan or portable fan)(Improve airflow during remediation)
- Mild detergent(Pre-clean to remove grime)
- White vinegar(Alternative mild disinfectant)
- Hydrogen peroxide 3%(Surface disinfectant option)
- Bleach (sodium hypochlorite)(Only on non-porous surfaces; never mix with ammonia)
- Silicone bathroom sealant(Seal around edges after cleaning)
Steps
Estimated time: 1.5-3 hours (varies with mold extent and area size)
- 1
Assess the scope of mold
Begin by visually inspecting the shower, grout, and surrounding walls for visible growth. Photograph areas from multiple angles for your records. Note any signs of moisture intrusion or hidden mold behind tiles. This step establishes the extent of the problem and informs the containment plan.
Tip: Take close-up photos of mold patches and a wide shot of the entire shower to track changes over time. - 2
Ventilate and contain
Open the bathroom window or run the exhaust fan to reduce airborne spores. Hang plastic sheeting to seal off the restroom from adjacent spaces, minimizing cross-contamination. This containment step is critical before you start scrubbing or cleaning.
Tip: Keep the door closed and use a dedicated vent for 20–30 minutes after cleaning begins. - 3
Don PPE and prep area
Put on nitrile gloves, eye protection, and a respirator or mask. Remove loose clothing that could trap spores and cover nearby surfaces with disposable sheets. Clear the area so you can work efficiently without interruptions.
Tip: Pre-fit your respirator and check seals before entering the cleaning zone. - 4
Remove loose mold and grime
Gently scrub visible mold from non-porous surfaces using a stiff brush and detergent. Wipe with microfiber cloths and discard contaminated materials in sealed bags. For porous grout, focus on removing surface grime without aggressive scraping that could damage tiles.
Tip: Avoid dry brushing as it can kick up spores; keep the area damp while cleaning. - 5
Apply cleaning agents and dwell
Apply your chosen cleaner to mold areas and let it sit for the recommended dwell time (typically 5–15 minutes for most solutions). Scrub again to lift any remaining growth, paying attention to grout lines and corners. Rinse with clean water and dry thoroughly.
Tip: Never mix cleaners; use one agent at a time and ventilate well. - 6
Rinse, dry, and seal
Rinse all surfaces with clean water, then dry completely using a clean microfiber cloth. If grout remains discolored but structurally sound, re-seal with a bathroom-grade silicone sealant after drying. Ensure moisture is permanently reduced to prevent recurrence.
Tip: Use a moisture-absorbing product behind the shower curtain to reduce dampness. - 7
Reassess moisture control
Check that condensation decreases after cleaning by monitoring humidity for a few days. Improve ventilation if needed and fix any leaks promptly. This step helps prevent mold from returning and keeps the shower space healthier.
Tip: Aim for humidity below 50% most of the time. - 8
Ongoing maintenance plan
Create a simple maintenance routine: wipe down after showers, dry surfaces, and inspect grout monthly. Schedule a professional inspection if growth reappears despite your efforts. This approach supports long-term mold prevention.
Tip: Keep a small calendar reminder for monthly checks.
FAQ
What causes mold over shower in most bathrooms?
Mold over shower typically grows where moisture lingers: steam from showers, leaks, and poor ventilation. Condensation on walls and grout creates a hospitable environment for mold spores to settle and multiply.
Mold over shower usually grows where moisture sticks around, like after showers or from leaks, especially without good ventilation.
Is mold over shower dangerous to health?
Exposure to mold can irritate the eyes, skin, and lungs, particularly for people with allergies or asthma. Some molds produce mycotoxins, but illness from indoor bathroom mold is uncommon with proper remediation.
Most people experience irritation rather than serious illness, but those with sensitivities should address mold promptly.
Which cleaners are safe and effective for shower mold?
For non-porous surfaces, diluted bleach can be effective. Hydrogen peroxide and white vinegar are gentler options. Avoid mixing cleaners and always ventilate the space.
Bleach, hydrogen peroxide, and vinegar can help, but don’t mix them and keep the area well-ventilated.
When should I replace tiles or grout instead of cleaning?
If grout is crumbling, tiles are loose, or moisture intrusion remains after cleaning, replacement is safer than continuing to clean. Porous materials often harbor hidden mold that cleaning won’t fully eradicate.
If grout is flaky or there’s ongoing moisture, replacement is usually best.
How long does it take for the bathroom to dry after cleaning?
Drying depends on ventilation and humidity, typically 30 minutes to several hours. Use fans and, if possible, an dehumidifier to speed up the process.
Drying can take from half an hour to a few hours, depending on airflow.
When should I hire a professional?
If mold covers a large area, recurs after cleaning, or you suspect hidden mold behind walls, a licensed remediation specialist is recommended. Professionals ensure proper containment and comprehensive remediation.
Call a professional if mold is widespread or keeps coming back.
Watch Video
The Essentials
- Act quickly to limit mold growth.
- Pinpoint moisture sources before cleaning.
- Use proper PPE and avoid mixing chemicals.
- Dry thoroughly and seal vulnerable areas.
- Call a pro if mold recurs or is hidden behind walls.