Mold or Mildew in Shower: Practical Remediation Guide
Learn practical steps to identify, clean, and prevent mold or mildew in the shower. This Mold Removal Lab guide covers detection, safe cleaners, and long-term bathroom maintenance.

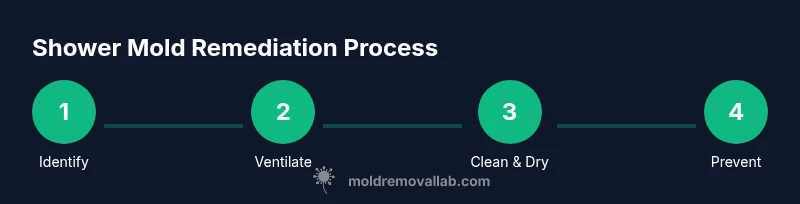
By the end, you will identify mold or mildew in the shower, select safe cleaners, and apply proven remediation steps to restore a healthier bathroom. This guide covers detection, removal, ventilation, and ongoing prevention with practical, homeowner-friendly methods. According to Mold Removal Lab, consistent moisture control and prompt cleaning dramatically reduce recurrence.
What qualifies as mold vs mildew in shower
Mold and mildew are both fungi that thrive where moisture is high, but they differ in appearance, texture, and potential health effects. Mildew is typically a surface growth that appears powdery and white, gray, or yellow, often on shower curtains, grout, and doors. Mold tends to be darker (green, black, or brown) and can penetrate materials, causing staining, musty odors, and, in some cases, structural damage. In a shower environment, distinctions matter because mold may indicate a leak, persistent moisture, or compromised materials. For homeowners, the key sign is recurring staining, darker patches, or a persistent musty smell, even after cleaning. Mold or mildew in shower should be addressed promptly to reduce exposure and prevent spread.
According to Mold Removal Lab, early detection and quick action prevent small problems from turning into costly repairs. In this guide, we’ll help you tell the difference, assess the extent, and choose safe remediation strategies that you can perform without specialized equipment.
Immediate safety and cleaning priorities
Dealing with mold or mildew in the shower requires a safety-first approach. Wear a properly fitted respirator or N95 mask, goggles, and gloves to limit exposure to spores. Ventilate the area well by turning on the bathroom fan or opening a window, and keep children and pets away during cleaning. Do not mix cleaners, especially bleach with ammonia or acids, as this can release harmful gases. If growth is extensive or behind tiles or drywall, pause and seek guidance from a professional. The Mold Removal Lab Team emphasizes PPE, good ventilation, and controlling the work area to prevent spread. After cleaning, rinse and dry surfaces thoroughly to prevent immediate re-growth.
Common sources of moisture in showers
Moisture buildup in showers comes from several sources: daily use leaves behind water on tile and grout; steam can saturate porous substrates; leaks from plumbing joints or seals allow hidden moisture to persist; and poor ventilation traps humidity. Shower doors and curtains can trap moisture in enclosed spaces, and grout lines are often the first places mold finds to anchor itself. Regularly inspecting sealant around stalls, checking for slow leaks, and ensuring adequate air exchange reduces the risk. Based on Mold Removal Lab analysis, moisture control is the primary driver of mold and mildew in shower environments, so prioritizing airflow and prompt drying yields the strongest long-term benefits.
Cleaning strategies by severity
Mildew on surfaces like shower doors and non-porous tiles can often be treated with everyday cleaners. Light mold on grout or corners may respond to household products like white vinegar or baking soda paste. For more persistent growth on non-porous surfaces, hydrogen peroxide spray is an effective option. For tougher cases on non-porous materials, a diluted bleach solution can be used cautiously, but never on porous surfaces where it can degrade material integrity. Porous materials (drywall behind tile, natural stone, or wood around the shower) may need spot treatment or replacement, as cleaning cannot fully remove deeply embedded mold. When selecting cleaners, start with the mildest effective option and monitor the area for signs of improvement. Mold Removal Lab stresses testing a small area first and stopping if surfaces become discolored or damaged.
Prevention strategies to keep showers mold-free
Prevention focuses on moisture control and rapid cleanup. Use a bathroom fan or open a window during and after showers to lower humidity. Wipe down surfaces with a squeegee or towel to remove standing water within 15–30 minutes of use. Consider sealing grout lines or re-caulking where needed to reduce porous pockets for mold growth. A dehumidifier in humid bathrooms can help in basements or powder rooms with poor ventilation. Keep towels dry and store damp items away from the shower. Routine maintenance, such as resealing grout every 1–2 years and addressing leaks promptly, dramatically reduces the likelihood of mold or mildew in shower.
When to call a professional
If you notice widespread or rapidly spreading growth, a persistent musty odor with no obvious cleaning solution, or growth behind walls, it’s time to involve a professional. Large contaminated areas, suspected hidden leaks, or mold growth near HVAC intakes warrants expert assessment. The Mold Removal Lab Team recommends professionals when growth is behind tiles, in framing, or in structural elements, or if the area is larger than a few square feet. A qualified remediator can evaluate moisture sources, perform containment, and safely remove affected materials.
Quick product guide: cleaners and tools
Use non-bleach cleaning agents first to minimize material damage and health risks. White vinegar, baking soda, hydrogen peroxide, and mild dish soap can address most mild to moderate cases. For stubborn mold on grout or tiles, a commercially available cleaner labeled for bathroom mold can be helpful, but check compatibility with your surfaces. Always test cleaners on a small area before broad application. After cleaning, ensure surfaces are thoroughly dried and consider sealing grout to extend the cleaning interval. This approach aligns with best practices outlined by Mold Removal Lab.
Health considerations and indoor air quality
Breathing mold spores can irritate eyes, skin, and the respiratory system, especially for children, the elderly, and those with allergies or asthma. If you or anyone in your home experiences persistent cough, wheeze, or eye irritation during or after cleaning, stop and seek medical advice. Maintaining good humidity levels (ideally under 50%), ensuring adequate ventilation, and promptly addressing leaks are essential steps for protecting indoor air quality. Regular inspection and timely remediation reduce exposure risks and create a healthier bathroom environment.
Tools & Materials
- N95 respirator(Fit-tested if possible; replace if damaged)
- Protective gloves(Chemical-resistant if using cleaners)
- Goggles or safety glasses(Eye protection from splashes)
- Scrub brush with stiff bristles(For grout and tiles)
- Microfiber cloths(Lint-free and reusable)
- Spray bottle(Label cleaners clearly)
- White vinegar (5% acidity)(Natural disinfectant for mild cases)
- Baking soda(Grainy paste for scrubbing)
- Hydrogen peroxide 3%(Effective against mold on non-porous surfaces)
- Mild dish soap(Breaks surface tension for cleaning)
- Bleach (optional)(Only on non-porous surfaces; never mixed with ammonia)
- Caulk removal tool(For replacing degraded caulk)
- Grout sealer(Water repellency for grout lines)
- Small fan or dehumidifier(Used during and after cleaning to reduce humidity)
Steps
Estimated time: 60-120 minutes
- 1
Assess the area and prep PPE
Survey the shower to identify affected surfaces and decide on cleaners. Put on an N95 respirator, goggles, and gloves. This minimizes exposure and protects you from chemical splashes.
Tip: Document visible growth with photos for reference and follow-up cleaning rounds. - 2
Ventilate and isolate the work area
Open the bathroom window or turn on the exhaust fan to reduce humidity. If possible, close doors to prevent spores from spreading to other rooms.
Tip: If you’re cleaning behind tile or drywall, limit disturbance to avoid spreading spores. - 3
Choose a cleaning method based on severity
Start with the mildest method (vinegar or baking soda). Escalate to hydrogen peroxide or diluted bleach only if needed and surfaces permit. Avoid harsh mixtures and test on a small area first.
Tip: Non-porous surfaces respond better to bleach; porous materials may require replacement instead of cleaning. - 4
Scrub affected surfaces
Apply cleaner to grout lines and tiles, then scrub with a stiff brush. Focus on seams, corners, and any dark patches. Rinse with clean water and wipe dry.
Tip: Work in small sections to monitor progress and avoid over-wetting surrounding areas. - 5
Rinse and dry thoroughly
Rinse cleaning residues away and dry surfaces completely with towels. Use a fan or dehumidifier to accelerate drying, especially in poorly ventilated bathrooms.
Tip: Don’t leave damp surfaces overnight; moisture encourages rapid regrowth. - 6
Treat grout and porous materials if necessary
If grout is damaged or porous backing remains, consider re-grouting and resealing to reduce future growth opportunities. Porous materials may need replacement if mold deeply penetrates.
Tip: Proper sealing extends the interval between major cleanings and helps moisture resist infiltration. - 7
Re-caulk or seal to prevent recurrence
Inspect and replace cracked caulk around the shower base, corners, and entry. Use silicone-based caulk for its water resistance and flexibility.
Tip: Cure times vary by product; avoid contact with water until fully cured. - 8
Establish ongoing moisture control and monitoring
Implement a daily wipe-down routine and weekly checks for signs of moisture. Consider a humidity monitor and periodic resealing as part of routine maintenance.
Tip: Document maintenance tasks in a calendar to keep moisture control consistent.
FAQ
What is the difference between mold and mildew?
Mildew is a surface growth that appears powdery and light in color, often on grout or curtains. Mold is typically darker, can penetrate surfaces, and may indicate more serious moisture issues. In showers, mold often grows in grout and caulk and may require deeper remediation.
Mildew sits on the surface; mold can penetrate materials, especially in showers.
Is mold in the shower dangerous?
Exposure to mold can irritate eyes, skin, and lungs for sensitive individuals. The health risk increases with exposure duration and the extent of the growth. Prompt cleaning and moisture control help reduce risks.
Mold can irritate the airways—clean promptly and improve ventilation.
Can I use bleach to clean grout?
Diluted bleach can be effective on non-porous grout, but it should be used with caution and never on porous materials. Always ventilate well and test a small area first. Alternative cleaners like hydrogen peroxide or vinegar are safer on many surfaces.
Bleach can help grout on non-porous surfaces, but test first and avoid porous materials.
How can I prevent mold growth after cleaning?
Maintain low humidity, use ventilation during and after showers, wipe surfaces dry, and address leaks promptly. Regular maintenance and resealing grout are key prevention steps.
Keep humidity low, dry the area, and reseal grout to prevent regrowth.
What should I do if mold returns after cleaning?
If mold reappears, reassess moisture sources, check for hidden leaks, and consider professional assessment. Replacing damaged grout or sealed surfaces may be necessary.
If it comes back, check moisture sources and consider a pro evaluation.
How often should I inspect my shower for mold?
Aim for a quick visual check weekly, with a deeper inspection every 1–3 months depending on moisture levels and usage. Field checks help catch early signs before growth spreads.
Do weekly checks and more thorough reviews every few months.
Watch Video
The Essentials
- Identify mold vs mildew early to tailor the fix
- Ventilate and dry thoroughly after cleaning
- Use the mildest effective cleaner first
- Seal grout and caulk to reduce moisture ingress
- Monitor bathroom humidity to prevent recurrence