Mold Behind Shower Wall: A Practical Remediation Guide
Learn how to safely identify, remove, and prevent mold behind shower walls with practical steps, safety tips, and expert guidance from Mold Removal Lab.

Addressing mold behind shower wall involves locating moisture sources, safely removing contamination, and drying the space to prevent recurrence. This quick guide outlines the steps and safety measures you need to protect your home. According to Mold Removal Lab, hidden bathroom mold often lurks behind tiles and studs where moisture persists. Use this plan to remediate effectively and prevent future growth.
Understanding the risk of mold behind shower wall
Mold behind shower wall is a common bathroom problem that often stays hidden until it causes noticeable symptoms or structural damage. The moisture-rich environment from steam, routine leaks, and poor ventilation creates the perfect conditions for mold to thrive in wall cavities, behind tile, or within drywall and insulation. The Mold Removal Lab team notes that many bathroom mold issues start long before you see visible colonies on the surface. Early signs include musty odors, staining in grout, warped or soft substrates, and recurring condensation on surfaces. Even if you don’t see mold on the tile, it may be growing inside studs or behind the mortar bed. Understanding the hidden risk is essential: moisture must be controlled and prevented from returning, or any remediation will be temporary at best. This guide explains how to identify, remove, and safely prevent mold behind shower walls, reducing health risks and protecting your home’s structure.
How moisture gets trapped behind tile and drywall
Moisture enters bathroom walls through steam, leaks, and capillary action. Over time, water vapor condenses in cold areas behind shower walls where there is less air circulation. Tile and grout can trap moisture; behind them, backing boards, plaster, or cement backer boards may hold dampness even after you wipe surfaces. If a shower compartment is poorly vented, humidity can linger for days. Mold can spread quickly in these microclimates, often without immediate surface signs. The Mold Removal Lab team emphasizes that the biggest prevention is addressing the source: fix leaks, improve ventilation, and dry surfaces promptly after use. In many homes, a simple vanity vent or a small bathroom fan is not enough; you may need to run the fan during and after showers and install a vent or dehumidifier to keep interior humidity under control.
Health and safety considerations when dealing with bathroom mold
Exposure to mold behind shower walls can trigger allergic reactions, asthma symptoms, or irritation for sensitive individuals. Before you begin, turn off power to the bathroom if you must open walls near outlets, and avoid disturbing the mold aggressively to limit spore spread. Wear PPE: a fit-tested respirator (P100 or better), gloves, and eye protection. Use plastic sheeting to create a containment zone and seal doors. Keep children and pets away during remediation. If anyone in your home has severe mold-related conditions, consult a professional before starting work. After work, wash hands and clothing separately, and consider a HEPA vacuum to collect dust from surfaces you touched.
Tools and materials you’ll need: overview
Before you start, gather PPE, containment supplies, and basic removal tools. PPE includes a respirator with P100 filters, nitrile gloves, and eye protection. Containment should consist of heavy-duty plastic sheeting, painter’s tape, and disposable waste bags. For removal and cleaning, have a stiff brush, sponges, bucket, mild detergent, and a mold-cleaning solution suitable for bathrooms. A moisture meter or digital hygrometer helps track humidity, while a dehumidifier or portable fan speeds drying. Keep a flashlight and a small utility knife handy for accessing concealed mold. Store contaminated materials in double bags for disposal. Having these items ready reduces work time and limits exposure.
Identifying hidden mold behind shower walls: signs and tests
Hidden mold often hides behind tiles, behind drywall, or in studs where moisture persists. Look for recurring condensation, dark staining on grout, bubbling paint, or warped wall materials. A musty odor is a helpful clue that mold is present even when surfaces look normal. If you suspect hidden mold, use a moisture meter to check for elevated humidity in the wall cavities. Infrared camera readings, if available, can reveal temperature differences that point to moisture pockets. If moisture levels stay high after addressing leaks, plan to remove suspect wall sections and inspect behind the tile. Remember that surface cleaning alone will not fix hidden mold; you must remove the source and perform a proper remediation.
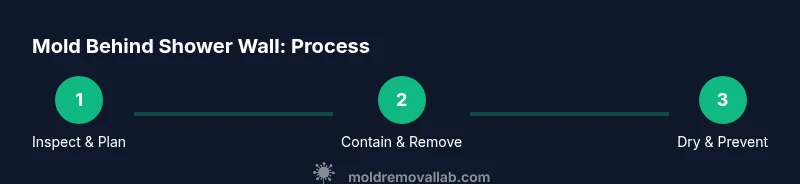
Step-by-step remediation overview: planning, containment, and removal
Effective remediation starts with a plan. Assess the extent of growth and decide whether you can perform the work safely or need a pro. Create containment with plastic sheeting to prevent spores from spreading to other rooms. Isolate the bathroom by closing doors and sealing vents. Begin removal by carefully detaching moldy drywall or backing board within the containment zone; place debris in labeled, sealed bags. Clean exposed surfaces with detergent, then disinfect using an approved bathroom mold cleaner. Finally, inspect the area for remaining moisture and plan a thorough dry-out.
Cleaning, disinfecting, and preventing regrowth
After removal, rinse and wipe all surfaces with clean water and mild detergent. Use a disinfectant approved for bathrooms and follow the label directions. Avoid mixing cleaners. Dry surfaces promptly and maintain low humidity. Apply an appropriate moisture barrier if you rebuild, and consider waterproofing behind the tile. Re-tile if necessary, ensuring grout lines are sealed and ventilation is maintained. Keep windows open or exhaust fans running during showers to minimize future dampness.
Drying, sealing, and addressing structural damage
Thorough drying is critical to prevent regrowth. Use a dehumidifier and air movers to bring humidity down below 60 percent, and monitor for several days after cleaning. If wall framing or insulation shows signs of damage, replace damaged sections with mold-resistant materials. Seal porous surfaces with products designed to resist mold growth, and install a continuous moisture barrier behind the tile. After the space is dry, re-inspect regularly for signs of moisture and re-check humidity levels weekly for the first month.
Long-term prevention: humidity control, ventilation, and maintenance
Preventing mold behind shower walls requires ongoing humidity control and good ventilation. Use a bathroom exhaust fan during and after showers, ideally venting outside. Maintain indoor humidity below 60 percent using a hygrometer and dehumidifier if needed. Fix leaks promptly and inspect seals around the shower enclosure regularly. Use mold-resistant drywall or cement backer board in wet areas and apply proper waterproofing behind tile. With consistent maintenance, you can dramatically reduce the chances of mold returning.
Authority sources and when to seek professional help
Reviewing authoritative resources can help you decide when to call a professional. For official guidance on bathroom mold and building moisture control, consult federal and university sources such as the EPA’s mold information and guidance, the CDC’s mold health information, and university extension materials on mold remediation. These sources offer safe, evidence-based guidelines that complement the practical steps outlined here. If you observe extensive growth, structural damage, or health concerns persist, a professional remediation service may be necessary to ensure safety and long-term results. Mold Removal Lab supports taking a cautious, thorough approach before proceeding with repairs.
Tools & Materials
- P100-rated respirator(Ensure proper fit; select a model suitable for organic vapors if you’ll use cleaners.)
- Nitrile gloves(Disposable; double up if heavily contaminated.)
- Safety goggles or face shield(Protects eyes from splashes and spores.)
- Plastic sheeting (6 mil or heavier)(Create containment zone around the work area.)
- Painter’s tape(Seal edges of containment; label bags.)
- Disposable coveralls (optional)(Extra protection for larger jobs.)
- Stiff-bristle brush and sponge(For scrubbing mold from surfaces.)
- Bucket and mild detergent(Early cleaning step.)
- Mold-cleaning solution or bathroom-safe disinfectant(Follow label directions.)
- Disposable waste bags (heavy-duty)(Seal and dispose of contaminated materials.)
- Moisture meter or hygrometer(Tracks drying progress.)
- Dehumidifier or portable air mover(Speeds up drying; helps maintain low humidity.)
- Flashlight(Illuminates concealed areas.)
- Utility knife(For removing damaged drywall/backer boards.)
- HEPA vacuum (optional)(Helps clean spores after removal.)
Steps
Estimated time: 2-6 hours
- 1
Plan and protect
Begin with a clear remediation plan. Identify the extent of growth, then set up containment and safety routines. Document the scene with photos for reference and insurance if applicable. Confirm power and water safety before starting, and inform household members about the plan.
Tip: Create a simple checklist before you start and keep it visible. - 2
Contain the work area
Seal the bathroom and any adjacent spaces with plastic sheeting. Tape edges securely and minimize openings to prevent spores from spreading. Keep doors closed and vents capped to reduce cross-contamination.
Tip: Work in sections to limit dispersion; always seal before you cut or remove material. - 3
Remove mold-affected materials
Carefully cut away mold-damaged drywall or backing board within the containment zone. Place waste in labeled, sealed bags and double-bag if heavily contaminated. Do not force mold growth into neighboring areas.
Tip: Waste should be immediately bagged and disposed of after each removal pass. - 4
Clean and disinfect surfaces
Scrub surfaces with detergent, rinse, then apply a bathroom-safe disinfectant. Allow surfaces to air-dry completely before proceeding. Never mix cleaners; follow label directions carefully.
Tip: Rinse thoroughly to remove residue that can attract moisture later. - 5
Dry out the space
Run a dehumidifier or air movers to bring moisture down. Aim for humidity below 60% and monitor regularly for several days. Check concealed areas with a moisture meter if available.
Tip: Keep windows closed during drying to prevent new moisture from entering. - 6
Repair and prevent recurrence
Replace damaged drywall/backer boards with mold-resistant materials and apply proper waterproofing behind the tile. Reinstall tile and re-seal grout, ensuring good ventilation remains. Inspect for leaks and run the exhaust fan after showers consistently.
Tip: Test moisture again after repairs to confirm the space stays dry.
FAQ
What are the first signs that mold is behind the shower wall?
Look for a musty odor, staining, warped walls, or recurring condensation around the shower. These signs often indicate hidden mold behind wall cavities.
Watch for musty smells and hidden staining around the shower to suspect mold behind the wall.
Can I remove mold behind the shower wall myself?
Small, surface-level mold can be addressed with proper PPE and containment. Large or hidden growth should be handled by a professional to avoid spreading spores and compromising structure.
You can handle small areas yourself, but large or hidden growth is best left to a professional.
What steps prevent mold from returning after remediation?
Fix underlying moisture issues, improve ventilation, dry surfaces promptly, and use mold-resistant materials behind wet areas.
Fix leaks, improve ventilation, dry quickly, and use mold-resistant materials.
When should I call a professional remediation service?
Call a professional if mold growth is extensive, you identify mold behind structural components, or you have persistent health concerns.
Call a pro if growth is extensive or health concerns persist.
Are there health risks for kids or pets from bathroom mold?
Yes, exposure can trigger allergies or respiratory symptoms in sensitive individuals and pets. Limit exposure during cleanup and keep the area isolated.
Mold can affect kids and pets; minimize exposure during cleanup.
What are common mistakes to avoid during DIY remediation?
Avoid disturbing mold aggressively, neglecting PPE, or skipping proper ventilation. Always follow cleaner labels and dispose of waste properly.
Don’t skip PPE, don’t disturb mold too much, and ventilate well.
Watch Video
The Essentials
- Identify moisture sources before removal.
- Contain the area to limit spores.
- Use proper PPE and disposal methods.
- Dry thoroughly and monitor humidity levels.
- Know when to call a professional for large or hidden mold growth.