Bathroom Mold Cleanup: Safe Removal & Prevention
Learn to safely remove bathroom mold, fix moisture issues, and prevent recurrence with practical, step-by-step guidance from Mold Removal Lab.

If you say 'i have mold in my bathroom', your first step is to verify moisture sources, wear protective gear, and follow a proven cleanup plan. This guide walks you through safe removal, cleaning agents, and prevention to keep mold from returning. Start by testing for leaks, then scrub with an approved solution, dry thoroughly, and improve ventilation.
What mold is in bathrooms and why it's dangerous
Bathroom mold in many homes grows where moisture lingers—around showers, sinks, and plumbing fittings. Common species can trigger allergic reactions or irritate the eyes, skin, and lungs, especially for sensitive individuals. The Mold Removal Lab team emphasizes that visible mold often signals unseen moisture problems behind walls or under flooring. Treating only the symptom (the mold) without fixing moisture guarantees it will return. A comprehensive approach targets both growth and its root cause: humidity sources that feed it. By addressing the moisture cycle, you protect occupants and extend the life of bathroom surfaces.
First steps: safety and assessment
Before you touch any mold, ensure you have the right protective gear and a plan. Put on an N95 mask (or P100 for heavy contamination), gloves, goggles, and disposable coveralls to prevent exposure. Next, identify the moisture source: look for leaky pipes, dripping faucets, or poor ventilation that keeps the room damp after showers. If you find major leaks or mold behind walls, stop the cleanup and seek professional assessment. Small, surface areas with limited growth can be tackled safely with proper containment and cleaning.
Cleaning methods by surface type
Different surfaces require different approaches. Non-porous surfaces like ceramic tile and glass can be cleaned with detergent and a mold-removal product, then dried thoroughly. Porous materials such as drywall or grout may need discarding if growth is extensive or embeds deeply. Bleach is sometimes used on nonporous surfaces, but it may not reach mold roots inside porous materials. Always rinse, dry completely, and avoid mixing cleaners. Ventilation during cleaning helps reduce airborne spores and speeds drying.
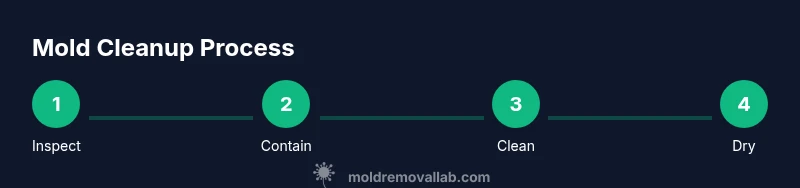
Step-by-step remediation workflow
- Inspect for moisture leaks and sources; document affected areas. 2) Seal off the work area with plastic sheeting to prevent spores from spreading. 3) Don PPE (gloves, goggles, respirator) and prepare cleaning supplies. 4) Clean nonporous surfaces with detergent and water, then apply a mold cleaner to treated areas. 5) Scrub firmly to remove visible mold, rinse, and dry. 6) Dry the space completely using fans or dehumidifiers, and repair moisture sources. 7) If porous materials were contaminated, remove and bag them for disposal. 8) Reassess humidity levels and ensure adequate ventilation to prevent recurrence.
Prevention: moisture control and ventilation
Preventing mold return hinges on controlling humidity and improving airflow. Run exhaust fans during showers and after, fix leaks promptly, and use a dehumidifier in high-humidity baths if needed. Regularly inspect caulk and sealant around tiles and fixtures, replacing when cracked or damp. Consider a moisture meter to monitor persistent damp spots. Implementing these steps reduces the likelihood of future mold growth and protects indoor air quality.
Porous materials and when to discard
Mold can root deeply into porous materials, especially if moisture remains unchecked for extended periods. If mold penetrates drywall, insulation, or cardboard backing, replacement is often necessary to prevent regrowth. Noninvasive cleaning can sometimes salvage surface laminates on cabinets or tiles, but porous contents with visible growth should be removed and disposed of. After disposal, ensure surrounding framing and studs are dry before reinstalling new materials.
Health considerations and when to seek medical advice
Exposure to bathroom mold can trigger symptoms for some people, including nasal congestion, coughing, or itchy eyes. If you or household members experience persistent or worsening respiratory issues, consult a healthcare professional. People with asthma, allergies, or compromised immune systems should take extra precautions during cleanup and consider professional remediation for larger infestations. If you notice a strong musty odor that persists after cleaning, it may indicate hidden mold or moisture problems that require further investigation.
Tools & Materials
- Nitrile gloves(Chemical resistant, snug fit)
- Protective goggles(Splash protection)
- N95 respirator(Fit-tested if possible)
- Disposable coveralls(Protect skin and clothes)
- Plastic drop cloths or sheeting(Contain area)
- Scrub brushes and sponges(Sturdy, non-abrasive)
- Detergent or dish soap(Mild cleaner)
- EPA-registered mold remover(Follow label directions)
- Bleach (sodium hypochlorite) solution(Use only on nonporous surfaces; never mix with ammonia)
- Disposable trash bags(Seal and dispose of contaminated materials)
- Trash bags for disposal(Leak-proof)
- Drying equipment (fans/dehumidifier)(Promotes fast drying)
- Moisture meter (optional)(Detect hidden moisture)
Steps
Estimated time: 2-6 hours
- 1
Inspect for moisture leaks
Visually inspect the entire bathroom for active leaks and moisture hotspots. Note areas around the shower, sink, and toilet, then mark locations to address after cleanup.
Tip: Take photos to document pre-clean conditions for future reference. - 2
Contain the work area
Seal off the bathroom from adjacent rooms using plastic sheeting and tape to prevent spores from spreading during cleaning.
Tip: Use a second layer of plastic under doors to minimize air movement. - 3
Put on PPE and prep space
Wear gloves, goggles, respirator, and disposable coveralls before touching moldy areas. Move anything clean away from the work zone.
Tip: Ensure PPE fits correctly for maximum protection. - 4
Clean nonporous surfaces
Wipe nonporous surfaces with detergent and water, then apply the mold remover and scrub to remove visible growth.
Tip: Rinse surfaces after cleaning to remove residue. - 5
Treat with mold remover
Apply EPA-registered mold cleaner according to label directions and allow appropriate contact time before wiping dry.
Tip: Avoid mixing cleaners; follow manufacturer instructions precisely. - 6
Dry thoroughly
Use fans and a dehumidifier to dry the area completely, aiming to reduce humidity below the threshold that supports mold growth.
Tip: Keep the space ventilated during and after cleaning to speed drying. - 7
Handle porous materials
If porous items show mold deeply, remove and bag for disposal; do not attempt to clean heavily contaminated materials.
Tip: Label bags clearly as mold-contaminated for proper disposal. - 8
Address moisture sources
Repair leaks, improve ventilation, and consider ongoing dehumidification to prevent recurrence.
Tip: Install or upgrade an exhaust fan that vents outdoors and runs during showers.
FAQ
How do I know if it’s mold or mildew in my bathroom?
Mildew appears as a flat, powdery film on surfaces, while mold can be fuzzy and invade porous materials. Quick checks include moisture presence and growth patterns. If unsure, assume mold and follow a containment and cleaning protocol.
Mildew looks flat and powdery; mold is typically fuzzy and can grow into porous materials. If unsure, treat it as mold and follow proper cleanup steps.
Can I use bleach to kill mold in a bathroom?
Bleach can kill surface mold on nonporous surfaces, but it does not reach roots inside porous materials. Always use it on nonporous surfaces only and never mix with ammonia or other cleaners.
Bleach can kill surface mold on nonporous surfaces, but avoid using it on porous materials and never mix with ammonia.
Should I hire a professional for bathroom mold?
Consider a pro if mold covers more than a small area, is growing behind walls, or if you have health risk indicators. Professionals can assess hidden moisture and ensure safe remediation.
If the mold is large or hidden behind walls, getting a professional is recommended to ensure safe and complete remediation.
How long does it take to dry after cleanup?
Drying time varies with humidity and materials. Expect longer durations in damp bathrooms, and ensure continuous ventilation until the space is fully dry.
Drying times depend on humidity and materials; keep the space ventilated until it’s fully dry.
Is mold dangerous to my health?
Mold can trigger allergies and respiratory symptoms in sensitive individuals. Seek medical advice if you notice persistent symptoms and consider professional remediation for health concerns.
Mold can affect health, especially for sensitive people. If symptoms persist, consult a healthcare professional.
What should I do if I still smell mold after cleaning?
A persistent musty odor may indicate unseen mold or moisture behind walls. Reassess the area, use moisture control, and consider a professional assessment if the odor continues.
If the odor lingers, recheck for hidden moisture and consider a professional check.
The Essentials
- Identify and fix moisture sources to stop mold growth.
- Wear proper PPE and contain the work area during cleanup.
- Choose appropriate cleaners for surface type and dry completely.
- Address ventilation and humidity to prevent recurrence.
- Discard porous materials if mold invasion is deep.