How to Remove Mold From Shower Caulk: Step-by-Step Guide
Learn a proven, step-by-step method to remove mold from caulk in the shower, clean mold safely, replace damaged caulk, and keep moisture under control for a healthier bathroom.

To learn how to remove mold from caulk in shower, start with surface cleaning, then replace compromised caulk to prevent recurrence. This guide outlines a safe, step-by-step approach using common household cleaners and inexpensive tools. You’ll learn when to scrub, when to replace, and how to finish with a mildew-resistant sealant to keep your bathroom healthier in the long run.
Why Mold in Shower Caulk Happens
Mold growth in shower caulk is common in homes with high humidity. Caulk in showers is constantly damp and often sits at the edge where water collects. The caulk bead can trap moisture and create a perfect environment for mold spores to thrive. Over time, mold can embed into the caulk and even penetrate behind the seal, affecting air quality and bathroom aesthetics. Prevention matters as much as removal. The Mold Removal Lab team emphasizes proper ventilation, consistent cleaning, and timely resealing to reduce recurrence. Regular checks and drying surfaces after showers can dramatically cut mold growth and keep the space healthier for your family.
In this guide you’ll find practical, evidence-based steps, safe cleaners, and a clear decision path on whether to clean or replace caulk. By following these steps, homeowners and renters can restore a healthier shower environment and avoid recurring mold.
Assessing the Caulk: When to Clean vs Replace
Not every mold spot requires complete caulk removal. Start by inspecting the bead for cracks, peeling, or crumbling. If the caulk is intact but stained, a thorough cleaning may suffice. If you notice soft, crumbly edges or mold growth behind the bead, replacement is the best long-term solution. The material matters: silicone-based caulk resists moisture better than acrylic latex, making it the preferred choice in showers. If the existing caulk is silicone and remains adhered to edges, cleaning may restore a solid seal; otherwise plan a full reseal with mildew-resistant silicone. This decision point helps prevent needless work and sets up for lasting results.
The Mold Removal Lab analysis shows that silicone caulk, when applied correctly and kept dry between uses, offers superior mold resistance compared with cheaper latex alternatives. If you’re unsure, perform a small test: clean a patch, dry thoroughly, and observe for mold return over a week before committing to a full replacement.
Cleaning Methods That Work on Caulk Mold
There are several safe, effective options for removing surface mold from caulk without harsh chemicals. Hydrogen peroxide 3% is a popular first-line cleaner; spray, let sit for 10 minutes, then scrub with a stiff brush. White vinegar is a natural alternative, but it may be less effective on deep mold. Borax paste or baking soda paste can lift grime and deter mold when worked into the bead. If you choose bleach, limit its use to white caulk and never mix with ammonia or acids. Always ventilate, wear PPE, and test a small area first. After cleaning, dry surfaces completely before resealing to prevent quick mold return. Use the gentlest method that achieves results to protect tile and substrate.
Conclusion: surface cleaning can remove visible mold, but lasting protection comes from proper sealing and moisture control. The Mold Removal Lab recommends starting with peroxide or borax and reserving bleach for white caulk only if necessary, to minimize damage and odors.
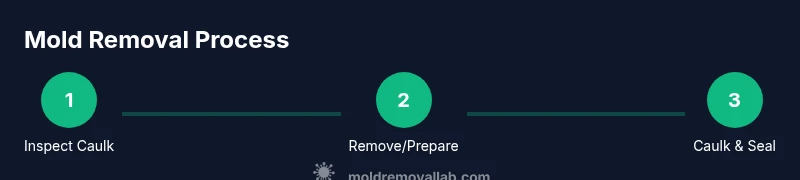
Step-by-Step Overview
Below is a practical outline of the exact actions you’ll perform. The steps are designed to be completed in about an hour or so, depending on the extent of mold and the size of the shower. Each action builds toward a clean, sealed joint ready to resist moisture. For best results, consult the separate Step-by-Step section that follows for detailed instructions with tips and timing.
- Inspect the area to determine if cleaning or replacement is needed.
- Gather PPE and cleaning supplies before starting.
- Remove old caulk if necessary and clean the joints thoroughly.
- Apply a mold-killing cleaner, let it sit, and scrub away residue.
- Apply new silicone bathroom caulk, then smooth and cure.
- Recheck after curing and maintain moisture control to prevent recurrence.
Safety First: Protective Gear and Ventilation
Mold exposure can irritate the eyes, skin, and lungs, especially in damp indoor spaces. Always wear PPE: nitrile gloves, safety goggles, and an N95 or equivalent mask. Ventilate the area well by opening a window or using an exhaust fan. If the bathroom shares a small vent, consider running it for the duration of the project and for several hours afterward to reduce moisture in the air. Keep children and pets away from the work zone until the caulk has cured. Never mix cleaners, and always follow label directions. PPE protects you from chemical splashes and mold spores.
This is a safety-critical step in the process because proper protection reduces exposure and makes cleanup safer. The Mold Removal Lab emphasizes ventilation as a non-negotiable part of any mold remediation task in wet areas.
Common Mistakes and How to Avoid Them
Common mistakes include skipping ventilation, using the wrong caulk in a wet area, or not waiting for full cure before use. Avoid over-wetting the area during cleaning, which can push moisture behind the tile line and promote re-growth. Do not mix cleaners like bleach and ammonia; this creates dangerous gases. Do not reuse old caulk; damaged beads compromise the seal. Test cleaners on a small patch first and read product labels to avoid adverse reactions with painted or colored caulk. By avoiding these pitfalls, you reduce the risk of rapid mold return and preserve the integrity of your bathroom surfaces.
Preventing Mold Return: Sealing and Maintenance
Prevention is easier with a plan. Use mildew-resistant silicone caulk rated for bathrooms, which provides the best resistance to moisture. Apply a clean bead along the joint and smooth it with a caulk tool for a uniform finish. Use masking tape on edges to prevent smearing and allow a neat line. Keep humidity below 60% with a dehumidifier if needed, and ensure proper bathroom ventilation after every shower. Regular cleaning with a mild solution and quick drying reduces the chance of mold returning. The combination of better materials, proper technique, and moisture control creates a durable barrier against mold growth.
The Mold Removal Lab team highlights that ongoing maintenance and moisture management are the keys to long-term success in preventing mold on shower caulk.
Authority Sources
- https://www.epa.gov/mold
- https://www.cdc.gov/mold/default.htm
- https://www.niehs.nih.gov/health/topics/agents/mold/index.cfm
Tools & Materials
- Nitrile gloves(chemical-resistant, protects hands from cleaners and mold)
- N95 mask(prevents inhalation of mold spores during cleaning)
- Safety goggles(eye protection from splashes)
- Scrub brush with stiff bristles(for scrubbing caulk and grout lines)
- Old toothbrush(for tight gaps and detailing)
- Plastic scraper/caulk removal tool(helps lift old caulk without scratching tiles)
- Spray bottle(for applying cleaners evenly)
- Hydrogen peroxide 3% solution(effective mold killer; use in spray bottle or direct application)
- Silicone bathroom caulk (mildew-resistant)(for resealing joints after cleaning)
- Caulk smoothing tool(to create a clean, even bead)
- Masking tape(optional for neat edges around tiles)
Steps
Estimated time: 60-90 minutes
- 1
Prepare area and safety gear
Put on nitrile gloves, mask, and goggles. Open a window or turn on the vent. Remove loose items from the shower area and lay down protective sheets if needed. This prevents contamination of nearby surfaces and protects you from chemical splashes.
Tip: Ventilation is the single most important safety step in this process. - 2
Inspect caulk and remove if needed
Check the caulk bead for cracks, peeling, or crumbling. If the bead is compromised, use a caulk remover tool or plastic scraper to lift old caulk. Otherwise proceed to cleaning only. This ensures a proper seal later on.
Tip: If removing, work slowly to avoid damaging the tiles. - 3
Clean and treat surfaces
Apply hydrogen peroxide 3% to the moldy caulk and let it sit for 10 minutes. Scrub with a stiff brush, rinse, and dry completely. If using alternative cleaners, follow label directions and avoid mixing—especially with ammonia or bleach.
Tip: Drying is critical; moisture left behind will invite quick mold return. - 4
Apply new caulk
Apply a steady bead of mildew-resistant silicone bathroom caulk along the joint. Use masking tape on either side to keep a crisp line. If replacing, remove the old caulk entirely and clean the edge before resealing.
Tip: Keep a consistent bead width for an even seal. - 5
Smooth and finish the bead
Use a caulk smoothing tool or a damp finger to smooth the bead, ensuring full contact with both surfaces. Remove excess caulk and allow the edge to set without disturbance.
Tip: Smoothing prevents air pockets where mold can hide. - 6
Cure and re-check
Allow the caulk to cure as directed on the product (usually 24 hours). Re-check the seal and moisture level in the bathroom. Resume normal use gradually after curing and maintain humidity control to prevent recurrence.
Tip: Avoid exposing the new caulk to water during curing.
FAQ
How do I know if I should replace the caulk instead of cleaning it?
Look for cracks, peeling, or crumbling beads. If mold appears behind the caulk or the seal won’t hold after cleaning, replacement is the better long-term solution.
Check the caulk for cracks or crumbling. If the seal won’t hold after cleaning, replace it.
Is bleach safe for mold on shower caulk?
Bleach can kill surface mold on white caulk but tends to degrade some caulk materials over time and can discolor surfaces. Use it sparingly and never mix with ammonia.
Bleach can help on white caulk, but use caution and never mix with ammonia.
What kind of caulk is best for a shower?
Silicone-based, mildew-resistant bathroom caulk is preferred for showers due to superior water resistance and longevity.
Go with silicone mildew-resistant caulk for bathrooms.
How long does caulk take to cure after resealing?
Most silicone bathroom caulk cures within 24 hours, but check the label for exact times and avoid using the shower during curing.
Cure time is about a day; avoid water during this period.
Can I reuse old caulk if it looks clean?
No. Old caulk loses adhesion and can harbor mold even if it looks clean. Always replace with new, mildew-resistant caulk.
Don’t reuse old caulk; always use fresh sealant.
What maintenance prevents mold return?
Keep humidity low, dry surfaces after use, and inspect caulk annually. Re-seal every 1-2 years or as needed.
Regular maintenance after sealing helps prevent mold from returning.
Watch Video
The Essentials
- Inspect caulk condition to decide between cleaning and replacement
- Use mildew-resistant silicone caulk for showers
- Ventilate well and dry surfaces to prevent mold
- Replace rather than repair if caulk is damaged beyond cleaning
- Proper curing is essential for a long-lasting seal