How to Treat Mold in Crawl Space: A Practical How-To
A complete, safe, step-by-step guide to treat mold in crawl spaces, covering assessment, containment, cleaning, drying, moisture control, and prevention for homeowners and renters.

Why Treat Mold in Crawl Space Matters
Mold that grows in crawl spaces is more than a cosmetic issue; it can affect indoor air quality, cause structural damage over time, and contribute to health concerns for occupants. The damp, dark environment of many crawl spaces creates ideal conditions for mold to thrive when there is moisture intrusion from leaks, improper drainage, or high humidity. When you set out to treat mold in crawl space areas, you’re not just addressing a stain — you’re reducing potential allergens and preventing further damage to the home’s foundation and insulation. According to Mold Removal Lab, recognizing this problem early and acting deliberately can prevent costly repairs later. The emphasis should be on safety, containment, and a focus on moisture sources as the root cause rather than only the visible mold growth. This approach aligns with best practices for home remediation and reduces the likelihood of recontamination during cleanup.
Quick assessment and mindset for crawl-space mold work
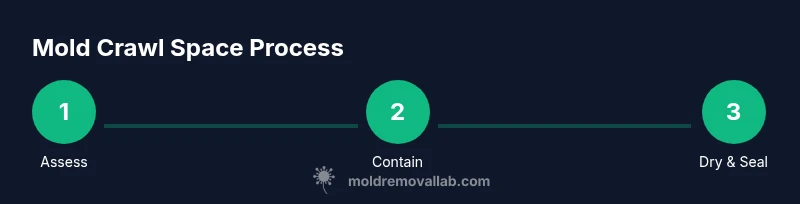
In many homes, crawl spaces are out of sight and out of mind until a musty odor or dampness becomes noticeable. Start with a safe, planned assessment to determine how widespread the growth is and what materials are involved. Note whether moisture is coming from a roof or plumbing leak above, a drainage issue around the foundation, or condensation due to poor insulation. Pay attention to wooden beams, joists, cardboard, fiberboard, and insulation batts, as these are commonly affected surfaces. Keep in mind that mold can spread through porous materials, so you may need to evaluate areas beyond the obvious signs. The Mold Removal Lab team recommends documenting every area touched by mold for reference and liability purposes, especially if you will need to consult a professional later.
Safety and containment mindset for crawl-space remediation
Before touching any moldy surfaces, prepare the workspace by sealing off the crawl space from the living areas to limit cross-contamination. Use plastic sheeting to create a containment zone and set up a dedicated air path that prevents mold spores from blowing to inhabited levels. Safety gear is non-negotiable: wear an appropriate respirator, goggles, gloves, and disposable coveralls. If you or any family member has allergies or asthma, consider scheduling the project when airflow can be carefully controlled. This phase reduces exposure risk and helps protect occupants while work proceeds. The containment plan should remain in place until all mold growth is cleaned and the space is completely dry.
Cleaning and surface treatment basics
Effective mold cleanup focuses on removing the mold from surfaces and preventing spores from becoming airborne during the process. Use a detergent solution or EPA-registered cleaner on non-porous surfaces; for porous materials that are not reusable, disposal is often the safest option. Avoid mixing household cleaners with other chemicals, and never rely on bleach alone to handle mold in crawl spaces, especially with porous materials. After cleaning, wipe the area dry and recheck for any remaining signs of growth. Plan for a final inspection to confirm that the contamination is under control. Remember: the goal is not just removal of visible mold, but addressing the underlying moisture problem to prevent recurrence. The Mold Removal Lab perspective emphasizes a cautious, thorough approach to ensure long-term safety.
Drying, moisture control, and moisture barriers
Drying is the critical step that determines whether mold regrows. Use dehumidifiers and fans to thoroughly dry walls, joists, and insulation cavities, paying attention to corners and hidden pockets. Once dry, replace or reseal insulation and install a durable vapor barrier across the crawl space floor to minimize future moisture intrusion. Maintain indoor humidity levels around 30-50% where feasible, and ensure proper drainage around the foundation to avoid standing water. A well-sealed crawl space not only halts mold growth but also improves overall energy efficiency and indoor air quality. This phase of remediation is where proper moisture control delivers long-term protection.
Documentation, monitoring, and prevention planning
After you complete the cleanup, establish a monitoring plan to catch rising moisture early. Schedule periodic inspections, especially after heavy rains or rapid temperature changes. Keep an eye on any musty odors or any new damp spots near vents or plumbing lines. If you notice ongoing moisture, revisit the root cause and adjust drainage, ventilation, or insulation accordingly. Proactive maintenance reduces the chance of reoccurrence and saves money over time. The Mold Removal Lab guidance suggests documenting the remediation steps and outcomes so you can compare future results to this baseline, which helps with any future home improvements or insurance considerations.
A note on professional assistance and next steps
Not all crawl-space mold situations are the same. If mold covers large areas, penetrates structural components, or you experience persistent symptoms like coughing, headaches, or nasal irritation, consult a qualified mold remediation professional. A pro can perform a more thorough assessment, use specialized equipment, and ensure that containment, cleaning, and drying meet local codes and safety standards. The final decision should balance cost, safety, and the extent of contamination. The Mold Removal Lab Team emphasizes that homeowners should not hesitate to seek professional input when the scope extends beyond a simple cleanup or when interior living spaces could be impacted.
Longer-term prevention playbook
Finally, adopt a prevention plan that combines moisture control, regular inspections, and improved ventilation. Fix leaks promptly, maintain gutters and downspouts, and consider upgrading vapor barriers in damp crawls spaces. Regular cleaning and occasional re-assessment can help you keep crawl space mold at bay for years to come. The goal is to maintain a dry, well-ventilated environment and to recheck the area after severe weather or construction nearby. With a solid prevention plan, you can significantly reduce future mold risks and maintain a healthier home.