Mold Crawl Space Remediation: A Practical Home Guide
Learn a clear, practical step-by-step approach to remediating mold in crawl spaces. This guide covers moisture control and long-term prevention for homeowners.

By the end of this guide, you will identify moisture drivers in a mold crawl space, dry and decontaminate affected areas, and install a vapor barrier for long-term prevention. You’ll need basic PPE, moisture meters, plastic sheeting, a dehumidifier, and safe cleaning supplies. We also cover safety, measurements, and when to call a professional for complex cases.
What is a mold crawl space and why it matters
A mold crawl space is an area beneath a home where damp conditions can promote mold growth on structural wood, insulation, and stored materials. Mold in this zone often goes unseen because it resides out of sight, yet the spores can travel through vents, joists, and drains. The health risks are real for occupants and pets, especially when spaces are poorly ventilated or there is ongoing moisture intrusion. Effective management starts with understanding moisture sources, how mold colonizes, and the role of proper barriers in preventing spores from migrating into living areas. In most homes, a mold crawl space is addressable with a moisture-control plan that pairs mechanical drying, surface cleaning, and a durable vapor barrier to limit future growth. While any mold should be treated with care, crawl spaces respond best to long-term moisture control rather than quick surface cleaning. The goal is to create a dry environment that stays below the mold-friendly humidity range, usually under 50-60% depending on climate.
Common causes of mold growth in crawl spaces
Several factors converge to create mold-friendly conditions in crawl spaces: chronic leaks from roofs or plumbing, high humidity from poor ventilation, poor drainage around the foundation, and seasonal condensation on cold surfaces. Surfaces like wood beams, insulation, and cardboard articles provide nutrients for mold and can shelter hidden colonies behind walls or under floorboards. A simple moisture test can reveal elevated RH levels and dampness not visible to the naked eye. Recognizing these drivers helps homeowners prioritize fixes—leak repairs, improving drainage away from the foundation, and sealing the crawl space with a moisture barrier. When addressed together, these steps dramatically reduce recurrence risk and improve indoor air quality.
Inspecting your crawl space: signs to look for
Set aside time to inspect the crawl space at least twice a year, ideally after wet seasons. Look for musty odors, visible mold, dark stains on wood or insulation, warped or crumbling materials, and moisture on concrete or metal components. Check for standing water, damp concrete, efflorescence on blocks, and musty air that travels into living spaces through vents or gaps. Check for leaky pipes, roof penetrations, or improper grading that directs runoff into the crawl space. Document findings with photos and measurements, and monitor humidity with a reader to identify spikes in moisture during rain events.
Preparing for remediation: safety, containment, and planning
Before touching moldy surfaces, wear appropriate PPE to protect yourself from spores. Create a containment zone with plastic sheeting to prevent cross-contamination, seal entry points, and turn off HVAC or seal ducts near the crawl space. Prepare cleaning products, a dedicated sponge or brush, and a dedicated disposal bag for contaminated materials. Plan the work schedule to minimize exposure—longer sessions create more exposure risk—so break tasks into short, manageable blocks. If you uncover damaged insulation or structural rot, plan to replace it after moisture sources are fixed. Finally, ensure you test and document RH before and after remediation to confirm progress.
Moisture control strategies: the cornerstone of mold crawl space remediation
Long-term success relies on moisture control. Install a durable vapor barrier across the crawl space floor, overlapping seams and sealing to walls. Improve drainage around the foundation, clean gutters and extend downspouts away from the base, and repair any leaks promptly. Use dehumidification to keep relative humidity below 50-60%, depending on climate. You may also consider modest ventilation if air exchange reduces indoor humidity without introducing new moisture sources. Regularly inspect for condensation on pipes and ductwork, and maintain a dry, clean environment that discourages mold spore settlement.
When to call a professional
If you encounter widespread mold growth, recurrent moisture problems, or sensitive occupants (young children, elderly, or immunocompromised individuals), professional remediation is advised. A licensed remediator can assess structural risk, implement containment, and ensure proper cleanup using EPA-recommended methods. While DIY steps can reduce shallow mold, extensive contamination or hidden mold behind walls warrants expert equipment and training. Always verify credentials and request a written remediation plan before work begins.
Tools & Materials
- N-95 respirator(Ensure proper fit; replace if damaged)
- Goggles or safety glasses
- Gloves (nitrile or latex)
- Protective coveralls
- Headlamp or flashlight
- Moisture meter / hygrometer(To track RH levels during work)
- 6-mil plastic sheeting(Vapor barrier material)
- Tape (duct or foil)(For sealing plastic seams)
- Plastic cutting tool (box cutter or scissors)
- Detergent or EPA-approved cleaner(For cleaning non-porous surfaces)
- Bucket, sponge, and scrub brush
- Heavy-duty disposal bags
- Dehumidifier (portable)(Crawl-space sized unit)
- Caulk or foam sealant
- Leak repair materials (as needed)(Pipes, roof, or grade fixes)
Steps
Estimated time: Estimated total time: 2-5 days
- 1
Assess the scope and plan remediation
Begin by outlining the affected area, noting moisture sources, and setting a cleanup target. Take photos and measurements to document baseline conditions and guide the remediation sequence.
Tip: Document each area before and after work to track progress. - 2
Establish containment and safety barriers
Create a containment zone with plastic sheeting, seal doors and vents, and keep the work area isolated from living spaces. This limits the spread of spores during cleanup.
Tip: Use bright tape to mark the boundary and label entry/exit points. - 3
Ventilate and start drying
Run a dehumidifier and use a fan only if it doesn’t spread moisture elsewhere. Target a relative humidity below 50-60%, depending on climate, while ensuring continuous monitoring.
Tip: Keep doors to the living spaces closed to avoid cross-contamination. - 4
Clean visible mold on non-porous surfaces
Wipe with soap and water or an EPA-approved cleaner. Avoid dry brushing, and wear PPE throughout the process to minimize exposure.
Tip: Do not mix cleaners and ventilate the area well. - 5
Address moisture sources and leaks
Repair leaks in roofs, plumbing, or walls, and fix drainage issues that allow water to pool near the foundation. Addressing the source prevents recurrence.
Tip: Document leaks and schedule the repairs promptly. - 6
Install vapor barrier and seal crawl space
Lay 6-mil plastic over the floor, overlap seams, seal to walls, and extend plastic up 6 inches on vertical surfaces. Ensure no gaps that can trap moisture.
Tip: Overlap seams by at least 12 inches for better sealing. - 7
Improve drainage and ventilation in a balanced way
Direct exterior water away from the foundation, clean gutters, and ensure downspouts discharge away from the crawl space. Consider controlled ventilation if it reduces indoor humidity.
Tip: Check for new condensation after rain and adjust as needed. - 8
Re-inspect, clean, and finalize maintenance
Re-check humidity levels, remove any remaining debris, and perform final cleaning. Set up a plan for ongoing monitoring to catch regrowth early.
Tip: Maintain a humidity log and schedule periodic reviews.
FAQ
What is the difference between cleaning mold and remediation in a crawl space?
Cleaning removes visible mold on accessible surfaces, while remediation addresses moisture sources, containment, and potential contamination of porous materials. Remediation aims to prevent regrowth and protect indoor air quality.
Cleaning removes surface mold; remediation addresses moisture and containment to prevent future growth.
Can I do crawl space remediation myself, or should I hire a professional?
DIY can handle small, contained areas with proper PPE and tools. For widespread, hidden, or structurally compromised mold, a licensed professional is recommended to ensure safety and code compliance.
DIY works for small areas, but large or hidden mold is safer with a licensed professional.
How long does crawl space remediation take?
Time varies with area size and severity. Small, well-contained jobs may take a day or two; larger or complex cases can extend to several days with professional help.
Duration depends on size and complexity; expect anywhere from 1-5 days.
Is mold in crawl spaces a health risk to occupants?
Yes, mold can trigger allergies and respiratory issues, especially for children, the elderly, or immunocompromised individuals. Proper remediation reduces risk and improves indoor air quality.
Mold in crawl spaces can affect health, particularly for sensitive occupants.
What are signs of hidden mold in crawl space?
Look for musty odors, damp insulation, stained wood, warped materials, or elevated humidity readings even if you can't see mold on surfaces.
Musty smell, damp insulation, or warped materials can indicate hidden mold.
Will sealing the crawl space prevent future moisture problems?
Sealing helps reduce moisture intrusion, but it must be paired with fixing leaks, drainage issues, and ongoing humidity monitoring to be effective long-term.
Sealing helps, but you must fix root causes and monitor humidity for lasting results.
Watch Video
The Essentials
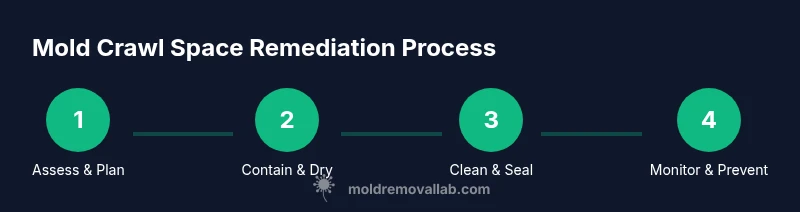
- Identify moisture drivers first.
- Contain and dry before cleaning.
- Seal crawl space with vapor barrier.
- Monitor humidity long-term.