How to Deal with Mold in Basement: A Practical Guide
Learn practical, step-by-step methods to address basement mold safely. Identify moisture sources, decide DIY vs pro remediation, clean & dry thoroughly, and prevent future growth with lasting moisture control.

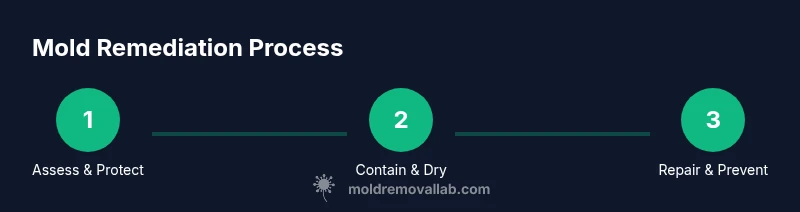
You will identify and stop moisture sources, safely remove small mold, thoroughly dry the area, and seal moisture entry points to prevent recurrence. Start by testing for leaks and high humidity, wear protective gear, and decide whether a DIY cleanup is feasible or a professional remediation is needed for larger patches. Then clean, dry, and monitor the space to maintain safety.
Understanding basement mold and why it happens
Mold in basements thrives where moisture remains, often from leaks, poor drainage, or high humidity. This guide on how to deal with mold in basement aims to give homeowners a clear, actionable path: identify moisture sources, decide between DIY cleanup or professional remediation, and implement drying and moisture-control measures. According to Mold Removal Lab, moisture control and prompt leak repair are foundational to any successful remediation. You may notice musty odors, damp walls, or visible growth on wood, drywall, or textiles. The core principle is simple: stop the moisture, clean what’s present, and dry everything thoroughly before finishing or sealing areas. Regular monitoring helps catch a recurrence early and reduces health risks for occupants.
Identifying moisture sources that feed basement mold
Basement mold does not appear from thin air; it grows where water or humidity persists. Key sources include plumbing leaks behind walls, roof or exterior wall leaks, seepage through foundation cracks, groundwater intrusion, and poor drainage around the home's perimeter. Indoor humidity above typical comfort levels (often 60% or higher in basements) accelerates mold growth even without a visible leak. Condensation on cold pipes or walls can also sustain mold over time. To lay a strong foundation for remediation, locate and repair leaks, improve drainage around the foundation, and install or service a sump pump or drainage tiles if needed. Regular humidity checks with a hygrometer help you stay proactive.
DIY cleanup vs professional remediation: how to decide
Small, non-porous mold patches on solid surfaces can sometimes be cleaned safely by a confident homeowner. If the affected area is larger than about 10 square feet or if the mold followed a water intrusion event, professional remediation is recommended. Structural damage, shredded drywall, or mold growth within insulation warrants expert assessment. When in doubt, consult a Mold Removal Lab advisor to evaluate your space. Remember, improper cleaning can spread spores and worsen health risks, so PPE and containment are crucial regardless of the chosen approach.
Controlling moisture: ventilation, dehumidification, drainage, and sealing
Controlling moisture is the centerpiece of mold prevention. Start by fixing leaks, then reduce indoor humidity with a dehumidifier set to maintain 40–50% RH in living spaces and under 50% in the basement. Improve ventilation by using exhaust fans or opening vents, especially during activities that generate moisture (laundry, bathing). Check outdoor drainage to ensure water flows away from the foundation, and seal cracks or gaps in walls and floors to limit moisture intrusion. A well-sealed space dries faster after cleaning and reduces the chance of regrowth.
Safe cleaning procedures and products for basement mold
For small areas, a detergent solution and a stiff brush can remove visible mold from non-porous surfaces. After cleaning, wipe surfaces with a mild disinfectant and ensure thorough drying. Avoid mixing ammonia with bleach, which can release harmful gases. Porous materials (drywall, insulation, carpet pad) that have mold growth are often best removed and discarded. Use a HEPA-filtered vacuum to collect dust and spores after cleaning, and bag waste promptly in sealed containers. When in doubt, test a small patch first and escalate to professional services if the patch expands.
A practical remediation plan: inspection, containment, drying, and restoration
A structured plan reduces risk and speeds results. Start with a thorough inspection to document affected areas and moisture sources. Establish containment with plastic sheeting and negative-pressure ideas to prevent spore spread. Dry the area using dehumidifiers and fans until moisture readings stabilize. Remove and replace severely affected materials, then apply mold-resistant finishes where appropriate. Finally, implement long-term moisture controls (drains, sealing, and monitoring) to prevent recurrence.
Prevention and monitoring to keep basement mold from returning
Prevention hinges on moisture control and timely maintenance. Keep humidity below 50% and fix leaks promptly. Regularly inspect walls, pipes, and foundation for signs of dampness, and maintain drainage systems. Install vapor barriers on suspect surfaces and use mold-resistant drywall or insulation in moisture-prone zones. A simple monthly check can catch early growth before it becomes a bigger problem, protecting occupants’ health and the structure.
When to test for mold and how results guide action
Testing is most helpful when you suspect hidden mold behind walls or insulation, or after a remediation to confirm clearance. Use a reputable mold-testing service or in-home kits with clear instructions, and interpret results alongside moisture readings and visual inspection. If tests show a persistent problem or multiple species, consider a professional remediation assessment and a formal moisture plan to prevent relapse. The Mold Removal Lab team emphasizes moisture-first strategies as the best defense against recurring mold.
Tools & Materials
- N95 respirator mask(Fit-tested if possible; protects against inhaling spores)
- Protective goggles(Eye protection against splashes and spores)
- Chemical resistant gloves(Nitrile or rubber; avoid latex if exposed to cleaners)
- Disposable coveralls or old clothing(Keeps clothing clean and reduces spread)
- Plastic sheeting (6 mil) and tape(Containment and zoning of the cleanup area)
- Duct tape or painter's tape(Secure edges of containment)
- HEPA vacuum(For dry cleanup and spore containment)
- Bucket, sponge, and stiff brush(Basic cleaning tools)
- Mold-safe cleaners (detergent, borax solution, or vinegar)(Avoid ammonia-bleach combos; do not rely on bleach for porous materials)
- Heavy-duty disposal bags(Seal contaminated materials for disposal)
- Dehumidifier(Maintain RH below 50% during cleanup)
- Fans with caution(Use to circulate air if containment is secure)
- Moisture meter or hygrometer(Track drying progress)
Steps
Estimated time: 6-18 hours
- 1
Assess scope and protect yourself
Identify affected areas and put on PPE before touching any mold or damp surfaces. Document visible growth and take note of potential health triggers for household members.
Tip: If you have asthma or allergies, consider professional help for any large patches. - 2
Shut down moisture sources
Find and stop leaks, fix plumbing issues, and address roof or wall penetrations. This step prevents new mold from forming during cleanup.
Tip: Turn off any water supply to the affected area if it’s safe to do so. - 3
Set up containment
Seal the cleanup zone with plastic sheeting and tape. Create negative air flow if possible to prevent spores from migrating to other rooms.
Tip: Keep doors closed; post a warning sign to restrict access. - 4
Dry the space
Use dehumidifiers and fans to bring relative humidity below 50% and to promote air circulation around damp surfaces.
Tip: Run equipment for 24–48 hours and recheck moisture levels. - 5
Clean and remove mold from non-porous surfaces
Wipe with detergent and rinse; use a mold-safe cleaner on hard surfaces. Porous materials may need removal and disposal.
Tip: Never dry brush moldy surfaces; this disperses spores. - 6
Disinfect and dry again
Apply a disinfectant suitable for the surface and ensure it dries completely before reusing the space.
Tip: Rinse after disinfection if the product requires it. - 7
Repair and restore
Replace damaged materials with mold-resistant options where feasible. Reinforce moisture barriers to reduce future growth.
Tip: Consider upgrading insulation or vapor barriers in problem areas. - 8
Verify dryness and monitor
Recheck humidity, inspect for new growth, and schedule follow-up checks after heavy rain events.
Tip: Keep a simple log of humidity readings and visual checks.
FAQ
Is basement mold dangerous?
Basement mold can affect indoor air quality and trigger allergies or asthma in some people. Large or toxic molds require professional assessment. Use PPE and limit exposure during cleaning.
Basement mold can impact air quality and trigger allergies in some people. For large or toxic growth, consult a professional.
Can I remove mold myself?
You can clean small, contained patches with protective gear and safe cleaners. If the area is large, or if you’ve had recent water damage, hire a professional.
You can handle small mold patches yourself, but large areas or water damage should be handled by a pro.
How long does remediation take?
Time varies with area size and moisture. Small jobs may take 1–2 days; larger jobs can extend to several days or more, depending on drying and repairs needed.
Remediation can take from a day to several days depending on size and moisture.
Do I need to repair leaks before cleaning?
Yes. Fixing leaks prevents re-growth and ensures the cleanup sticks. Dry the area completely before finishing or reoccupying.
Fix leaks first to avoid repeat mold growth and ensure the space dries properly.
What humidity level is safe in a basement?
Aim for indoor humidity below 50% in basements; keep below 60% in most living areas. Use a dehumidifier to maintain steady levels.
Keep basement humidity under 50 percent to slow mold growth.
Watch Video
The Essentials
- Identify and fix moisture sources first.
- Use protective gear and containment during cleanup.
- Dry thoroughly to prevent regrowth.
- Decide DIY vs professional based on area and water damage.