Mold Poisoning Test: A Practical Home Guide
Learn how to choose, collect, and interpret a mold poisoning test. This step-by-step guide covers test types, lab selection, result interpretation, and practical remediation for safer indoor air.

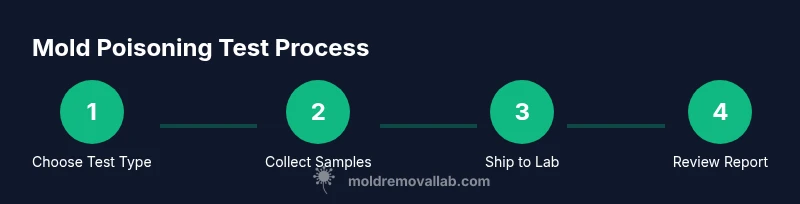
A mold poisoning test helps you confirm whether indoor mold exposure is a risk and guides remediation. You’ll choose a test type (air, surface, or dust), collect samples with a kit, and send them to an accredited lab. Results should be interpreted with a professional, and you’ll use them to plan targeted cleanup and prevention steps.
What a mold poisoning test is and why it matters
A mold poisoning test is a lab-based assessment designed to detect mold organisms or their byproducts in your indoor environment. It can involve indoor air sampling, surface swabs, or dust analysis gathered with a kit. The goal is to identify the presence and, to some extent, the types of mold that may contribute to health symptoms such as coughing, sneezing, wheezing, or persistent nasal stuffiness. The Mold Removal Lab team emphasizes that tests are most valuable when used to pinpoint problem areas and prioritize remediation. Tests alone don’t diagnose illness; they support a broader health and home-safety plan. Understanding what the test measures helps homeowners and renters separate probable indoor sources from outside contamination and plan targeted fixes.
Types of mold tests and what they measure
There are several approaches, each with its own strengths and limitations:
- Indoor air quality tests (air samples) estimate spore counts and species in the breathing zone over a defined period. Useful for evaluating overall exposure in a room or home.
- Surface tests (swabs) target visible mold at specific spots, helping confirm whether a surface is contaminated and monitor cleanup progress.
- Dust or settled-dust analysis captures an integrated snapshot of mold presence in a space over weeks or months, useful for detecting hidden sources.
- DNA-based tests (e.g., qPCR) identify specific mold species with high sensitivity, aiding risk assessment for toxic or allergenic species.
- Health-oriented tests such as mycotoxin or biological markers may be offered in some labs, but their clinical interpretation varies and should be discussed with a health professional. When evaluating options, prioritize labs that provide clear methodologies, controls, and legitimate reporting formats.
The goal is to use a method that matches your concern (single room vs whole-house) and to interpret results within context: water damage history, occupant sensitivity, and building ventilation. As a general rule, a combination approach—air plus surface testing—often yields the most actionable information. The Mold Removal Lab analysis highlights that multi-pronged testing improves remediation targeting and reduces unnecessary cleanup.
Before you test: preparing your home and choosing a lab
Preparation affects results, so plan ahead:
- Do not over-clean or sanitize extensively right before sampling, as this can alter surface results or reduce detectable residues.
- Decide the scope: one room, a zone, or the entire dwelling. Narrowing the focus helps labs propose appropriate test types and sampling locations.
- Choose a reputable, accredited lab. Look for labs with clear chain-of-custody procedures, validated methods, and accessible support for interpreting results.
- Confirm the kit requirements: how to collect, label, and ship samples; whether you need professional supervision; and whether the lab accepts self-collected samples from non-lab kits.
- Document water intrusion and visible mold. Photos and notes provide context that can support analysis and remediation planning.
For homeowners, working with a trained remediator or indoor air specialist can help select the right test mix and interpret results in light of health and safety considerations. The Mold Removal Lab team recommends coordinating testing with a remediation plan to avoid repeating work and to ensure that corrective actions address root causes such as leaks or high humidity.
The testing process: collection, shipping, and lab analysis
A typical mold poisoning test follows a simple sequence, but timing and lab protocols vary:
- Receive a test kit and read instructions carefully. Preparation includes choosing sampling locations and marking them on a layout of the space.
- Collect samples exactly as instructed—air samples often require specific pumps or cassettes, surface swabs require sterile swabs, and dust collectors may use filter-based collection devices. Accuracy hinges on following the protocol precisely.
- Label all samples clearly with date, location, and collector name. Maintain a clean chain-of-custody if required by the lab.
- Package samples securely, then ship or drop off to the lab within the specified window. Delays can degrade sample integrity.
- The lab analyzes the specimens using validated methods and issues a report detailing detected species, relative abundances, and interpretation guidance.
- Review results with the lab’s report, then plan remediation. If results indicate high-risk mold species or persistent contamination, engage a remediation professional and address underlying moisture sources.
Waiting times for results vary by lab and test type, but plan for a multi-day to several-week timeline from sampling to final report. The Mold Removal Lab team notes that clear reporting, including limitations and context, makes remediation decisions safer and more effective.
Interpreting results and what they mean for your health
Interpreting mold test results requires nuance:
- Presence vs. health risk: Detecting mold DNA or spores confirms presence but not a direct diagnosis of illness. Health risk depends on species, concentration, exposure duration, and occupant vulnerability.
- Species matters: Some molds produce mycotoxins or provoke stronger allergic reactions. Health care providers can help determine whether findings are clinically relevant for your situation.
- Context is key: A positive reading in an undisturbed, well-ventilated home may carry less urgency than the same reading in a water-damaged space with poor air exchange.
- Compare pre- and post-remediation: Follow-up testing can validate cleanup effectiveness and ensure that moisture problems were resolved.
- Action steps: If results show elevated levels or high-risk species, address moisture issues, improve ventilation, and consider professional remediation. Always consult healthcare providers if occupants have persistent symptoms.
Incorporating professional interpretation improves safety. The Mold Removal Lab team reminds readers that lab reports are tools to guide action, not standalone medical advice. Health-focused decisions should involve both environmental professionals and medical professionals when mold-related symptoms are present.
DIY testing vs professional services: pros and cons
Choosing between DIY testing kits and professional testing depends on your goals and constraints:
- DIY kits are typically more affordable and convenient for quick checks or learning about a space. They’re useful for homeowners who want a preliminary read and have time to interpret results cautiously.
- Professional testing offers higher confidence in sampling rigor, chain-of-custody, and lab accreditation. It’s often preferred when mold growth is suspected behind walls, under flooring, or when samples must support insurance or legal claims.
- Lab quality matters: Regardless of DIY or professional, opt for labs with transparent methodologies, validated controls, and clear result interpretation. The Mold Removal Lab analysis emphasizes using accredited labs to minimize false positives and negatives and to provide actionable remediation guidance.
- Health considerations: If household members have asthma, allergies, or immunocompromise, prioritize professional guidance and remediation planning even if DIY results appear modest.
When in doubt, start with a professional consultation to identify the best testing approach and to align testing with a remediation plan. The Mold Removal Lab team recommends a coordinated approach to testing and cleanup rather than piecemeal efforts that may miss hidden sources.
Practical remediation steps after testing
Testing informs remediation, but successful cleanup also depends on addressing moisture and airflow:
- Fix leaks and reduce humidity: Repair roof, plumbing, or HVAC penetrations and use dehumidifiers or ventilation to keep relative humidity below recommended thresholds.
- Contain and remove contaminated materials: Porous items with persistent mold growth may require disposal following safety guidelines and local regulations. Non-porous surfaces should be cleaned with appropriate cleaners, not over-wet, and dried thoroughly.
- Clean systematically: Use EPA-recommended methods for mold cleanup and consider non-toxic products like peroxide-based or vinegar-based cleaners where appropriate. Avoid mixing cleaners that can create hazardous fumes.
- Improve ventilation: Increase air exchange in damp areas (bathrooms, basements) and consider HEPA filtration in spaces with ongoing symptoms or high contamination.
- Re-test after remediation: Schedule follow-up testing to verify that mold levels have returned to baseline and that moisture sources have been controlled. Documentation helps with ongoing safety planning and potential insurance claims.
The Mold Removal Lab team underscores that remediation should target both the mold and the moisture that fed growth. A well-documented plan reduces recurrence and protects occupant health. For persistent or extensive contamination, professional remediation is often the safest route, complemented by ongoing maintenance and monitoring.
Tools & Materials
- Disposable nitrile or latex gloves(For sample collection and handling.)
- N95 or higher respirator(Protects against inhaling spores during sampling.)
- Sterile swabs or collection kits(Follow lab’s kit instructions.)
- Tape measure or layout map(Document room dimensions and sampling points.)
- Notebook or digital device for notes(Record locations, dates, and conditions.)
- Camera or smartphone(Capture mold visibility and moisture signs.)
- Sealable plastic bags and zip-locks(Seal samples securely for shipping.)
- Cooler with ice packs or insulated mailer(Keep temperature-sensitive samples stable during transit.)
- Printed lab instructions and shipping label(Ensure proper tracking and custody.)
- Waste bag for disposable items(Dispose of used supplies after sampling.)
Steps
Estimated time: 1-3 weeks
- 1
Define test scope and type
Determine which areas to test (single room vs entire home) and select test types (air, surface, or dust) that align with your concerns and budget. Clear objectives help labs recommend appropriate sampling locations.
Tip: Sketch a simple floor plan and mark suspected moisture hotspots before sampling. - 2
Prepare sampling kit and environment
Gather essential tools, review instructions, and reduce disturbances in the test area. Ensure space is representative of typical conditions and avoid heavy cleaning prior to sampling.
Tip: Turn off HVAC briefly to avoid cross-contamination during sampling. - 3
Collect samples according to protocol
Follow kit directions meticulously for each sample type. Label each item, seal containers, and document the exact location and time of collection.
Tip: Keep samples at stable temperature if required by the lab protocol. - 4
Package and ship samples to lab
Use the lab’s instructed packaging and shipping method. Include a contact email/phone for status updates and ensure you retain tracking information.
Tip: Do not delay shipping beyond the lab’s specified window. - 5
Receive and review lab report
Once results arrive, review detected species, spore counts, and any recommended actions. Note limitations or uncertainties provided by the lab.
Tip: Request clarification if a result is ambiguous or unexpected. - 6
Plan remediation based on results
Coordinate moisture control, containment, cleaning, and potential professional remediation. Schedule follow-up testing after cleanup to confirm effectiveness.
Tip: Document actions taken and maintain records for future inspections.
FAQ
What is the purpose of a mold poisoning test?
A mold poisoning test helps confirm whether mold exposure is occurring and guides the remediation plan. It’s a tool for identifying problem areas and prioritizing cleanup, not a standalone medical diagnosis.
A mold test shows whether there’s mold exposure and helps plan cleanup; it isn’t a medical diagnosis on its own.
Are DIY mold test kits reliable?
DIY kits can provide initial information, but reliability varies by lab methods and sampling technique. For suspected hidden sources or health concerns, professional testing is typically more dependable.
DIY kits give initial info, but for hidden mold or health concerns, professional testing is usually more reliable.
How long does it take to get results?
Turnaround depends on the lab and test type, but you can expect days to multiple weeks from collection to final report. Follow-up testing after remediation may take additional time.
Lab results typically take days to a few weeks, depending on the test and workload. Follow-up testing adds more time.
What should I do if tests show high mold levels?
Consult a remediation professional to address moisture sources and contaminated materials. Begin with moisture control and ventilation improvements while planning safe cleanup.
If levels are high, hire a remediation pro and fix moisture and ventilation, then continue with careful cleanup.
Can a mold test diagnose mold-related illness?
No. Mold tests detect mold presence or spores in the environment, not a medical condition. Health symptoms should be discussed with a physician.
No, environmental mold tests don’t diagnose illness; talk to a doctor about symptoms.
Should I retest after remediation?
Yes. A post-remediation test confirms the effectiveness of cleanup and ensures moisture problems are resolved to prevent recurrence.
Yes, retesting after cleanup confirms effectiveness and helps prevent recurrence.
Watch Video
The Essentials
- Choose the right test type for your space
- Use an accredited lab for reliable results
- Follow sampling protocols precisely
- Interpret results with health and home context
- Target remediation to moisture sources and perform follow-up testing