Inspector Mold: Safe Home Mold Inspection Guide
Safely assess inspector mold at home, identify moisture sources, and decide when to involve professionals with practical steps from Mold Removal Lab.

By completing a structured home inspection, you’ll identify common mold signs, locate moisture sources, and decide whether professional remediation is required. This guide outlines safety precautions, a step-by-step inspection plan, essential tools, and how to interpret findings from an inspector mold assessment.
What is inspector mold and why it matters
According to Mold Removal Lab, inspector mold refers to mold growth identified during a formal assessment. The Mold Removal Lab team found that moisture control is the single most important factor in preventing regrowth. An accurate inspection involves examining indoor humidity, visible growth, musty odor, and sources of moisture. Understanding these aspects helps homeowners act quickly to reduce health risks and structural damage. The term inspector mold is not a diagnosis; it signals that a licensed inspector has observed signs that warrant further attention, moisture management, and potentially remediation. For homeowners, recognizing inspector mold early can prevent costly damage and minimize health risks for occupants, especially children and elderly residents who are more vulnerable to indoor air contaminants.
Tools & Materials
- Flashlight with extra batteries(Bright, adjustable beam for dark corners and crawl spaces)
- Digital moisture meter(Checks moisture in drywall, wood, and concrete; document readings with photos)
- Nitrile gloves(Protect hands during inspection and sampling)
- N95 respirator(Fit-tested respirator recommended for mold environments)
- Camera or smartphone(Photograph signs, moisture readings, and locations)
- Notepad and pen(Record observations, dates, and room identifiers)
- Measuring tape(Map room dimensions and locations of moisture sources)
Steps
Estimated time: 60-120 minutes
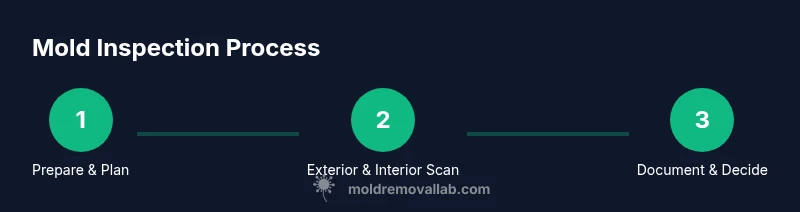
- 1
Prepare and safety check
Before entering suspect areas, put on PPE (gloves, respirator, eye protection) and ensure good ventilation. Review the plan, identify exit routes, and note any hazards (sagging ceilings, exposed wiring). This minimizes health risks and helps you document conditions accurately.
Tip: Wear a properly fitted respirator and keep a clear path to exit in case you encounter severe odors or signs of hazardous moisture. - 2
Scan entry points and exterior for moisture
Begin with exterior walls, gutters, downspouts, and window seals. Look for staining, efflorescence on masonry, or peeling paint that signals moisture intrusion. Keep notes of affected areas and capture photos for reference.
Tip: Check after rain or heavy dew when moisture problems are most evident. - 3
Assess interior spaces for visible signs
Move methodically through each room, inspecting ceilings, walls, and floors for stains, discoloration, or bulges. Use the moisture meter on common building materials to identify hidden dampness behind finishes.
Tip: Document every finding with a timestamp and location; consistency across readings strengthens the assessment. - 4
Inspect hidden or hard-to-reach areas
Open access panels, inspect behind cabinetry, under sinks, basements, crawl spaces, and attic spaces where air flow may be limited. Look for condensation, mold colonies, or damp insulation.
Tip: Respect personal property and avoid forcing doors or panels that could cause damage. - 5
Record data and collect samples if appropriate
Photograph signs, record readings, and label specimens if you are trained to collect them. If you’re unsure about sampling, document observations and leave sampling to a licensed professional.
Tip: Never disturb visible mold aggressively; surface disruption can release spores into living areas. - 6
Decide on next steps and documentation
Review observations to determine if active growth is present and whether remediation is necessary. Compile a concise report with locations, readings, and recommended actions; share with occupants and, if needed, with a remediation contractor.
Tip: If growth is extensive or you are health-compromised, schedule a professional mold inspection promptly.
FAQ
What exactly does 'inspector mold' refer to, and when should I be concerned?
Inspector mold refers to mold growth observed during a formal assessment by a licensed professional. You should be concerned when you notice visible growth, a persistent musty odor, or moisture problems that could support mold. If found, plan a controlled remediation or further testing.
Inspector mold is mold growth seen during a licensed inspection. If you notice signs like stains or a musty odor, consider a professional assessment.
When should I hire a professional inspector mold?
Hire a professional when you have extensive mold growth, persistent moisture, or health concerns. A licensed inspector can confirm the presence of mold, identify moisture sources, and recommend a remediation strategy.
If you have extensive mold or health concerns, get a professional mold inspector.
Can I test for mold myself at home?
DIY tests can indicate the presence of mold but cannot determine species or safety. For reliable results and guidance, rely on a certified inspector and accredited labs for sampling if needed.
DIY tests can show you there’s mold, but a pro is better for accurate identification and guidance.
Is bleach effective at removing inspector mold?
Bleach is often not effective for porous materials like drywall or wood and can create safety hazards. Proper remediation uses containment, removal of affected materials, and, if necessary, professional remediation.
Bleach isn’t a reliable solution for mold on porous surfaces; professional remediation is often required.
What should I document after an inspection?
Document findings with photos, room IDs, dates, readings, and notes about moisture sources. This helps track remediation progress and supports any insurance claims.
Take photos, note locations and dates, and keep readings handy for follow-up work.
How long does mold remediation take after an inspection?
Remediation duration varies with the extent of growth and structure; a small area may take a few days, while larger infestations can take weeks. A professional will provide a project timeline.
It depends on how much mold is present; a pro can give you a timeline after assessment.
Watch Video
The Essentials
- Document mold signs clearly to guide remediation
- Identify moisture sources to prevent recurrence
- Know when to escalate to a professional
- Preserve evidence with photos and notes for insurance