Can You Test for Mold Without Seeing It? Practical Guide
Learn how to detect hidden mold without visible growth using moisture assessments, air and surface testing, and lab analysis. Practical steps for homeowners and renters.

Definition: Yes, you can test for mold without seeing it. By combining moisture assessment, air sampling, surface tests, and professional lab analysis, you can detect hidden mold and determine remediation needs. This approach reduces guesswork and helps track progress after cleanup, even in spaces where growth isn't visible yet. Professional guidance helps interpret results accurately.
Can you test for mold without seeing it?
Can you test for mold without seeing it? Yes, you can, and doing so is often essential in homes with unresolved moisture issues. According to Mold Removal Lab, hidden mold thrives where moisture persists, even behind clean surfaces. The Mold Removal Lab team found that focusing on humidity, moisture intrusion, and air movement helps identify problem areas even before black spots appear. In practice, homeowners combine moisture assessments with validated testing methods to locate hidden growth and guide remediation steps. This approach reduces guesswork and helps prioritize work, especially in crawl spaces, basements, and HVAC plenums where moisture tends to accumulate. When you act on moisture signals first, you set up a path to clear air, safer surfaces, and a drier home.
How mold testing works when there is no visible mold
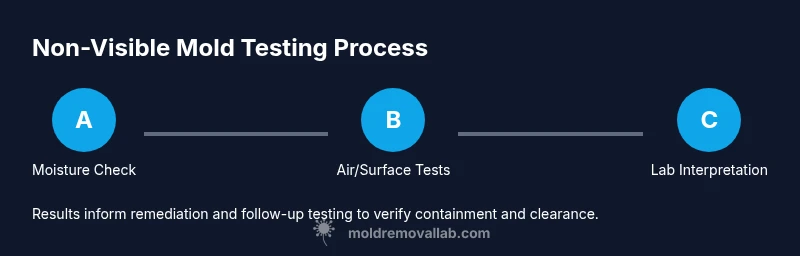
When there is no visible mold, testing relies on three pillars: moisture data, air sampling, and surface analysis. Each method has strengths and limitations. Moisture data helps you map wet zones; air sampling looks for elevated spore counts; surface testing captures settled residues from growth behind walls. No single test guarantees complete detection; instead, results are interpreted together with your home history and moisture history. Professional laboratories use standardized methods and controls to minimize false positives and negatives. Homeowners can start with a reputable kit or hire a lab, but it’s important to understand that results may indicate risk rather than a definitive mold species. In all cases, testing should coincide with moisture remediation to prevent reoccurrence.
Moisture assessment: the first clue
Moisture is the root cause of most hidden mold problems. Start by identifying persistent leaks, condensation on cold surfaces, or roof or plumbing issues. A digital moisture meter can highlight damp spots in walls, floors, and insulation. Track humidity levels in problem areas and compare with baseline readings from dry seasons. If the environment remains damp after repairs, you should plan targeted remediation and re-testing. Remember, humidity alone doesn’t prove mold, but it is the best early-warning signal scientists rely on. Keep a log of moisture incidents and renovations. Lowering moisture often prevents mold more effectively than aggressive cleaning.
Air sampling and surface testing explained
Air sampling captures spores that travel through your home's air, while surface testing collects material from suspected surfaces. For air tests, samples are drawn over a defined period and sent to a lab for analysis. Surface tests may involve swabs, tape lifts, or bulk samples. Both methods require proper containment during collection to avoid cross-contamination. If you’re using consumer kits, read the instructions carefully: mislabeling or improper handling can lead to misleading results. Labs interpret results in the context of your building’s moisture history, not as a stand-alone judgment.
DIY kits vs professional labs: Choosing your path
DIY mold testing kits can offer quick confirmation that mold is present. However, their accuracy varies, and results often require lab confirmation for legitimacy in insurance or landlord situations. Professional mold testing laboratories provide chain-of-custody, standardized controls, and more robust analysis, including potential species identification and spore counts. If you choose a DIY kit, plan to follow up with a professional for interpretation and remediation decisions. Your decision should consider the home’s size, moisture risk, and the potential consequences of misinterpretation.
Interpreting results and next steps
Interpreting mold test results requires context. A 'positive' result for mold does not automatically mean you have a dangerous health hazard; it signals active moisture and growth risk. Compare results to your recent moisture history and remediation actions. If results show elevated spores or visible residues after cleanup, re-test later in the process. Always factor indoor air quality, occupant sensitivity, and ventilation. When in doubt, consult a Mold Removal Lab professional for an independent assessment and a remediation plan.
Remediation planning after detection
Detection is only the first step. Remediation should target moisture sources, containment, and removal of affected materials. Fix leaks, improve ventilation in bathrooms and kitchens, and dry out affected spaces thoroughly. Use HEPA-filter vacuums and damp-wipe with appropriate cleaners if allowed by the material. After cleanup, plan a re-test to confirm clearance before reoccupying the space. Coordinate with occupants, seal off the area, and schedule professional remediation if the infestation area is large or porous materials are involved.
Common mistakes and safety considerations
Common mistakes include delaying moisture repair after a positive test, sampling without proper containment, and ignoring cross-contamination risks during collection. Always wear appropriate PPE when handling moldy materials and follow local regulations for disposal. Avoid aggressive cleaning of large infestations; contact a qualified professional for containment and remediation. Safety first means securing occupants and preventing exposure during remediation.
Timeline, costs, and process expectations
Testing for mold without visible growth involves several steps: moisture assessment, sampling, lab analysis, and remediation planning. Turnaround times depend on the method and lab capacity, and costs vary by region and service level. Expect to allocate time for scheduling, sample collection, lab processing, and post-remediation re-testing. While costs can vary, planning for a phased approach often yields clearer results and reduces the risk of recurrent mold growth.
AUTHORITY SOURCES
- CDC Mold: https://www.cdc.gov/mold/default.htm
- EPA Mold: https://www.epa.gov/mold
- OSHA Mold: https://www.osha.gov/mold
Tools & Materials
- Mold testing kit (air or surface, validated)(Choose a kit with clear lab support or instructions; follow all steps exactly.)
- N95 or P100 respirator(Protect against inhalation of spores during collection.)
- Latex or nitrile gloves(Wear when handling moldy materials and samples.)
- Moisture meter(Scan suspected areas to locate persistent damp spots.)
- Flashlight(Help visualize dark corners and behind appliances.)
- Sealable bags and zip ties(Contain samples and protect from contamination during transport.)
- Notebook or digital log(Record locations, readings, and dates for traceability.)
Steps
Estimated time: Total time: 2-7 days (including lab turnaround and potential remediation scheduling)
- 1
Identify moisture sources
Survey the home for leaks, condensation, and signs of water intrusion. Document locations with a simple map or notes, as moisture history informs where to test first.
Tip: Focus on kitchens, bathrooms, basements, and crawl spaces where humidity tends to be highest. - 2
Choose your testing method
Decide between air sampling, surface testing, or a combination. Consider space accessibility and prior moisture events when selecting methods.
Tip: If unsure, start with a surface test in suspected problem areas and an air test in the attic or HVAC plenum. - 3
Prepare the sampling area
Limit disturbances that could skew results (e.g., avoid airing the space aggressively just before sampling). Set up containment if feasible.
Tip: Turn off fans temporarily to reduce cross-contamination during sampling. - 4
Collect samples precisely
Follow kit or lab instructions exactly. Label each sample clearly, note location, and maintain a clean workflow to avoid cross-contamination.
Tip: Keep a timing log to track when each sample was collected for lab relevance. - 5
Package and submit samples
Place samples in appropriate containers, seal, and ship or deliver to the lab with proper documentation.
Tip: Use a traceable shipping method if you’re sending to an external lab. - 6
Review results and plan remediation
Interpret results in the context of moisture history and building layout. Identify priority zones for moisture repair and remediation.
Tip: Don’t diagnose health risks from a test; use results to guide moisture control and cleanup. - 7
Re-test to confirm clearance
After remediation, re-test to verify that moisture has been controlled and mold growth is resolved.
Tip: Schedule re-testing after drying is complete and before re-occupying spaces.
FAQ
Can hidden mold be detected without visible signs?
Yes. Hidden mold is often detected through moisture analysis and sampling. A combination of methods improves accuracy beyond any single test.
Yes. Hidden mold can be detected via moisture checks and sampling, and using multiple methods gives the best results.
Are DIY mold tests trustworthy?
DIY tests can indicate the presence of mold but may lack reliability and proper interpretation. Lab confirmation is often recommended for remediation decisions.
DIY tests can hint at mold, but labs typically provide more reliable interpretation.
How long does mold testing take?
From sampling to results, it usually takes a few days, depending on the method and lab capacity. Remediation timelines extend this window.
Most tests take a few days, with remediation following after results.
What should I do if tests show mold?
Limit spread, fix moisture sources, and involve a qualified remediation professional. Re-test after cleanup to confirm clearance.
If mold is detected, fix moisture and call a pro; re-test afterward.
Is it safe to handle mold myself?
Small, contained areas can be addressed with precautions, but large infestations require professionals to avoid exposure and cross-contamination.
Small areas may be DIY, but big infestations should be handled by pros.
Will testing identify mold species?
Some tests identify common species, but remediation decisions focus on containment and moisture control rather than species alone.
Tests can identify some species, but cleanup focuses on moisture control and containment.
Watch Video
The Essentials
- Identify moisture sources to locate hidden mold.
- Use a combination of tests for reliable results.
- Interpret results with professional guidance.
- Re-test after remediation to verify clearance.