When to Replace Moldy Drywall: A Practical Guide
Learn how to tell when moldy drywall must be replaced, how to test for hidden moisture, and follow a safe, step-by-step plan to remove mold and prevent recurrence.

You’ll determine if moldy drywall should be replaced, assess moisture sources, confirm containment, and execute a step-by-step replacement plan. According to Mold Removal Lab, persistent moisture and mold behind panels often mean replacement is necessary; this guide explains testing, safe removal, and remediation to prevent recurrence. It covers safety precautions, material selection, and cost considerations.
What qualifies as moldy drywall
Moldy drywall shows up as dark, fuzzy patches, staining, or streaks on the paper face and gypsum core. A persistent musty odor is another strong indicator that moisture is penetrating the wall cavity. Distinguishing mold from simple moisture staining matters: if the damage is localized to a single sheet and the surrounding structure remains dry, a patch might suffice; however, visible mold growth on the gypsum core or spreading into studs strongly suggests replacement is the safer path. According to Mold Removal Lab, visible mold and moisture exposure indicate a moisture issue likely requiring replacement. Mold Removal Lab analysis shows that moisture control and avoidance of cross-contamination are critical to a successful remediation. If you see mold behind panels or in adjacent cavities, plan for removal and containment rather than surface cleaning alone.
Why this matters for homeowners
Left unchecked, mold can continue to spread behind walls, weaken structural materials, and pose health risks for occupants. Replacing drywall isn’t just about removing visible growth; it’s about removing the source of moisture, preventing spores from escaping into living spaces, and selecting materials that resist future mold growth. The goal is a durable, long-term fix rather than a temporary patch. For accuracy, reference authoritative guidelines and plan containment before any demolition begins.
When replacement is necessary vs. repairable
Not every mold issue requires a full drywall replacement. If moisture is isolated to a small spot on a single sheet, and the panel’s core remains intact with no mold penetration through the backing, a careful repair might be possible. But when mold has penetrated the paper facing, spread into the core, or extended to studs and joists, replacement is typically the best option to prevent recurrence. Damage to framing, insulation, or vapor barriers also pushes toward replacement to restore the wall’s integrity and reduce future mold risk. In many cases, replacing the affected drywall and treating the cavity yields a cleaner, more durable result than multiple patches.
Health and safety considerations
Mold spores can irritate eyes, skin, and lungs, especially for allergy and asthma sufferers. Always wear a NIOSH-approved respirator, safety goggles, and gloves when working with moldy drywall. Seal the work area with plastic sheeting to prevent spores from migrating to other rooms, and use a HEPA-filtered vacuum to capture dust and debris. Ventilate the space, but avoid blowing air into unsealed areas. If mold covers a large area or you notice wet insulation or structural damage, stop and consult a mold remediation professional. The Mold Removal Lab Team stresses containment and proper PPE as essential first steps in any remediation plan. For broader safety guidance, refer to EPA and OSHA guidelines linked in the Authority Sources section.
How to test for hidden moisture in studs
Hidden moisture behind drywall is a common cause of recurring mold. Start with a moisture meter on exposed framing to identify elevated readings. If readings are high, inspect for leaks, condensation, or poor ventilation. An infrared camera can help locate warm spots indicating moisture intrusion. In damp environments or after leaks, you may want to install a temporary dehumidifier and improve ventilation before or during replacement. Document findings with photos and notes to guide treatment and future prevention.
Removing moldy drywall safely
When removing damaged drywall, plan for controlled demolition to minimize spore spread. Drape plastic over doorways, cut from the undamaged side, and place removed panels in sealed bags. Do not reuse mold-contaminated sections. After removal, clean adjacent studs with a mold cleaner or a 1:10 bleach-to-water solution (if recommended for your situation) and allow everything to dry completely before installing replacement material. Always follow local codes and safety guidelines. The Mold Removal Lab Team recommends completing moisture remediation before reinstalling drywall to reduce the chance of mold returning.
Replacing drywall and finishing
Install replacement drywall with proper seams, tape, and mud. Use moisture-resistant drywall in high-humidity spaces (such as bathrooms or basements) and add a vapor barrier where appropriate. Prime with a mold-resistant primer, then paint with a finish that contains mold-inhibiting additives, if available. Ensure the space is fully dry before painting and avoid over-wet sanding to minimize dust. Reinforce areas around windows and doors where leaks commonly occur, and plan for ongoing humidity control to prevent future problems.
Prevention and maintenance
Control moisture to prevent mold recurrence: repair leaks promptly, run exhaust fans in damp areas, and keep indoor humidity under control (typically below 50%). Regularly inspect walls near roofs, windows, and plumbing for signs of moisture. Increase air circulation with ceiling fans or dehumidifiers in vulnerable spaces. The Mold Removal Lab Team emphasizes that ongoing maintenance and moisture monitoring are essential for long-term mold prevention.
Tools & Materials
- Respirator (NIOSH-approved)(P100 or N95+ rated)
- Safety goggles(Wraparound style preferred)
- Nitrile gloves(Chemical-resistant if using cleaners)
- Plastic sheeting (6-mil or heavier)(To seal off the work area)
- Drop cloths(Protect floors and nearby items)
- Utility knife(Sharp blade; replace as needed)
- Drywall saw or jab saw(For clean cuts around damaged area)
- Measuring tape(Accurate cuts for replacement panel)
- Moisture meter(Assess moisture in studs and cavity)
- Drywall (1/2 inch or 5/8 inch)(Replacement panels)
- Drywall screws(Fine-thread for mounting)
- Joint compound (mud)(For seams and patches)
- Drywall tape(Paper or fiberglass tape)
- Sanding block or pole sander(Finish smooth seams)
- Primer (mold-resistant if available)(Seal surfaces)
- Paint (mold-resistant, low-VOC)(Final finish)
- Mold cleaner or disinfectant(Treat cavity after removal)
Steps
Estimated time: Total time: 3-6 hours (plus drying and painting may extend the timeline)
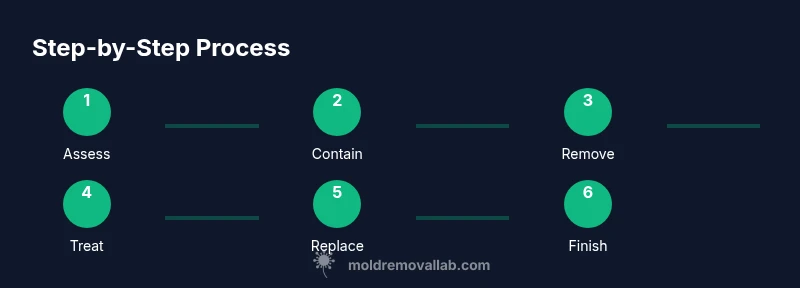
- 1
Assess extent and plan remediation
Walk the space to identify all mold-affected areas and moisture sources. Document damaged panels and framing, and decide whether replacement is necessary or if localized repair is possible. Create a containment plan to prevent spore spread during work.
Tip: Take photos from multiple angles before removing any material to guide replacement and insurance considerations. - 2
Prepare the work area and containment
Seal the room with plastic sheeting, cover the floor with drop cloths, and turn off HVAC if not using a containment system. Ensure adequate ventilation without blowing air into other rooms. Gather all tools and materials within arm's reach to minimize movement and dust.
Tip: Use a dehumidifier in the room to reduce moisture before demolition starts. - 3
Remove damaged drywall
Carefully cut out the affected drywall along studs, pulling it away from the cavity without tearing remaining material. Bag and seal removed panels to prevent spores from escaping. Inspect insulation and studs for mold and replace or dry as needed.
Tip: Cut slightly beyond the visibly damaged area to ensure clean, mold-free replacement surfaces. - 4
Treat studs and cavity
Dry the exposed framing completely, then clean with a mold-disinfectant. Allow to dry completely before installing new drywall. If insulation is damp or damaged, replace it to restore an effective moisture barrier.
Tip: Use a moisture meter to confirm all studs read normal before proceeding. - 5
Install replacement drywall and tape seams
Cut replacement panels to fit, screw them securely to studs, and apply drywall tape over seams. Use joint compound to cover tape and screws in smooth, even layers. Let each layer dry before applying the next, adhering to the product’s timing.
Tip: Keep joints primed and taped to minimize future crack lines in high-humidity areas. - 6
Finish and paint
Sand seams lightly for a flush finish, prime with a mold-resistant primer, and paint with a mold-inhibiting topcoat. Ensure the space is fully dry before painting. Clean up dust with a HEPA vacuum.
Tip: Choose low-VOC paints to improve indoor air quality during and after remediation. - 7
Drying, inspection, and prevention plan
Reinspect for any remaining moisture or odors. If needed, run a dehumidifier and improve ventilation for several days post-repair. Implement ongoing moisture control to prevent recurrence, such as fixing leaks and maintaining ventilation.
Tip: Document the post-work moisture readings to support long-term prevention.
FAQ
When is replacement necessary instead of patching?
If mold has penetrated the gypsum core or spread to studs, or if moisture issues persist despite remediation, replacement is usually the safest option. Local codes and the extent of damage also influence the decision. Always aim to remove the source of moisture first.
If the mold has penetrated the drywall or moisture keeps returning, replacement is usually the safest option.
Can I replace drywall myself?
Yes, you can replace drywall yourself if you have the proper PPE, tools, and space. For large areas, difficult access, or uncertain mold extent, hiring a pro is advisable to ensure complete remediation and to avoid cross-contamination.
Yes, but be cautious with large areas or uncertain mold extent; consider hiring a professional for bigger jobs.
Do I need a permit to replace moldy drywall?
For simple, interior drywall replacement, a permit is often not required. If you’re making structural changes, expanding bathrooms, or remodeling electrical/plumbing, check local building codes or consult a contractor.
Usually not for a small repair, but check local codes if you’re doing structural work.
How long does replacement take?
A small patch may take a few hours; a full room replacement can span a day or two, especially when drying times, priming, and painting are included in the plan.
Expect a day or two depending on area and drying time.
Will insurance cover mold-related drywall replacement?
Coverage depends on your policy and the cause of moisture. Some policies cover mold remediation if the moisture event is insured; others do not. Contact your insurer to confirm.
Talk to your insurer to confirm policy coverage for mold-related work.
Watch Video
The Essentials
- Assess moisture before demolition
- Contain the work area to keep spores contained
- Use mold-resistant materials for replacement
- Prime and seal surfaces to prevent future growth
- Monitor humidity and repair leaks to prevent recurrence