How to Use Vex Clean Mold Remover Gel for Safe Mold Removal
Learn how to safely remove mold using Vex Clean Mold Remover Gel. This practical, step-by-step guide covers prep, application, dwell time, and prevention for kitchens, bathrooms, and basements.

You will learn the step-by-step method to safely remove visible mold with Vex Clean Mold Remover Gel, including when to use it, how to prepare surfaces, apply the gel, and monitor dwell time. The guide also covers post-treatment cleaning, ventilation, and preventing future growth for homes in kitchens, bathrooms, and basements.
What is Vex Clean Mold Remover Gel?
Vex Clean Mold Remover Gel is a gel-based cleaner designed to treat visible mold growth on non-porous or sealed surfaces. The gel's thick texture helps it cling to vertical walls, countertops, tile, and glass, extending contact time with the mold while reducing splash-back. According to Mold Removal Lab, gel-based removers deliver active agents more effectively to mold colonies in damp rooms where splashing is common. The product typically contains surfactants and antimicrobial ingredients that help break down the biofilm mold forms and make spores easier to lift. When used correctly, the gel minimizes disturbance to surrounding items and minimizes airborne spread compared with spray formulations. This article uses Vex Clean Mold Remover Gel as a practical example to illustrate best-practice steps, safety, and prevention strategies that homeowners and renters can follow without specialized equipment.
When to Use Vex Clean Mold Remover Gel
Mold grows quickly in high-humidity rooms and damp basements when routine cleaning routines miss hidden moisture pockets. Use this gel for visible mold on non-porous surfaces such as ceramic tile, enamel, metal fixtures, glass, and sealed wood surfaces. For porous materials (drywall, unfinished wood, or fabric), the gel may be less effective and can require longer dwell times or professional remediation. Mold Removal Lab analysis shows gel formulations often perform best when mold is structurally shallow and has not penetrated deeply into porous substrates. In kitchens and bathrooms, this product can be a practical first step, while basements or laundry areas with ongoing moisture may require additional moisture control to prevent recurrence.
Safety and PPE Essentials
Safety first. Wear nitrile gloves, splash goggles, and a protective mask whenever working with mold products. Ensure good ventilation by opening doors and windows, and consider using a portable fan to direct air away from living spaces. Do not mix gel products with bleach or ammonia, which can produce toxic gases. Keep children and pets out of the work area. If anyone experiences eye irritation or a skin reaction, rinse with clean water and seek medical advice. By following these precautions, you reduce exposure to mold spores and volatile compounds while applying Vex Clean Mold Remover Gel.
Surface Preparation and Containment
Clear the area of personal items that could be damaged, cover nearby surfaces with drop cloths, and run a fresh air source if possible. Vacuum the area with a HEPA-equipped cleaner to remove loose spores before applying the gel. Check for moisture sources and address leaks or standing water before treatment; mold will return if damp conditions persist. Wipe nearby non-affected surfaces with a damp cloth to reduce stray spores. Label containers after use and store them out of reach of children.
Understanding Gel Performance on Surfaces
Gel products differ from sprays because their thickness slows runoff and keeps the active agents in contact with the mold. On non-porous surfaces like ceramic, glass, and metal, gel can be applied in a thick layer and left to work. On porous materials, the gel may be absorbed, reducing effectiveness; in such cases longer dwell times or alternate remediation methods may be required. The Mold Removal Lab team notes that gel-based removers often deliver safer and more controlled results in households with limited ventilation, because the gel minimizes airborne spread compared with aerosol products.
Dwell Time and Testing for Effectiveness
Dwell time is the period the gel remains in contact with the mold. For light to moderate growth on non-porous surfaces, 15–30 minutes may be sufficient, but heavier growth can require 60–120 minutes or more. Always test a small patch first to confirm the gel does not discolor the surface. After the dwell time, check for a visible change; if mold remains, a second application may be necessary. Do not rush this step—patience improves outcomes and reduces the need for repeated applications.
Scrubbing, Wiping, and Rinsing
After the dwell time, use a soft brush or cloth to gently lift remaining mold, then wipe the area with a clean damp cloth. Rinse the surface with water if the manufacturer recommends it, and dry thoroughly with a clean towel or microfiber cloth. Avoid leaving moisture behind, as dampness fuels regrowth. If residue remains, repeat the application or consider a second treatment on the same spot after allowing the surface to dry.
Porous Surfaces: Limitations and Alternatives
Porous materials like drywall, untreated wood, and fabrics are more challenging to treat with gel products. Gel removers may slow surface growth but can fail to remove embedded mold spores in porous substrates. In these cases, professionals may need to perform an in-depth remediation or the surface may need to be removed and replaced. Always consult the product label and consider tests on inconspicuous areas first to avoid staining or material damage. Use moisture control strategies to prevent future colonization on porous surfaces.
Cleaning Tools and Post-Treatment Disposal
Dispose of any used wipes, paper towels, and disposable brushes according to local regulations for household hazardous waste if required. Clean reusable tools with water and soap, then allow them to dry before storage. Worn-out gloves should be discarded and replaced regularly. Keep the gel container tightly closed and store in a cool, dry location away from sunlight. Proper disposal reduces lingering residues and environmental impact.
Prevention: Stopping Mold from Coming Back
Prevention is the most cost-effective mold strategy. Fix leaks promptly, control humidity (ideally below 50%), and improve air circulation in damp rooms. Use exhaust fans during showers, run dehumidifiers in basements, and seal windows and gaps where moisture can collect. Regularly inspect areas prone to dampness and address any new growth early. The Mold Removal Lab team emphasizes that consistent moisture control is the best defense against recurrence and mold waves in kitchens, bathrooms, and laundry rooms.
Real-World Scenarios and Practical Tips
Consider a small bathroom mold patch on tile grout. The gel can be applied in a thick layer, left to dwell, then wiped away after 20 minutes; you may need a second pass for stubborn patches. In a damp basement, repeat applications over multiple days may be required, combined with dehumidification. For kitchens with moisture-prone sinks, ensure proper ventilation and promptly dry surfaces after use. Each scenario benefits from testing a small area first and following safety recommendations to prevent exposure and spread.
Choosing the Right Gel and Next Steps
When selecting a gel-based remover, read the label for surface compatibility, dwell time, and any warnings about porous materials. If mold recurs, consider consulting a mold remediation professional or performing a more thorough assessment of humidity sources. The Mold Removal Lab team recommends documenting mold-prone areas and maintaining a routine cleaning schedule to prevent future outbreaks. If you need more help, explore related products and guidelines from reputable sources and home-improvement resources.
Tools & Materials
- Vex Clean Mold Remover Gel(Primary gel product for treatment; follow label directions)
- Nitrile gloves(Protect hands during all steps)
- Safety goggles(Eye protection from splashes)
- Face mask or respirator(For mold spores and fumes)
- Soft scrub brush(Non-abrasive to avoid surface damage)
- Microfiber cloths(For wiping and drying)
- Drop cloths or plastic sheeting(Containment to protect surrounding areas)
- Vacuum with HEPA filter(Pre-clean loose spores before treatment (optional but helpful))
- Bucket and clean water(Rinse cloths and tools as needed)
- Trash bags(Dispose of contaminated materials safely)
Steps
Estimated time: 120-180 minutes active work; plus 24-72 hours drying time
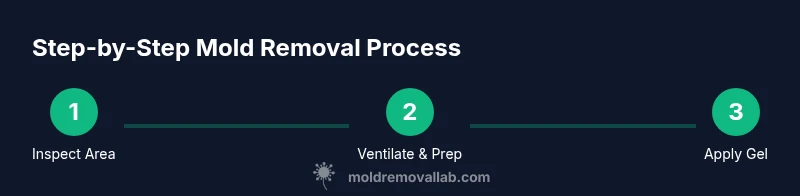
- 1
Inspect area and gather supplies
Identify all affected surfaces and collect the gel, PPE, and containment materials. Document areas that are damp or leaky to plan moisture control after treatment.
Tip: Create a simple plan of attack and lay out tools for quick access. - 2
Put on PPE and ventilate
Wear nitrile gloves, goggles, and a mask. Open windows and use a fan to improve ventilation and reduce spore concentration during treatment.
Tip: Ventilation is essential to minimize exposure during application. - 3
Contain and protect surroundings
Lay drop cloths to capture drips. Move valuables away from the work area and seal containers to prevent accidental exposure.
Tip: Seal doors to limit cross-contamination to other rooms. - 4
Test patch on a hidden area
Apply a small amount of gel on a discreet spot to ensure it does not discolor the surface before full application.
Tip: If discoloration occurs, stop and choose an alternative remediation method. - 5
Apply gel to affected area
Apply a thick, even layer of Vex Clean Mold Remover Gel over the mold growth, ensuring full coverage.
Tip: Keep a sizable margin around mold to capture stray spores. - 6
Wait for dwell time
Let the gel sit as directed by the label, typically 15–120 minutes depending on growth and surface.
Tip: Do not disturb the area unless instructions permit. - 7
Gently scrub if needed
Using the soft brush, gently loosen any lifted mold without damaging the surface.
Tip: Avoid heavy scrubbing on delicate finishes. - 8
Wipe away residue
Wipe the area with a damp cloth to remove dissolved residues, then dry with a clean microfiber.
Tip: Ensure no moisture remains in seams or grout. - 9
Rinse if recommended and dry thoroughly
Rinse only if the product label allows it and dry completely to prevent new mold growth.
Tip: Use fans or dehumidifiers to accelerate drying. - 10
Assess the area and repeat if necessary
If visible mold remains, apply a second treatment and repeat the dwell and wipe process.
Tip: Limit treatments to avoid surface damage; reseal after final cleaning. - 11
Clean tools and dispose
Clean reusable tools with soap and water; dispose of disposable items in sealed bags.
Tip: Bag contaminated waste securely for disposal. - 12
Prevent recurrence
Address moisture sources, improve ventilation, and monitor susceptible areas to prevent regrowth.
Tip: Maintain humidity control and perform routine inspections.
FAQ
Is Vex Clean Mold Remover Gel safe to use in bathrooms?
Yes, when used according to the label and with proper ventilation and PPE. For repeated mold or large patches, consider professional guidance.
Yes, safe when used as directed with ventilation and protective gear. For large patches, seek professional help.
Can I use the gel on porous surfaces like drywall?
Gel products may not remove embedded mold in porous materials. Treat non-porous areas first and consider replacement or professional remediation for porous substrates.
Gel may not fully remove mold from porous materials; assess and consider professional remediation for those surfaces.
How long should I wait after applying the gel?
Dwell time varies by product and mold severity, typically 15–120 minutes. Do not rush; longer dwell times can improve effectiveness on tougher patches.
Dwell time varies; usually between 15 and 120 minutes depending on the patch.
Will the mold return after treatment?
Mold can return if moisture sources are not controlled. Combine gel treatment with humidity control and leak repairs to reduce recurrence.
Mold can come back if moisture isn’t controlled; fix leaks and keep humidity down.
Can I use Vex Clean Mold Remover Gel on fabrics?
Gel removers are generally not intended for fabrics. Treat fabrics with dedicated textile mold cleaners or seek professional advice.
Usually not for fabrics; use fabric-safe cleaners or consult a pro.
When should I call a mold remediation professional?
If mold covers a large area, recurs after DIY treatment, or involves HVAC systems, contact a licensed mold remediation professional.
Call a pro if the mold is widespread or keeps coming back.
Watch Video
The Essentials
- Identify mold growth and use gel-based remover for better contact.
- Prioritize ventilation and PPE to minimize exposure.
- Differentiate treatment for porous vs non-porous surfaces.
- Allow adequate dwell time and avoid rushing the process.
- Combine remediation with moisture control to prevent recurrence.