Natural Mould Remover: Safe DIY Mold Cleanup Guide for Homes
Learn to safely remove mold using natural solutions, with expert guidance from Mold Removal Lab. Practical steps, safety tips, and prevention to stop recurrence.

You will learn how to make and use a natural mould remover safely, targeting common indoor mold areas like bathrooms and basements. This guide covers ingredients, safety, application steps, and when to switch to professional remediation. By the end, you’ll have a practical, reusable solution for everyday mold challenges at home.
Understanding natural mould remover: what it is and when it works
According to Mold Removal Lab, natural mould remover strategies rely on common, non-toxic agents to disrupt mold colonies on non-porous surfaces. This approach works best for light growth in bathrooms, kitchens, basements with good ventilation, and areas with fresh air supply. Mold Removal Lab Analysis, 2026, emphasizes that these methods are most effective when combined with moisture control and thorough drying. The goal is to break the mold cycle without harsh chemicals, while recognizing when materials need removal or professional remediation. In practice, a natural mould remover typically uses vinegar, baking soda, hydrogen peroxide, or tea tree oil in diluted forms. It is essential to test cleaners on small patches of material and to avoid porous surfaces that can trap spores. Always wear protective gear, work in a well-ventilated space, and keep children and pets away from treated zones. The method is not universal, but it offers a practical first line of defense for many households.
Safety and prep before you start
Before you pick a cleaner, prepare the area. Move furniture away from the affected zone, open windows or run a fan to create cross-ventilation, and remove textiles that can harbour spores. Put on protective gloves, a waterproof apron, goggles, and a respirator or mask suitable for dust and fumes. If anyone in your home has asthma or allergies, consider temporary relocation during treatment. Place a drop cloth or plastic sheeting to catch drips and protect floors. Finally, perform a quick patch test in a hidden corner of the surface to confirm that your chosen solution won’t discolor or damage it. Proper prep reduces mess and increases effectiveness.
Common natural ingredients and how to use them
A successful natural mould remover often harnesses household staples. White vinegar (undiluted or diluted 1:1 with water for delicate surfaces) disrupts mold growth by acidity. Baking soda creates a mild abrasive paste that helps lift spores and deodorize. Hydrogen peroxide (3% solution) acts as a mild oxidizer to break down mold pigments. Tea tree oil offers a stronger antifungal option but should be diluted and used with caution due to its potency. For porous materials or extensive growth, you may need to repeat applications and consider replacing contaminated materials. Always store cleaners in clearly labeled bottles, keep them away from children, and avoid mixing cleaners that could release harmful gases.
Cleaning steps: a practical, repeatable method
Apply your chosen natural cleaner to the moldy area and let it sit for 10–15 minutes to penetrate. Scrub with a soft-bristle brush or microfiber cloth, paying attention to crevices and grout. Rinse with clean water and dry thoroughly using a towel or fans. If mold returns after drying, reapply and extend the dwell time. For wider ranges of growth, split the area into sections and repeat the process to avoid cross-contamination. Avoid saturating porous materials like drywall; if growth persists, consider removal or professional assessment.
Treating different surfaces: walls, tiles, fabrics, wood
Non-porous surfaces such as ceramic tiles or sealed metal respond well to vinegar or hydrogen peroxide with gentle scrubbing. Painted walls tolerate diluted cleaners; test a hidden spot first to confirm no paint damage. Porous surfaces like drywall, fabric, or unsealed wood may trap spores; if growth appears within the material, replacement is often the safer option. Wood surfaces can be treated with a diluted solution but must dry completely to prevent further swelling or decay. Always document what you treated and monitor for regrowth over the following days.
How to test and monitor moisture to prevent regrowth
Mold thrives where humidity remains high. After cleaning, measure the ambient humidity and aim to keep it below 60% in most homes, and ideally around 40–50% in damp zones. Use a hygrometer or moisture meter to track changes over time. If humidity remains stubbornly high, inspect for unseen leaks, condensation, or poor ventilation. Addressing the moisture source is as important as the cleaning itself, since without moisture control, mold is likely to return.
When to use DIY vs professional remediation
DIY natural mould remover is appropriate for small, isolated patches on non-porous surfaces or minor damp areas. If mold covers more than a square meter, grows behind walls, or you notice a musty odor despite cleaning, seek professional help. Health risks are higher for individuals with allergies, asthma, or compromised immune systems, and large-scale infestations can indicate structural problems. In such cases, a licensed mold remediation expert can assess, contain, and remediate safely.
Maintenance to prevent future mold growth
Prevention rests on moisture control. Use exhaust fans in bathrooms and kitchens during and after showers, fix leaks promptly, and keep indoor humidity balanced year-round. Regularly inspect basements, crawl spaces, and utility rooms for condensation and damp spots. Consider a dehumidifier in damp climates and keep air circulating with furniture not pressed against walls. Small, frequent cleanups are easier than large-scale remediation later.
Quick-reference checklist and troubleshooting
- Confirm the area is well-ventilated and protected.
- Test a small patch before full application.
- Use non-porous surfaces first; replace porous materials if mold persists.
- Keep surfaces dry after cleaning and monitor humidity.
- Seek professional help if growth expands beyond small patches or behind walls.
Tools & Materials
- Protective gloves(Nitrile or latex; chemical resistance preferred)
- Goggles or safety glasses(Eye protection during splashes)
- Dust mask or respirator(NIOSH-approved for organic vapors if using vinegar or peroxide)
- Microfiber cloths(Multiple for cleaning and drying)
- Soft-bristle brush(For grout and crevices)
- Spray bottle (labelled)(For vinegar or peroxide solutions)
- Baking soda(For pastes and deodorizing)
- White vinegar (5–7% acidity)(Effective against many mold strains)
- Hydrogen peroxide (3% solution)(Mild oxidizer; avoid mixing with vinegar)
- Tea tree oil (optional)(Use only diluted and with caution)
- Bucket or tray(For rinsing tools)
- Dehumidifier or fan(Aid drying and air circulation)
- Moisture meter/hygrometer(Useful for monitoring humidity)
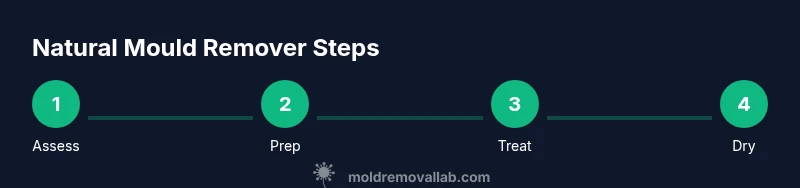
Steps
Estimated time: 60-90 minutes
- 1
Assess and prep the area
Identify all mold-affected zones and clear the space. Ventilate the area and protect adjacent surfaces with plastic sheeting. Wear protective gear before starting.
Tip: Ventilation reduces inhalation risk during cleaning. - 2
Test a small patch
Apply a small amount of your chosen cleaner to a hidden patch to ensure no surface damage or discoloration.
Tip: If discoloration occurs, switch cleaners or seek alternatives. - 3
Apply cleaner to mold growth
Spray the natural remover on the affected area and let it sit for 10–15 minutes to penetrate.
Tip: Do not rinse immediately; dwell time improves effectiveness. - 4
Scrub and lift the mold
Gently scrub with a soft-bristle brush to lift spores from the surface. Focus on grout lines and texture valleys.
Tip: Use back-and-forth motions; avoid aggressive scrubbing on fragile surfaces. - 5
Rinse and dry thoroughly
Wipe away residue with clean water and dry completely using towels or a fan. Moisture left behind invites regrowth.
Tip: Ensure no damp pockets remain in hidden corners. - 6
Reassess moisture and vent
Check humidity and improve ventilation to prevent recurrence. Place a dehumidifier if necessary.
Tip: Aim for average indoor humidity under 60%. - 7
Document results and monitor
Take photos before and after cleaning. Recheck the area in 24–72 hours for signs of regrowth.
Tip: Early detection speeds up remedial action. - 8
Decide on next steps
If mold persists beyond a small patch or returns quickly, escalate to professional remediation.
Tip: Structural leaks should be addressed by a specialist.
FAQ
Can vinegar remove mold effectively on all surfaces?
Vinegar can be effective on non-porous surfaces and light growth, but it may not fully remove mold embedded in porous materials. Always test and consider alternatives for stubborn areas.
Vinegar works well on non-porous surfaces, but for porous materials you may need additional steps or professional help.
Is a natural mould remover safe for children and pets?
Yes, when used with proper ventilation and protective gear, natural cleaners are generally safer than harsh chemicals. Always keep children and pets away during application and ensure surfaces are dry before use.
Natural cleaners can be safer if you vent well and dry the area, but keep kids and pets away during treatment.
Will baking soda kill mold?
Baking soda helps lift and deodorize mold and can slow regrowth when used as a paste or in cleaning solutions. It is not a guaranteed mold killer for heavy infestations on porous materials.
Baking soda helps lift mold and deodorize, but it's not a guaranteed fix for heavy mold.
Can tea tree oil be used as a natural remover?
Tea tree oil can offer antifungal properties but should be diluted and tested; it is optional and not necessary for all situations. Avoid high concentrations around kids and pets.
Tea tree oil works for some cases when diluted, but it's optional and requires caution.
How long before I see results after cleaning?
Results vary, but many homeowners notice reduced odor and less visible growth within days. Persistent growth may indicate ongoing moisture issues requiring further action.
You may notice improvements within a few days, but ongoing moisture may cause regrowth.
When should I call a professional?
Call a professional if mold covers large areas, returns after cleaning, or grows behind walls or in HVAC systems. Structural leaks or complex infestations are best handled by licensed remediators.
Call a pro if the mold is extensive or returns after DIY efforts.
Watch Video
The Essentials
- Start with safe, natural cleaners on non-porous surfaces.
- Moisture control is essential to prevent mold regrowth.
- Test patches before wide application and monitor humidity.
- Know when to call a pro for larger infestations.
- Document results to guide future prevention.