Uncle Sam Blow Mold: Practical Guide to Safe Remediation
Learn practical, safe remediation for uncle sam blow mold contamination. This guide covers identification, PPE, cleaning methods, moisture control, and prevention to keep indoor air healthy.

By following this guide, you will safely identify and remediate uncle sam blow mold contamination in your home. You’ll learn how to spot signs, evaluate risk, select at-home cleaning methods, and prevent future growth. This step-by-step approach emphasizes practical, safe actions for homeowners, backed by Mold Removal Lab expertise. The goal is to limit exposure, minimize spread, and restore indoor air quality.
What is Uncle Sam Blow Mold?
Uncle Sam blow mold figurines are classic holiday decorations crafted from hollow plastic shells. When these items are stored in damp basements, garages, or crawl spaces, the organic dust and moisture can encourage mold growth on their surface and inside hollow regions. The phrase uncle sam blow mold refers to a specific style of patriotic figure, often made of lightweight materials that are susceptible to moisture intrusion. According to Mold Removal Lab, early detection is key to limiting damage and avoiding more invasive remediation. The Mold Removal Lab Team emphasizes that mold growth on blow-mold figures is not just a cosmetic problem; it can indicate elevated moisture in the surrounding environment and hidden contamination behind wall panels or within porous components. Homeowners should approach these objects with caution, using proper PPE, and isolating affected items to prevent cross-contamination. The goal is to safely assess, clean, and restore the item without spreading spores to uncontaminated areas.
How Cold, Damp Environments Contribute to Uncle Sam Blow Mold
In homes with poor moisture control, even stored decorations can become a liability. Condensation on metal fixtures, roof leaks, or rising damp from the foundation creates a microclimate that favors mold growth inside crevices. Blow mold pieces often have seams, vents, and interior cavities that trap dust and moisture. When these areas stay damp, spores settle and multiply, leading to musty odors and visible discoloration. Recognize signs early: a musty smell, powdery surface, or subtle staining near joints. Taking prompt action minimizes damage and reduces cleaning difficulty later. Remember, practical remediation starts with understanding how the piece interacts with its environment and how moisture moves through surrounding materials.
Health Risks and Safety Considerations for Homeowners
Exposure to mold can affect air quality and trigger allergies or respiratory symptoms. For fragile individuals, such as children, the elderly, or those with asthma, even small amounts of mold can cause irritation. Always treat any visible mold as a potential risk until proven otherwise. The best approach is to work methodically, use protective equipment, and avoid disturbing settled spores unnecessarily. When in doubt, pause and seek guidance from a qualified professional. This section emphasizes that safety comes first and that informed handling reduces the chance of cross-contamination to other surfaces or rooms.
PPE and Safety Precautions for At-Home Remediation
Before you touch a suspect item, put on an appropriate respirator or high-quality mask, protective eyewear, and gloves. Use disposable coveralls if possible to prevent carrying mold to other areas. Work in a well-ventilated space, ideally with a fan that directs air away from living areas. Keep children and pets away from the work zone. Bag and seal contaminated materials for proper disposal. These precautions protect you and others as you begin the remediation process.
Containment and Airflow Management to Stop Spread
Containment reduces the chance that spores migrate to clean areas of the home. Isolate the affected area with plastic sheeting, seal gaps, and create a dedicated cleanup zone. Use a dedicated vacuum and avoid using household devices that recirculate air. During remediation, maintain airflow from the clean side toward the outside to prevent re-entry of spores. After work is complete, ventilate the space thoroughly to restore air quality.
Cleaning Agents: What Works and What to Avoid
Gentle, non-abrasive cleaners are best for blow mold surfaces. A mild soap and water solution can remove dust and surface residues, followed by a rinse with clean water. White vinegar is a common natural option for mold suppression on non-porous surfaces. For more serious cases, consider sodium-based cleaners recommended for hard surfaces, but never mix cleaners—this can create hazardous fumes. Avoid bleach on some plastics, and never combine bleach with ammonia. Always test a small area first and follow product instructions.
At-Home Remediation: A Practical Plan for Uncle Sam Blow Mold
Start by isolating the item from other decorations and ensuring the area is well-ventilated. Gently remove loose dust with a soft brush, then clean with a mild soap solution. Rinse and dry thoroughly, paying attention to seams and interior cavities. If staining remains, apply a gentle mold inhibitor approved for plastics and allow to dry completely. Reassess the space for moisture sources, fix leaks, and adjust humidity to prevent recurrence. Document outcomes and plan a periodic check to ensure long-term health of the item.
Drying, Moisture Control, and Rechecks after Cleanup
Proper drying is critical to prevent regrowth. Ensure all cavities and surfaces are thoroughly dry before reintroducing the item to storage. Use dehumidifiers in the room and keep humidity low to discourage mold recurrence. Recheck for any hidden leaks or condensation issues around the display area. Regularly inspect for changes in color, texture, or odor. Ongoing moisture control is essential for maintaining a mold-free environment around stored decor, including uncle sam blow mold items.
Prevention Strategies to Minimize Recurrence in Home Storage
Adopt a moisture-aware storage plan. Use desiccants in storage containers and keep items in breathable, sealed boxes to minimize moisture accumulation. Store in a dry, climate-controlled area and rotate display items to prevent prolonged exposure to any moisture spots. Regularly inspect stored pieces for early signs of mold. Establish a cleaning routine for holiday décor to catch issues before they spread.
When to Hire a Professional and What to Expect
If you encounter persistent mold growth behind the item, in hidden spaces, or if you have health concerns, seek professional remediation. A certified mold remediation specialist can assess moisture sources, perform advanced testing if needed, and implement remediation that minimizes exposure. Expect a thorough inspection, containment, targeted cleaning, moisture control recommendations, and a clear plan for prevention. A professional service helps ensure safety and long-term results.
Tools & Materials
- N95 respirator or higher(Secure fit; replace if damp)
- Chemical-resistant gloves(Long cuffs; avoid skin contact)
- Goggles or face shield(Protect eyes from splashes)
- Disposable coveralls(Optional but recommended for contamination risk)
- Soft-bristled brush(Non-abrasive; use gently)
- Mop and absorbent towels(For spills and drying)
- Mild soap and water solution(Surface cleaner)
- White distilled vinegar(Mild mold suppressor on hard surfaces)
- Plastic sheeting and tape(Containment barriers)
Steps
Estimated time: 2-5 hours
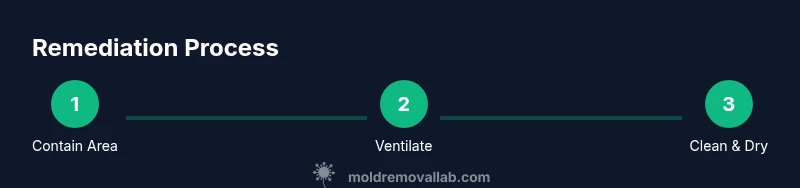
- 1
Contain the area
Establish a clean workspace by sealing the area with plastic sheeting. Remove or isolate nearby items to prevent cross-contamination. This step minimizes the spread of spores to undamaged areas.
Tip: Set up a dedicated cleanup zone and avoid moving items through living spaces. - 2
Ventilate and isolate airflow
Open windows where possible and use a fan to direct air away from living spaces. Avoid circulating air back into occupied rooms to keep spores from drifting.
Tip: Position the fan on the outside of the containment to push air outward. - 3
Protect yourself and others
Put on an N95 mask, goggles, and gloves before handling any suspected material. Keep children and pets away from the work area during remediation.
Tip: Do not touch your face; wash hands after finishing each task. - 4
Remove contaminated porous materials
If parts of the blow mold are porous or structurally damaged, carefully remove and bag them for disposal to prevent hidden mold spread.
Tip: Place removed items in sealed bags and dispose per local guidelines. - 5
Clean remaining surfaces
Wipe non-porous surfaces with a mild soap solution, then rinse with clean water. Use a soft brush to dislodge any surface mold from seams and crevices, then dry thoroughly.
Tip: Test a small area first to ensure no material damage. - 6
Dry thoroughly and reduce humidity
Dry all surfaces completely and use a dehumidifier or fans to expedite moisture loss. Keep humidity levels low in storage areas to prevent recurrence.
Tip: Ensure all interior cavities are completely dry before reassembly or storage. - 7
Address moisture sources
Inspect for leaks or condensation around the storage area and repair as needed. Improving ventilation and sealing drafts reduces future mold chances.
Tip: Fix root causes like leaks before prolonged storage. - 8
Sanitize and inspect again
Re-clean high-risk areas and re-check for signs of remaining growth or odor. A second pass ensures a more complete remediation.
Tip: Use a mold-inhibiting product approved for plastics if needed. - 9
Document and monitor
Record what was cleaned, the steps taken, and any moisture issues found. Plan periodic checks to catch signs of regrowth early.
Tip: Set a reminder to inspect the item quarterly.
FAQ
What is uncle sam blow mold and why is it a concern?
Uncle Sam blow mold refers to a vintage plastic figure, often hollow and susceptible to moisture. Mold growth on or behind such items signals a moisture problem in storage areas and can warrant remediation to protect indoor air quality.
Uncle Sam blow mold is a vintage hollow plastic figure. It can harbor mold if stored in damp spots, which means you should check storage conditions and take action if needed.
Can I clean blow mold contamination myself at home?
Yes, many mild cases can be addressed at home with proper PPE, gentle cleaners, and careful drying. If there is persistent growth behind seams or signs of structural damage, consider professional assistance.
You can usually clean small, surface mold at home with the right safety gear. If you notice growth in hidden areas or damage, a pro should handle it.
What are signs of hidden mold behind walls or within the item?
Signs include musty odors, hidden staining, or softening of the material. If you detect odors or suspect concealed growth, pause and evaluate moisture sources before proceeding.
Musty smell or unseen staining can mean hidden mold; stop and check moisture sources before continuing.
How long does home remediation typically take?
Time varies with area size and moisture issues but can take several hours to complete, including drying and follow-up checks. Plan for an extended session if multiple items are involved.
Most remediation takes a few hours, plus drying time. It depends on how much area and what moisture issues exist.
Should I replace the blow mold item after cleanup?
Replacement depends on material integrity and whether mold returns after remediation. If the item remains structurally compromised or continues to harbor mold, replacement is often the safest option.
If the item is damaged or mold keeps coming back, replacement is usually the safer choice.
When is professional remediation necessary?
If mold covers large areas, recurs after cleaning, or involves hidden spaces, a professional remediation service is advised. They will contain, remove, and advise on prevention.
Call a professional if mold is widespread or keeps coming back; they can properly manage containment and prevention.
Watch Video
The Essentials
- Identify and isolate uncle sam blow mold items promptly
- Use proper PPE and containment to prevent spread
- Choose safe cleaners and avoid mixing products
- Address moisture sources to prevent recurrence
- Recheck areas and document the remediation for future prevention