Master Mold: A Practical Guide to Safe Mold Removal
Identify, evaluate, and remediate master mold in homes with PPE, containment, drying, and prevention steps from Mold Removal Lab.

Master mold remediation is achievable with a careful, safety-first approach. This guide walks homeowners through identifying signs, isolating the area, removing contaminated materials, and drying thoroughly to prevent recurrence. Backed by Mold Removal Lab expertise, you’ll learn PPE, containment, drying, and prevention strategies to reduce health risks and keep moisture under control.
Understanding Master Mold: What It Is and Why It Matters
According to Mold Removal Lab, the term master mold is an informal descriptor used by homeowners and contractors to denote a dominant, aggressively spreading mold colony that indicates chronic moisture. It is not a scientifically defined species, but it signals a persistent problem that requires prompt, thorough remediation. In practice, master mold often covers multiple surfaces and porous materials, penetrates behind walls, and tends to reappear if moisture sources aren’t addressed. This section outlines how to recognize the scale of an infestation, why it behaves this way, and how indoor moisture management plays a pivotal role in control. Expect to encounter musty odors, visible colonies, staining, and often elevated humidity—signs that demand attention before health risks escalate.
Signs, Locations, and Triggers
Master mold commonly takes hold in spaces with recurring moisture issues. Look for: - Musty odors that linger even after cleaning - Visible dark or greenish-black colonies on walls, ceilings, or insulation - Water stains or staining that appears and then worsens over weeks - Persistent condensation, high humidity, or damp materials (drywall, fabric, wood) - Rapid growth after leaks or floods. Mold can spread via porous materials, HVAC systems, and hidden cavities. Early detection reduces costly remediation later and supports healthier indoor air quality.
Pro tip: keep a moisture audit log for rooms with repeated dampness, and check for hidden leaks behind cabinets or baseboards.
Health Risks and Safety Protocols
Exposure to master mold can trigger allergic reactions, asthma symptoms, and respiratory irritation, particularly for children, seniors, and people with compromised immune systems. Safe remediation prioritizes personal protection, proper containment, and minimizing dust. At a minimum, use a properly fitted respirator (N95 or higher), eye protection, and gloves. Work slowly to avoid dispersing spores, and seal off the area to limit cross-contamination. If anyone in the home has chronic lung disease or severe allergies, treat suspected contamination as a safety risk and seek professional guidance.
DIY Readiness: When You Can Take It On
Small, isolated patches of non-porous mold on smooth surfaces may be manageable for a careful DIY approach. Prepare the space, wear PPE, and clean with EPA-registered products following label directions. However, if the mold covers a large area (typically more than 10 square feet), is growing on porous material (drywall, wood, fabric), or if leaks and moisture are ongoing, it is safer to involve professionals. Always verify that you have adequate time and ventilation, and never attempt to bypass safety steps.
Containment and Cleaning: A Practical Approach
Containment reduces the spread of spores during removal. Establish a physical barrier with plastic sheeting, tape, and negative pressure if feasible. Seal doors and vents, minimize activity that stirs dust, and keep tools within the contained space. Cleaning should start from the outer edges of the contaminated area and move inward to avoid spreading spores. Use a detergent solution for initial cleaning and follow with an EPA-registered mold cleaner for disinfection. Dispose of contaminated materials in sealed bags and labeled containers to prevent cross-contamination.
Drying, Dehumidification, and Moisture Control
Moisture control is the cornerstone of preventing recurrence. After cleaning, thoroughly dry all affected areas and materials. Use dehumidifiers or fans to maintain relative humidity below 50-60% in the affected zone, and address ongoing moisture sources (leaks, condensation, vapor barriers). Monitor with a moisture meter if available. Quick drying is essential but avoid over-drying wood or porous surfaces that could crack or warp.
Preventing Recurrence: Maintenance and Long-Term Strategies
Persistent moisture is the root cause of mold growth. Implement a home-wide moisture plan: fix leaks promptly, improve ventilation in bathrooms and kitchens, use exhaust fans during showers and cooking, and consider a whole-house dehumidifier if humidity remains high. Regular inspections, especially after heavy rain or flooding, help catch problems early. A proactive approach reduces future mold risk and supports healthier living spaces.
Important Warnings and Common Mistakes
Avoid common errors like mixing cleaning agents unsafely, neglecting to wear PPE, or skipping containment. Do not remove mold if you suspect large-scale growth or structural damage. Never disturb mold in ways that release spores into living areas. If you’re unsure about the extent of contamination or if electrical or structural hazards are involved, pause remediation and consult a professional. The biggest mistake is postponing action—address it now for better long-term health outcomes.
Where to Turn for Help: When a Pro Is Necessary
If mold growth is extensive, involves porous materials, or if moisture problems persist despite remediation, it is wise to contact a certified mold remediation professional. Professionals assess the full extent of growth, perform controlled removal, and restore ventilation and moisture controls. The Mold Removal Lab team emphasizes that complex cases require proper containment, specialized equipment, and post-remediation verification to ensure safety and prevent relapse.
Tools & Materials
- N95 or higher respirator(Fit-tested if possible; replace filters after exposure to moldy material)
- Protective goggles(Eye protection to prevent splashes and dust contact)
- Disposable coveralls or PPE suit(Lan on clothing to keep mold spores off skin)
- Heavy-duty nitrile gloves(Double-glove recommended when handling contaminated materials)
- Plastic sheeting or tarps(Create a containment barrier around the work area)
- Duct tape or painter’s tape(Seals edges and containment seams)
- EPA-registered mold cleaner(Follow label instructions; do not mix cleaners)
- Detergent solution (mild soap)(Initial cleaning before disinfectant)
- HEPA vacuum(Use only after containment is established)
- Spray bottle(For applying cleaning solutions)
- Disposal bags (heavy-duty)(Seal and label contaminated waste)
- Moisture meter or hygrometer(Helpful for tracking drying progress)
Steps
Estimated time: 2-6 hours
- 1
Prepare and Protect
Before you begin, don PPE and clear the area. Cover floors with plastic and remove nonessential items. The goal is to minimize exposure and keep dust contained. Why: PPE and containment protect your health and prevent spores from spreading to other rooms.
Tip: Check that the respirator seals well and that all vents are closed. - 2
Contain the Work Area
Create a physical barrier around the affected space with plastic sheeting. Seal doorways and vents, and control airflow to prevent cross-contamination. If possible, set up negative air pressure inside the containment using a portable unit.
Tip: Label the containment clearly and avoid opening doors frequently. - 3
Remove Contaminated Materials
Carefully bag and remove porous materials (drywall, insulation, carpet) that are visibly moldy. Place them in sealed bags inside the containment, and avoid breaking or shredding larger pieces outside the area to minimize dust.
Tip: Do not mix moldy debris with clean trash; double-bag if needed. - 4
Clean Surfaces
Wash nonporous surfaces with detergent solution first. Follow with an EPA-registered mold cleaner to disinfect. Rinse and dry each surface as you go to prevent moisture uptake.
Tip: Work from least contaminated edges inward toward the center. - 5
Dry Thoroughly and Restore Humidity Control
Use dehumidifiers and fans to bring humidity below 50-60%. Monitor moisture levels and ensure hidden areas (behind walls or under flooring) are dry before removing containment.
Tip: Keep doors and vents closed during the drying phase. - 6
Post-Remediation Check and Prevention
Inspect for any remaining moisture problems or new condensation. Repaired leaks should be addressed, and HVAC systems checked for mold-friendly recirculation. Plan regular maintenance to minimize future growth.
Tip: Document the remediation with photos and notes for future reference.
FAQ
What qualifies as master mold in a home?
Master mold is an informal term for a dominant, widespread mold infestation indicating chronic moisture. It’s not a scientific species, but it signals the need for thorough assessment, containment, and remediation.
Master mold describes a large, persistent mold problem indicating ongoing moisture. It signals you should assess, contain, and remediate promptly.
Is DIY remediation safe for small affected areas?
Small, isolated spots on nonporous surfaces can be approached by careful DIY methods if proper PPE and containment are used. Larger areas, porous materials, or ongoing leaks require professional help.
DIY can be safe for tiny, nonporous spots with good PPE and containment, but larger or porous areas should be handled by pros.
When should I hire a professional?
If mold covers more than about 10 square feet, involves porous materials, or moisture sources persist after cleaning, professional remediation is advised to ensure safe and complete removal.
Hire a pro when the mold is widespread, porous materials are involved, or moisture keeps returning.
What PPE is essential for mold removal?
Use a properly fitted respirator (N95 or higher), protective goggles, disposable coveralls, and gloves. PPE minimizes exposure to spores during removal and cleaning.
Wear a respirator, eye protection, coveralls, and gloves to stay safe while removing mold.
Can mold be removed from wood or fabric myself?
Mold on nonporous wood is more manageable, but porous materials like drywall, carpet, or fabric may trap spores. Replacement is often recommended for heavily affected porous materials.
Mold on wood can sometimes be cleaned, but porous materials like drywall often require replacement.
How can I prevent mold from returning?
Fix leaks promptly, control humidity, improve ventilation, and perform regular inspections after moisture events. Consistent moisture control is essential to prevent regrowth.
Fix leaks, manage humidity, improve ventilation, and inspect after damp events to stop mold from coming back.
How long does remediation take?
Time depends on the extent of growth and moisture control needs. A small, contained area may finish in hours, while larger, complicated cases can take days.
Remediation duration varies with scope; small jobs may take hours, larger ones days.
Watch Video
The Essentials
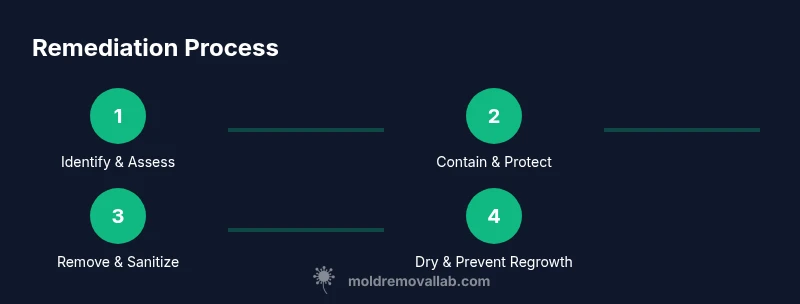
- Identify master mold early to limit spread.
- Contain and protect yourself before removal.
- Dry thoroughly to prevent regrowth.
- Address moisture sources for long-term success.