Sugar Mold Cleanup: Safe Pantry Guide 2026
Learn practical steps to identify, safely remove, and prevent sugar mold in your pantry. Expert guidance from Mold Removal Lab for homeowners and renters seeking a healthy kitchen.

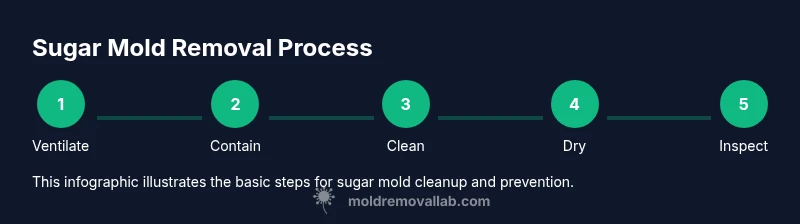
Goal: safely remove mold from sugar residues and prevent recurrence in your pantry. You’ll need basic PPE, cleaning supplies, and good ventilation. This quick guide outlines a practical, step-by-step approach to clean safely, discard contaminated items, and implement simple prevention to protect your family’s health. It also emphasizes when to escalate to professional remediation.
What is sugar mold and how does it form in kitchens?
Sugar mold refers to mold growth on sugar-rich foods and residues. In homes, it often develops on spilled sugar, syrup, dried fruit dust, or damp pantry surfaces where moisture and warmth meet carbohydrate-rich surfaces. According to Mold Removal Lab, sugar mold is a common pantry issue that signals moisture and potential food-safety concerns. It’s not a unique species; rather, standard household molds such as aspergillus or penicillium can colonize sugary residues when humidity is high. Recognizing sugar mold early helps prevent spread to nearby foods and surfaces. In most cases, you’ll notice fuzzy growth, discoloration, or a musty odor near the affected area. The key is to address both the mold and the moisture source behind it.
Sugar mold often targets container rims, shelf edges, and any damp cracks where syrup or juice may have pooled. The growth can spread quickly if left unchecked, especially in warm, humid kitchens or alongside damp plumbing. Homeowners should treat mold on sugar residues as a food-safety concern as well as a structural moisture issue, since moisture and warmth foster mold proliferation.
This guide draws on practical guidance from Mold Removal Lab to help you identify, clean, and prevent recurrence without unnecessary disruption to your pantry routines. By understanding how sugar mold forms, you can tailor a cleanup that protects both your health and your stored foods.
Health and safety considerations when dealing with sugar mold
Safety matters when cleaning mold. Always wear gloves, an N95 or higher respirator, and eye protection. Ensure adequate ventilation by opening windows or using a fan. Do not mix cleaning agents, and avoid cleaning near food containers. If you have asthma or allergies, take extra precautions or relocate items during cleanup. Sugar mold on pantry surfaces can contaminate stored foods; discard any items that contacted mold and wipe containers with disinfectant before returning to shelves. After cleanup, wash hands thoroughly and sanitize work areas to reduce cross-contamination. The Mold Removal Lab Team emphasizes that safe, careful handling reduces health risks and prevents recontamination. If anyone in the home has a compromised immune system, consider postponing cleanup or engaging a pro.
PPE selection matters. Use disposable or washable gloves that cover wrists, a well-fitted N95 mask to reduce inhalation of spores, and eye protection. Work slowly to minimize disturbance of the mold colony, which can release spores into the air with rapid movements or vigorous scrubbing. Keep children and pets away from the cleanup zone and seal the area after finishing to prevent re-entry by curious hands or nosy pets.
Health-minded households should treat mold cleanup as a mitigation task, not a casual household chore. Mold can cause allergic reactions, respiratory symptoms, and in some cases more serious health effects, particularly for sensitive individuals. Following protective practices can significantly reduce risk during cleanup.
How to inspect and isolate affected area without spreading mold
Start by identifying the full extent of contamination. Look for visible growth on sugar, jar rims, shelf linings, and nearby damp corners. Isolate the area by moving non-affected foods away, sealing moldy items in plastic bags, and turning off fans that blow air between rooms during the cleaning process. Inspect for moisture sources: leaks, condensation, or poor ventilation. Use a flashlight to highlight hidden growth behind jars or in corners. Document findings to inform drying and remediation. Isolation is critical because mold spores can become airborne with agitation; keeping the area contained minimizes cross-contamination to clean zones.
When assessing the pantry, pay attention to porous items like cardboard, opened cereal boxes, and paper bags that may harbor spores. Porous materials often require disposal to eliminate hidden colonies, while non-porous surfaces can be treated with cleaning solutions and dried thoroughly. If you see widespread discoloration, a musty smell, or persistent moisture, reduce access to that section until drying is complete. The goal is to prevent any cross-contact while you perform a careful cleanup.
Finally, consider moisture control: address any leaks, improve ventilation, and use humidity monitors to ensure the space stays dry after remediation. A small change in humidity can dramatically reduce the likelihood of re-growth, especially in warm climates or seasons with high indoor moisture.
Cleaning strategy: choosing safe cleaners and methods
For sugar mold, choose cleaners that are effective yet safe for kitchen surfaces. Soap and water remove the bulk of surface contamination, while white vinegar or 3% hydrogen peroxide can help disinfect mildly. Avoid over-wetting porous surfaces like cardboard or wood shelves, which can worsen mold spread. On non-porous surfaces (glass, metal, sealed jars), a mild bleach solution is commonly recommended by health authorities when used according to label directions; always ventilate and never mix cleaners. This section also suggests using baking soda for odor control and microfiber cloths for gentle scrubbing. The goal is to reduce moisture, kill spores, and prevent re-growth without damaging pantry materials.
Material choice matters: glass jars and metal shelves respond well to disinfectants without warping, while wood shelves may require furniture polish-safe cleaners and extra drying time. After cleaning, wipe surfaces with a clean, damp cloth to remove residual cleaning agents, then dry completely with a dry microfiber or absorbent towel. If a surface remains damp after repeated attempts, consider replacing that item or sealing the affected area with a food-safe sealant before returning it to service. The Mold Removal Lab recommends documenting the products used for future reference and to help identify any triggers for mold return.
You should also consider odor control as part of the process. A simple baking soda tray or silica gel packs placed discreetly in the pantry can absorb residual moisture and odors. While these steps don’t replace moisture remediation, they can reduce the environment that mold loves and help keep pantry spaces fresh between deep cleanings.
Step-by-step removal process (overview)
This section provides an overview of the removal workflow and notes that the full, detailed steps are listed in the dedicated STEP-BY-STEP block. It emphasizes personal protection, containment, careful cleaning, thorough drying, and moisture control as the foundation of effective remediation. The overview also highlights the importance of documenting what was cleaned and what was discarded, to inform future prevention strategies. The overview reinforces that sugar mold cleanup should be methodical: protect yourself, prevent spread, clean with appropriate products, then dry completely and monitor humidity. The following STEP-BY-STEP section (in the dedicated block) provides precise actions and rationale for each move, ensuring readers have a clear path to recovery.
Remember that not all surfaces tolerate the same cleaning approach; porous materials require gentler handling and often disposal of affected items. The overview reminds readers that safety and documentation help ensure a healthier kitchen and a more resilient pantry setup over time.
Prevention and long-term pantry mold prevention strategies
Prevention focuses on moisture control, proper storage, and regular pantry maintenance. Use airtight containers for all dry goods, keep the pantry dry and well-ventilated, and run a dehumidifier or use desiccants in particularly damp spaces. Check for leaks under sinks and around plumbing, repair promptly, and fix condensation problems. Rotate stock so older items get used first, and clean shelves with a mild disinfectant regularly. Signing up for quarterly inspections or setting up moisture alerts can help homeowners stay ahead of mold growth. Regularly inspecting pantry corners, shelf edges, and container lids helps catch issues early and reduces the need for intensive remediation later. This section emphasizes that prevention is more cost-effective and less disruptive than repeat cleanup and potential food waste. Mold prevention benefits from combining humidity control, good storage practices, and routine cleaning agendas that fit into typical home maintenance routines.
In addition to moisture control, consider structural factors such as pantry location relative to kitchens with poor ventilation or proximity to heat sources. Small improvements like better door seals or a vented cabinet can reduce moisture accumulation. The Mayo Clinic and other health sources support routine, preventive maintenance as a practical approach to mid-sized mold risks in homes. Consistency is key: set regular checks, keep a tidy storage layout, and replace old or damaged containers that could harbor hidden mold colonies.
Authoritative sources and further reading
For evidence-based guidance, consider authoritative sources such as the U.S. Environmental Protection Agency (EPA) mold page, the Centers for Disease Control and Prevention (CDC) mold guidelines, and OSHA safety recommendations. These resources provide practical, consumer-friendly advice on mold prevention, safe cleanup, and health considerations.
Tools & Materials
- Personal protective equipment (PPE)(N95 respirator, gloves, eye protection)
- Soap and water(Mild dish soap for initial cleaning)
- White vinegar(Natural disinfectant option)
- Hydrogen peroxide 3%(Disinfectant alternative)
- Baking soda(Odor control and gentle cleaning)
- Microfiber cloths(For wiping and scrubbing)
- Soft scrub brush(Non-abrasive scrubbing)
- Plastic bags (sealed)(Contain contaminated items)
- Trash can with lid(Dispose of waste safely)
- Dehumidifier or fan(Aid drying and ventilation)
- Moisture meter (optional)(Check humidity levels)
Steps
Estimated time: 90-120 minutes
- 1
Ventilate and protect
Open windows or run an exhaust fan to disperse airborne mold. Put on PPE (N95, gloves, goggles) and prepare the area to prevent contamination.
Tip: Keep doors to other rooms closed and use a fan positioned to blow air outside. - 2
Isolate contaminated items
Move non-affected foods away from the area. Seal moldy items in plastic bags before removing them from shelves to contain spores.
Tip: Do not disturb moldy residue more than necessary to reduce spore release. - 3
Prepare cleaning solutions safely
Choose a cleaning approach appropriate to surface material. Soap and water first, then disinfect with vinegar or hydrogen peroxide if surfaces are non-porous.
Tip: Never mix cleaning agents; follow label directions for any disinfectants. - 4
Scrub affected surfaces
Use a microfiber cloth or soft brush to scrub visible mold from non-porous surfaces. Wipe in one direction to minimize spreading.
Tip: Avoid friction on porous materials which can embed mold spores. - 5
Rinse and thoroughly dry
Rinse clean with water if using a cleaning solution. Dry the area completely within 24-48 hours to prevent regrowth.
Tip: Use a moisture meter if available to confirm dryness. - 6
Dispose of contaminated materials
Place used towels and disposable items in sealed bags and discard in outdoor trash. Do not reuse cleaning cloths on other areas.
Tip: Label bags to prevent confusion and delay. - 7
Reassess and monitor moisture
Check for moisture sources such as leaks and condensation. Keep pantry dry moving forward with dehumidification or venting.
Tip: Set a monthly moisture check reminder.
FAQ
Is sugar mold dangerous if I accidentally eat a moldy sugar piece?
Most foodborne mold exposures are not deadly, but ingesting mold can cause allergic reactions and respiratory symptoms. If you accidentally eat a moldy piece of sugar, monitor for symptoms and discard the rest.
Eating moldy sugar isn’t recommended. Watch for reactions and discard moldy items.
What is sugar mold exactly?
Sugar mold is mold growth that occurs on sugar-rich residues in kitchens. It’s caused by moisture and warmth, not a unique mold species.
Sugar mold is mold growing on sugar residues due to moisture and warmth.
Can I clean sugar mold with only household cleaners?
Yes, for non-porous surfaces you can use soap and water followed by a disinfectant like white vinegar or hydrogen peroxide. Porous materials may require professional advice.
Soap and water plus a disinfectant can work on non-porous surfaces; porous items may need a pro.
When should I call a professional?
If mold covers a large area, persists after cleaning, or you have allergies or asthma, consider professional remediation. Persistent moisture problems also warrant expert assessment.
Call a pro if mold is widespread or keeps coming back.
Does sugar mold indicate a bigger moisture problem?
Often yes; sugar mold usually signals moisture intrusion. Address leaks, condensation, and ventilation to prevent recurrence.
Yes, it often means moisture is present; fix the source to prevent recurrence.
Watch Video
The Essentials
- Identify moisture sources and fix them promptly
- Always wear PPE and ventilate during cleanup
- Use non-porous surfaces cleaners first, then disinfect
- Dry thoroughly within 24-48 hours to prevent regrowth
- Store dry goods in airtight containers and monitor humidity