Corn Mold Cleanup: Identify, Remove, and Prevent
Learn to identify corn mold, safely remove it from pantry surfaces, and prevent recurrence. This practical guide from Mold Removal Lab covers diagnosis, cleaning methods, moisture control, and when to call a pro.

Goal: Learn to identify, safely remove, and prevent corn mold growth in household storage areas, especially kitchens and pantries where corn-based products are stored. This guide covers quick diagnosis, effective cleaning methods, drying and ventilation strategies, moisture control, safe disinfectants, and clear steps for DIY remediation. It also flags when professional help is needed to protect health and prevent recurrence.
What corn mold is and why it grows
Corn mold is a common term for several species of fungi that colonize dried corn products and nearby pantry materials when moisture and warmth align. You may see fuzzy or powdery growth on corn kernels, corn flour, popcorn bags, or even on cornmeal canisters. In pantry environments with high humidity, condensation on shelves can feed mold development. The phrase 'corn mold' emphasizes that moisture-rich storage of grain foods facilitates mold growth more than fresh corn, which is generally consumed quickly. Mold spores are everywhere, but they only become visible when conditions allow them to multiply. According to Mold Removal Lab, improper moisture control is the primary driver of corn mold in residential settings. When moisture lingers, especially in poorly sealed containers, mold can take hold on the surface of dried corn products and on packaging materials. If you notice any signs of corn mold, treat the area promptly to avoid spread to other stored items. Prevention starts with proper storage and humidity management.
Signs and common locations for corn mold in your home
Corn mold often hides in places where moisture lingers and where dried corn products are stored. Look inside cereal boxes, sealed bags, and jars with cracked lids. Check pantry corners, under shelves, and at the back of bins where condensation can collect. Signs include fuzzy or powdery growth on kernels, gray to greenish patches on bags, musty odors, and a powdery residue on the outside of metal cans. The presence of moisture near a heat source—like a stove or dishwasher—can encourage mold growth on corn products and their packaging. Even if you don't see obvious mold on a product, the surrounding packaging may show staining, softening, or discoloration that indicates cross-contamination risk. Corn mold can spread through spores that detach when you open containers, so it’s essential to quarantine affected items. Use a dedicated bag or container for disposal, and wash hands after handling moldy goods. Regularly inspect stored corn-based items, such as masa harina, cornmeal, or popcorn kernels, especially in humid seasons.
Health considerations and safety first when dealing with corn mold
Health considerations are a key reason to address corn mold promptly. Prolonged exposure can irritate the eyes, nose, and throat and may trigger allergies or asthma in sensitive people. In kitchens and storage areas, inhaling or touching mold spores can cause discomfort if you have existing respiratory conditions. Always approach mold cleanup with care, using protective gear and good ventilation. According to Mold Removal Lab, taking moisture control seriously reduces health risks and minimizes mold spread. While most household mold cleaners are effective on nonporous surfaces, porous materials like cardboard or fabric may require disposal and replacement. If anyone in the home experiences persistent coughing, wheezing, or skin irritation after exposure, seek medical advice. Children and pets should be kept away from contaminated areas during cleanup.
DIY remediation overview: safe steps you can take
DIY remediation for corn mold can be effective for small, contained areas with proper safeguards. Start by isolating the area and gathering PPE. Remove contaminated packaging and items and seal them in a bag. Clean non-porous surfaces with detergent and rinse, then apply a disinfectant such as vinegar or hydrogen peroxide. Dry the area thoroughly and monitor humidity for several days. If mold reappears after cleaning or covers a large area, switch to professional remediation to prevent further spread and protect health. Mold Removal Lab emphasizes patience and moisture control as key factors in stopping recurrence. After remediation, re-inspect the space weekly for a month to catch early signs of regrowth.
Tools, cleaners, and materials that help remove corn mold
A well-equipped cleanup kit makes corn mold removal faster and safer. Essential items include gloves, a respirator or N95 mask, eye protection, plastic sheeting, disposable bags, cleaning cloths, a stiff brush, detergent, white vinegar, and hydrogen peroxide. You’ll also need a spray bottle, bucket, and a dehumidifier or fan to speed drying. Use dedicated tools for mold tasks and store cleaning supplies away from food storage. If you’re unsure about the material’s safety, perform a small test in an inconspicuous area before full application. Always discard porous contaminated items and replace with new storage containers to prevent future corn mold colonization.
Cleaning agents and disinfection options for corn mold
Choose cleaning agents carefully. Detergent and hot water remove surface debris, while white vinegar or dilute hydrogen peroxide can help kill exposed mold spores on nonporous surfaces. Never mix cleaners that contain ammonia with bleach, and ventilate well during use. For stubborn residues, repeat cleaning and allow surfaces to dry completely before returning foods. Avoid using bleach on porous materials like cardboard or paper packaging, as it can weaken the material and release fumes. Mold Removal Lab recommends starting with lower-impact cleaners and escalating only if necessary, to minimize chemical exposure in kitchens and pantries.
Drying, moisture control, and ongoing monitoring
After cleaning, thorough drying is essential to stop corn mold from returning. Use a dehumidifier or a fan to promote airflow, and keep relative humidity below 60 percent where possible. Re-inspect the storage area at least weekly for a month, paying attention to any damp smells or visible signs. Store corn products in sealed, airtight containers to reduce exposure to moisture and spores. Regularly rotate stock so older items are used first, and avoid keeping opened bags or boxes in warm, humid spaces. Mold thrives on moisture; the better you control humidity, the less likely corn mold will recur.
Storing corn products to prevent future corn mold growth
Prevention begins with robust storage. Transfer kernels, flour, and meal into airtight, BPA-free containers or sealed resealable bags. Label containers with dates and use older stock first. Keep pantry temps cool and dry, ideally with a dehumidifier in humid climates. Consider placing moisture absorbers or silica gel packs in containers that hold corn products. Regularly clean pantry shelves, discard damaged packaging, and keep a consistent cleaning schedule to maintain mold-free storage environments. By following these practices, corn mold recurrence becomes unlikely.
What to do with contaminated food items and packaging
If corn mold is found on packaged goods, seal the item in a bag before removing from the pantry to prevent spores from spreading. Do not eat any visibly moldy kernels or exposed corn products. Discard contaminated items in a double-bag system to minimize exposure. Clean the shelf and packaging area, then wash hands thoroughly. For reusable containers, wash with hot soapy water and dry completely before reuse. When in doubt, throw it out and start fresh with new packaging to maintain food safety and reduce health risks.
When to call a professional for corn mold remediation
If mold covers a large area, penetrates porous surfaces, or if you notice persistent odors despite cleaning, contact a mold remediation professional. Professionals can safely remove mold from drywall, wood, and insulation and advise on moisture remediation to prevent recurrence. Mold Removal Lab suggests seeking help when you cannot confidently isolate the area or if mold keeps returning after DIY attempts. A pro assessment can save time, protect occupants, and prevent structural damage.
Tools & Materials
- Nitrile gloves(Chemical-resistant, powder-free)
- N95 respirator(Fit-tested if possible)
- Safety goggles(Wrap-around preferred)
- Plastic sheeting(6-mil or heavier)
- Disposable coveralls(Long-sleeve, non-breathable)
- Painter's tape(For sealing off area)
- Heavy-duty trash bags(At least 30 gallons)
- Mild detergent(Dish soap or all-purpose cleaner)
- White vinegar (5%)(Natural disinfectant)
- Hydrogen peroxide (3%)(Disinfectant option)
- Spray bottle(For cleaners)
- Bucket(For rinsing)
- Stiff scrub brush(Non-abrasive for nonporous)
- Sponges(Discard after use on mold)
- Dehumidifier or fan(Speed drying)
- Disposable rags(For wipe-downs)
Steps
Estimated time: 60-90 minutes
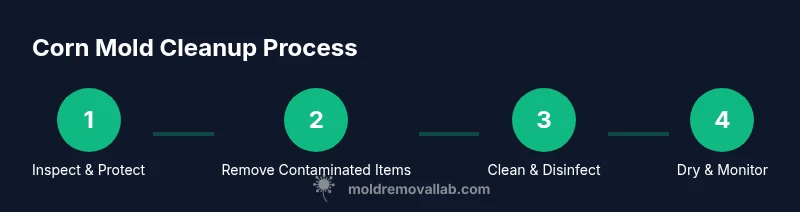
- 1
Assess & prep
Identify the affected area, gather PPE, and set up a contained work zone. Seal the door with tape to prevent spores from migrating to clean spaces. This minimizes exposure and keeps cleanup focused.
Tip: Lay out all tools within reach before you start to avoid leaving the moldy area exposed. - 2
Protect yourself
Put on nitrile gloves, an N95 respirator, and eye protection. Ensure good ventilation by opening a window or using a fan directed away from food storage. Protect skin and eyes from potential irritants.
Tip: Never skip PPE; mold exposure can irritate airways and skin, especially for sensitive individuals. - 3
Contain and remove contaminated items
Remove visibly moldy food packaging and any affected items. Place them in a sealed bag and seal it again before disposal to prevent spores from escaping.
Tip: If in doubt about a item’s safety, dispose of it rather than risk contamination. - 4
Clean nonporous surfaces
Wipe surfaces with a detergent solution, rinse, and apply a disinfectant such as white vinegar or diluted hydrogen peroxide. Avoid mixing cleaners that create harmful fumes.
Tip: Test a small area first to ensure it won’t damage surfaces. - 5
Dry thoroughly
Use a dehumidifier or fan to speed drying. Moisture control is critical to prevent regrowth of corn mold.
Tip: Aim for humidity below 60% and monitor for several days. - 6
Recheck and restore storage
Return cleaned items to labeled, airtight containers. Recheck weekly for a month and replace any compromised packaging as needed.
Tip: Rotate stock and maintain a clean, dry storage area.
FAQ
What is corn mold?
Corn mold refers to several fungi that colonize dried corn products when moisture is present. It appears as fuzzy or powdery growth and may cause odors or staining. Prompt cleanup reduces health risks and prevents spread to other stored items.
Corn mold is mold that grows on dried corn products when there's moisture, showing up as fuzzy spots. Clean promptly to prevent spread.
Is corn mold dangerous to health?
Mold exposure can irritate the eyes, nose, and throat and may aggravate allergies or asthma in sensitive individuals. Ventilation and moisture control lessen risks. Seek medical advice if symptoms persist.
Mold can irritate your airways; keep the area ventilated and dry, and see a doctor if symptoms continue.
Can I DIY corn mold cleanup?
Small, contained areas can often be cleaned safely with PPE and household cleaners. If the mold covers a large area or recurs, hire a professional to prevent spread and ensure thorough remediation.
Yes for small areas, but call a pro if it’s widespread or keeps coming back.
Should I discard moldy corn products?
Yes. If corn-based products show visible mold, signs of spoilage, or off smells, discard them and replace with fresh stock. Do not consume moldy foods.
Moldy corn products should be discarded to avoid health risks.
When should I contact a professional?
If mold covers a large area, penetrates porous materials, or if cleaning doesn’t resolve the problem, a professional remediation service can safely remove mold and address moisture sources.
If mold is widespread or keeps coming back, get a professional evaluation.
Watch Video
The Essentials
- Identify corn mold signs early and seal affected areas.
- Wear proper PPE and avoid cross contamination.
- Choose milder cleaners first; vent and dry thoroughly.
- Store corn products in airtight containers and rotate stock.
- Call a pro if mold covers large areas or recurs.