Shrooms Mold: Safe, Practical Home Remediation Guide
A practical, step-by-step guide to identifying, cleaning, and preventing shrooms mold in homes, with safety tips, tool recommendations, and professional-remediation guidelines from Mold Removal Lab.

By following this guide, you will safely identify and remediate shrooms mold in your home, with practical steps you can do yourself or know when to call a pro. You’ll learn to distinguish moisture-driven mold from mushroom-like growth patterns, gather the right tools, and implement a proven remediation plan endorsed by Mold Removal Lab. Primary goal: a healthier living space.
Understanding shrooms mold in homes
Shrooms mold is a colloquial term many homeowners use to describe mold growth that resembles tiny mushrooms or fruiting bodies appearing on damp surfaces. While not a disease, these growths signal active colonization and indicate moisture problems that can affect indoor air quality and occupant health. According to Mold Removal Lab, mold is a natural organism that thrives wherever moisture and organic material combine. When you notice unusual growths, you should treat them as a moisture-management issue first and a remediation task second. Exposure to mold spores can trigger allergies and respiratory symptoms, especially in sensitive individuals, children, and the elderly. Effective remediation starts with identifying the moisture source, reducing humidity, and removing contaminated materials safely. Remember that mold is rarely a one-off problem; it tends to reappear if underlying conditions are not corrected. This guide focuses on practical, safe steps you can take to minimize growth, restore hygiene, and prevent recurrence.
Common sources and signs of shrooms mold
Moisture is the universal fuel for mold growth. Look for hidden leaks behind walls, under sinks, and around windows. Roof or plumbing leaks, high indoor humidity, and poor ventilation create ideal conditions for mold fruiting bodies. Common signs include a musty odor, visible colonies, staining on walls or ceilings, peeling paint, and damp feel in affected rooms. In kitchens, bathrooms, basements, and crawl spaces, you may notice more rapid growth after seasons of heavy rain or snowmelt. Early detection is key: addressing moisture promptly reduces the likelihood of long-term damage and health concerns.
Safe assessment and PPE considerations
Before you touch any moldy surface, prioritize safety for you and others in the space. Wear an appropriately rated respirator (N95 or better), impermeable gloves, and protective eyewear. Work in a well-ventilated area and avoid creating aerosols by sweeping or dry-brushing moldy surfaces. If possible, seal off the contaminated area with plastic sheeting to prevent spores from spreading to other rooms. Proper hygiene matters too: wash hands thoroughly after handling contaminated materials, and wash contaminated clothing separately. If you feel short of breath, dizzy, or severely allergic, leave the area and seek professional assistance.
Step overview: a practical remediation plan
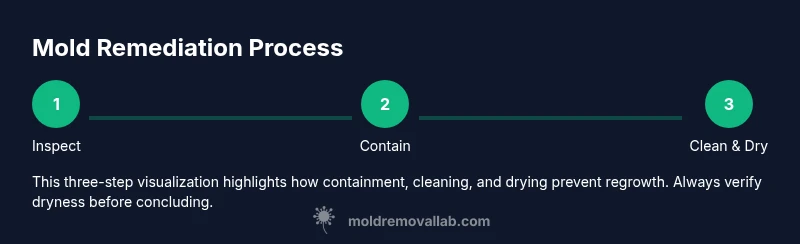
A solid remediation plan balances moisture control, physical removal, and verification. Start by identifying and fixing the moisture source, then isolate the area to prevent cross-contamination. Use approved cleaners or detergent solutions on nonporous surfaces, and consider material removal for porous substrates that cannot be thoroughly cleaned. Drying and re-inspection are critical to prevent regrowth. Document before-and-after conditions for your records and for any future maintenance.
Cleaning methods by surface type
Nonporous surfaces (glass, metal, painted walls) can usually be cleaned with soap and water, then dried completely. For painted or sealed surfaces, a gentle detergent solution followed by thorough drying often suffices. Porous materials (drywall, insulation, carpet backing, ceiling tiles) are more challenging; visible growth may require removal and replacement to ensure containment and air quality. In all cases, avoid over-wetting, test a small area first, and ventilate the space while cleaning. If odors persist after cleaning, it may indicate hidden moisture pockets or concealed mold colonies.
Containment and moisture control
Containment minimizes cross-contamination; seal doors with plastic sheeting and use negative pressure if available. Run dehumidifiers or air movers to bring relative humidity below 50-60% and accelerate drying. Repair leaks promptly and address any condensation issues by improving insulation and ventilation. Regularly monitor humidity with a meter and recheck areas previously affected to ensure mold does not return.
When professionals are required
Certain situations warrant professional remediation: large affected areas, growth on porous building materials, or mold combined with sewage or hazardous contaminants. If the scope involves structural materials, electrical components, or the contamination covers more than a small area, seeking licensed remediation specialists is prudent. A professional team can perform containment, advanced cleaning, and post-remediation verification to ensure safety and compliance.
Prevention and moisture management
Mold prevention centers on moisture control. Keep indoor humidity below 50-60%, fix leaks promptly, and improve ventilation in kitchens, bathrooms, and laundry areas. Use exhaust fans, dehumidifiers, and air exchange when possible. Regularly inspect areas prone to dampness—basements, crawl spaces, and around pipes—and address issues before mold becomes visible. A proactive maintenance plan reduces the risk of repeated growth and protects occupant health.
Debunking myths about shrooms mold
Not all mold is instantly dangerous, but all mold warrants attention when growth is visible. Bleach is not a universal solution for porous materials and can worsen damage if used improperly. Cleaning does not guarantee permanent removal if the moisture source remains. Some mold types require professional testing to determine hidden reservoirs. Treat any visible growth seriously, but maintain perspective about health risk and remediation steps.
Quick-start checklist for beginners
- Identify moisture source and create airflow. - Wear PPE and isolate the area. - Clean nonporous surfaces with detergent and dry completely. - Assess porous materials for removal. - Dry the space to below 50-60% humidity. - Reinspect after 24-48 hours for signs of regrowth. - Document steps taken and monitor humidity long-term.
Tools & Materials
- N95 or P100 respirator(Ensure proper fit; consider P100 for dusty environments)
- Protective gloves(Chemical-resistant if using cleaners)
- Safety goggles(Eye protection during cleaning)
- Disposable coveralls or work clothes(Prevent contamination spread)
- Plastic sheeting (6 mil or thicker)(Create containment barriers)
- Mild detergent or cleaning solution(Soap + water is often enough for nonporous surfaces)
- Spray bottle and scrub brushes(Gentle scrubbing for tough spots)
- HEPA vacuum or vacuum with HEPA filter(For clean-up and debris collection)
- Moisture meter or hygrometer(Monitor humidity levels)
- Dehumidifier or air mover(Speed up drying and mold control)
- Trash bags (heavy-duty)(Seal contaminated materials before disposal)
- Plastic bags and tape for containment(Securely seal and label waste)
Steps
Estimated time: 3-6 hours
- 1
Inspect affected area
Carefully examine all surfaces for visible growth and hidden moisture sources. Document the extent of the problem with notes and photos to guide remediation decisions.
Tip: Take photos from multiple angles to track changes. - 2
Stop moisture intrusion
Repair leaks, fix roof or plumbing issues, and improve drainage around the home. Begin reducing humidity in the space immediately.
Tip: Temporary measures like fans can help, but permanent fixes are essential. - 3
Contain the work area
Use plastic sheeting to seal doors and vents. Create negative pressure if possible to prevent spores from spreading to adjoining rooms.
Tip: Keep doorways closed and minimize movement in the area. - 4
Prepare and protect yourself
Put on PPE; lay down drop cloths if needed; remove loose debris and plan disposal of contaminated materials.
Tip: Do not skip PPE—mold exposure can irritate the eyes, skin, and lungs. - 5
Clean nonporous surfaces
Wash with detergent and water; scrub affected areas and rinse. Dry surfaces thoroughly to prevent regrowth.
Tip: Avoid saturating porous substrates during cleaning. - 6
Assess porous materials
Evaluate drywall, insulation, carpet backing, and similar materials. If growth is extensive, removal may be required to ensure safety.
Tip: Document condition before removal for insurance or records. - 7
Dry the area completely
Use dehumidifiers and fans to bring moisture down and maintain airflow until dryness is confirmed.
Tip: Check moisture levels after drying and keep dehumidifiers running during the final inspection. - 8
Re-inspect and monitor
Check the area after 24-48 hours and again after a few weeks to ensure no regrowth occurs.
Tip: Set a reminder to recheck seasonal moisture spikes.
FAQ
What exactly is 'shrooms mold' and should I be worried?
Shrooms mold is a lay term for mold growth that can resemble small fruiting bodies on damp surfaces. It indicates moisture problems and potential health risks, so address both the moisture source and remediation measures promptly.
Shrooms mold refers to mold that looks like tiny mushrooms on damp areas. It signals moisture issues and health risks, so fix moisture and start cleanup promptly.
Can I clean mold myself, or do I need a pro?
Small, contained growth on nonporous surfaces can often be cleaned safely with detergent and drying. Large areas, porous materials, or complex conditions merit professional remediation to ensure proper containment and thorough drying.
Small spots can be cleaned at home, but large or porous growth should be handled by professionals.
What surfaces are hardest to remediate for mold?
Porous materials like drywall, insulation, and carpet backing are challenging because mold may be embedded. These often require removal and replacement to prevent regrowth.
Porous materials are hardest because mold can be trapped inside and may require removal.
How long does it take to complete a typical mold remediation?
A typical small-area remediation can take a few hours, while larger or multi-room projects may span days depending on moisture control and material removal needs.
Smaller jobs take hours; larger ones may take days.
What are signs that mold has returned after remediation?
Watch for a musty odor, visible new growth, or dampness in the area. If you notice any of these, re-test moisture levels and inspect for leaks.
If you smell mold or see new growth, re-check moisture and inspect for leaks.
Watch Video
The Essentials
- Identify and fix the moisture source first
- Contain the area to prevent cross-contamination
- Dry thoroughly and re-check for returning growth
- Differentiate between nonporous and porous cleaning needs
- Know when to call a professional remediation team