Mushroom Mold: Identification, Risks, and Safe Removal
Identify mushroom mold, assess health and structural risks, and follow a safe remediation plan. Practical, step-by-step guidance on containment, cleaning, drying, and prevention for homes.

Mushroom mold indicates ongoing moisture trouble and potential hidden damage. In this guide you’ll identify mushroom mold, assess health and structural risks, and follow a safe remediation plan. You’ll learn containment, cleaning, drying, and when to call a professional to protect your home and your family. From detection to prevention, this approach minimizes exposure and future problems.
What mushroom mold is\n\nMushroom mold is a distinctive growth pattern that resembles tiny mushrooms or fluffy colonies emerging from damp surfaces. It typically develops after moisture intrusion from leaks, humidity, or condensation over time. In many homes, what looks like harmless discoloration can actually be a fungal colony; mushroom mold is a common label for this growth when the fruiting structures become visible. The presence of mushroom mold signals that the moisture problem is active and spores may be spreading through indoor air. Understanding its biology helps homeowners address both the visible growth and the hidden moisture source. Distinguishing mushroom mold from ordinary mildew and from edible fungi clarifies how indoor conditions favor its formation. Practical steps focus on reducing exposure and preventing recurrence.
Health and structural risks\n\nMushroom mold can release spores that irritate eyes, nose, and lungs, especially for sensitive individuals. Repeated exposure may worsen allergies or asthma, and some molds produce compounds that may irritate the skin. In addition to health concerns, prolonged mold growth can affect building materials, wood framing, drywall, and insulation, reducing structural integrity over time. The goal is to stop moisture, remove the active growth, and confirm that conditions are no longer conducive to regrowth. Always treat mushroom mold as a signal of a moisture problem requiring action, not a surface cosmetic issue.
Signs beyond appearance\n\nIn addition to visible growth, mushroom mold often accompanies a musty odor, damp or stained walls, warped panels, paint peeling, or a white, green, or brown fringe on surfaces. Spore settling can color fabrics or belongings, and allergic reactions may intensify when air is stagnant. Detecting a pattern of dampness—especially after leaks or high humidity—helps locate the source. Early signs vary by material: porous surfaces like drywall or wood are more vulnerable, while nonporous surfaces may show staining but be cleaner with proper cleaning and drying. The key is to correlate smell, moisture history, and visual cues to size up the risk.
Safety first: protective gear and containment\n\nBefore touching or cleaning mushroom mold, put on appropriate PPE: a well-fitting N95 respirator (or better), protective goggles, and gloves. Treat the area as contaminated: seal off with plastic sheeting, close doors, and avoid spreading spores to other rooms. Do not mix cleaning chemicals in ways that could release harmful vapors. Establish containment to keep spores from drifting into HVAC systems. Ventilate the area using outdoor air when feasible, but avoid blowing air from the clean into the moldy zone. Proper containment reduces exposure during remediation.
Understanding the moisture connection\n\nMushroom mold thrives where moisture remains: leaks, poor ventilation, or humid environments create a perfect habitat. Addressing the moisture source is as critical as removing the mold itself. Simple cleanup without fixing the underlying moisture will likely lead to re-growth. Use moisture meters or hygrometers to monitor humidity levels and target a relative humidity (RH) below 50-60% in affected areas. Reducing moisture also slows spore production and helps any subsequent cleaning be more effective.
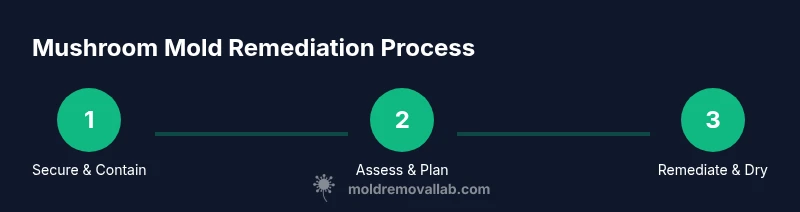
Step-by-step approach overview\n\nA structured approach helps ensure safety and effectiveness. Start by securing and containing the space, then assess the extent of growth and moisture. Remove or seal porous materials if they are heavily affected, clean nonporous surfaces, and thoroughly dry the area. Finally, re-check humidity levels and monitor for signs of recurrence. This overview sets the stage for the detailed steps that follow, so you can work confidently without overlooking moisture control.
When to call a professional\n\nIf mold covers a large area (typically more than 10 square feet) or if there is uncertain moisture intrusion behind walls or under flooring, professional remediation is recommended. Specialists can perform in-depth moisture mapping, mold testing, and safe removal with proper containment. If you have health concerns, pregnant people, or children in the home, consider professional involvement sooner rather than later. Quick professional assessment can prevent further damage and exposure.
Prevention and moisture control\n\nAfter remediation, prevention centers on moisture control: fix leaks promptly, improve ventilation, use dehumidifiers in damp spaces, and ensure bathrooms and kitchens vent outdoors. Regular checks for condensation on windows, walls, and pipes help catch issues early. Clean regularly with recommended solutions and use mold-resistant products on susceptible surfaces where appropriate. Consistent moisture control is the best defense against mushroom mold.
Verification and follow-up cleanup\n\nPost-remediation verification confirms success. Revisit the area after drying, recheck RH levels, and look for any new signs of growth. Consider a follow-up inspection or air quality monitoring if the area was large or high-humidity. Retesting provides assurance and helps prevent a relapse. Keep documentation of moisture readings and remediation actions for future reference.
Tools & Materials
- N95 respirator or higher(Filter efficiency 95% or higher; fit-tested.)
- Protective gloves (nitrile)(Disposable, chemical resistant.)
- Goggles or face shield(Eye protection during cleanup.)
- Plastic sheeting (6 mil) and tape(To create containment barriers.)
- HEPA vacuum or HEPA filter(For cleanup and debris removal.)
- Detergent and water solution(Mild detergent for cleaning nonporous surfaces.)
- Mold-safe disposal bags (heavy-duty)(Seal and dispose of contaminated materials.)
- Moisture meter or hygrometer(Optional but helpful for monitoring RH.)
- Dehumidifier or high-output fans(Speeds up drying and reduces RH below 50-60%.)
Steps
Estimated time: 2-6 hours
- 1
Secure the area and wear PPE
Close off the affected zone, limit access, and don your PPE before beginning any assessment or cleaning. This reduces exposure to mold spores and protects occupants during remediation.
Tip: Check respirator fit and ensure seal before starting. - 2
Contain the work area
Set up plastic sheeting to create a containment barrier around the work zone. Seal edges with tape to prevent spores from drifting to adjacent living spaces.
Tip: Seal gaps around doors and vents to minimize air leakage. - 3
Assess extent and moisture source
Visually inspect and use a moisture meter if available to map the affected area. Document sources of moisture (leaks, condensation, poor ventilation) for repair planning.
Tip: Take photos for reference and future prevention planning. - 4
Remove or isolate porous materials
Porous items with extensive mold growth should be removed and bagged for disposal. Nonporous surfaces can be cleaned and disinfected after removal of visible mold.
Tip: Do not yank materials; cut around affected areas to minimize spread. - 5
Clean and disinfect surfaces
Clean with detergent solution on nonporous surfaces, then apply an appropriate disinfectant. Avoid mixing cleaners that create dangerous vapors; ventilate well during and after cleaning.
Tip: Rinse and dry thoroughly between steps to prevent reoccurrence. - 6
Dry and monitor
Run a dehumidifier and fans to accelerate drying until RH remains below 50-60%. Re-check area after drying and verify no active growth remains.
Tip: Continue monitoring for several days after remediation.
FAQ
What is mushroom mold and how does it form?
Mushroom mold refers to a fungal growth forming fruiting structures that resemble small mushrooms when moisture persists. It develops from damp conditions and inadequate drying.
Mushroom mold forms after persistent moisture, producing small mushroom-like structures. It signals a moisture problem and requires remediation.
Is mushroom mold dangerous to health?
Mold spores can irritate the eyes, nose, and lungs, especially for sensitive individuals. Prolonged exposure or high spore counts may worsen allergies or asthma.
Mold spores can irritate airways and trigger allergies; seek professional help for extensive growth.
Can mushroom mold grow on concrete or drywall?
Yes, mushroom mold often grows on damp drywall, wood, or concrete when moisture is present. Surface cleaning may remove some spores, but structural drying is essential.
Yes, it can grow on damp drywall or concrete; drying and moisture control are key.
Should I test for mold after remediation?
Post-remediation testing is optional for small, well-contained projects. For higher risk areas, consider moisture and possibly air sampling to confirm safety.
Testing after remediation can confirm safety if the area was large or moisture intrusion was significant.
What protective gear should I wear during cleanup?
Wear an N95 respirator, gloves, and eye protection. Maintain good ventilation and avoid disturbing mold during cleanup.
Wear a mask, gloves, and eye protection to reduce exposure while cleaning.
Watch Video
The Essentials
- Identify mushroom mold signs promptly
- Contain the work area to prevent spread
- Follow a structured cleanup and drying plan
- Verify humidity and monitor for recurrence