Safe Mold Removal for Shoe Mold Trim in Homes and Closets
Learn practical, step-by-step methods to identify, safely clean, and prevent mold growth on shoe mold trim around doors, closets, and entryways, protecting indoor air quality and trim appearance.

This guide teaches homeowners how to safely assess and remove mold from shoe molding and trim around entryways and closets. You'll learn how to identify mold, choose safe cleaning methods, and prevent recurrence with sealant and ventilation. Follow the step-by-step process to minimize health risks and protect your home today easily.
Understanding the risk of mold on shoe mold trim
Mold on shoe mold trim is more common in homes with high humidity, poor ventilation, or water intrusion. The trim around entryways, closets, and threshold areas often stays damp from frequent foot traffic and door drafts. In many homes, these narrow mold hotspots go unnoticed until visible growth appears. According to Mold Removal Lab, even small patches can indicate a broader moisture issue that warrants attention. Recognizing the signs early helps you avoid spread to adjacent drywall or paint and protects indoor air quality for every occupant. This section explains how mold typically appears on shoe mold trim and why trim materials can be especially vulnerable when moisture lingers.
Signs, risks, and how to assess shoe mold trim for moisture problems
Mold on shoe mold trim can look like fuzzy or splotchy discoloration, often gray, black, or green. It may appear after a spill, a leak, or a humidity spike. In severe cases, you might notice a musty odor or paint blistering near the trim. Assessment should include checking adjacent surfaces (baseboards, wall corners, and flooring) for moisture damage, discoloration, or soft spots. Keep a moisture meter handy to gauge surface and substrate dampness. For households with allergies or asthma, even small mold patches can trigger symptoms. The Mold Removal Lab team emphasizes that repeated damp conditions often precede mold regrowth, so addressing root causes is crucial.
Cleaning approaches for light to moderate growth on shoe mold trim
Light growth on shoe mold trim can often be addressed with a gentler approach. Start with PPE, then scrub the affected area using a mild detergent solution and a soft-bristled brush. Rinse with clean water and dry thoroughly. For more stubborn spots, a hydrogen peroxide solution (3%) or a diluted white vinegar treatment can be effective, but avoid mixing cleaners that may create fumes. After cleaning, wipe the area dry and keep it well-ventilated to prevent residual moisture. If the surface is painted wood or enamel trim, test a small hidden area first to ensure there is no discoloration or finish damage before proceeding.
When to replace trim and how to prevent recurrence on shoe mold trim
If the trim is warped, deeply stained, or shows persistent mold growth despite cleaning, replacement is often the best option to prevent recontamination. Choose mold-resistant or sealed trim materials, and seal surrounding gaps to reduce future moisture intrusion. Preventing mold recurrence depends on improving humidity control (dehumidifiers, fans), fixing leaks promptly, and ensuring seams and corners are properly sealed. After replacement, repaint or re-seal with a mold-resistant finish to keep the area clean and visually appealing. Routine checks every few months help catch early signs of moisture problems before mold returns.
Documentation, monitoring, and next steps after remediation
Document the remediation steps you took, including photos, cleaning products used, and moisture readings if available. Monitor humidity levels and check the trim area weekly for any signs of dampness or discoloration. Keeping a simple log helps you identify patterns, such as seasonal humidity spikes or leaks, so you can address issues proactively. If mold recurs within 30-60 days despite careful cleaning and sealing, it may indicate a hidden moisture source behind the wall or under the flooring, at which point consulting a qualified remediator is advised. The Mold Removal Lab team recommends acting early and maintaining a preventive routine to protect your living space.
Tools & Materials
- N95 respirator(for mold dust protection)
- Chemical-resistant gloves(latex or nitrile)
- Eye protection(goggles or safety glasses)
- Soft-bristled brush(for scrubbing trim surfaces)
- Sponge or terry cloth(non-abrasive)
- Spray bottle with water(for dilution and rinsing)
- Mild detergent or soap(pH-neutral if possible)
- Hydrogen peroxide 3% or white vinegar(optional disinfectant alternatives)
- Rags or paper towels(for drying and cleanup)
- Replacement shoe trim or wood filler(if trim is damaged or stained)
- Sealant or mold-resistant paint(to seal after cleaning)
- Dehumidifier or fan(to dry area quickly)
- Garbage bag(for disposal of contaminated materials)
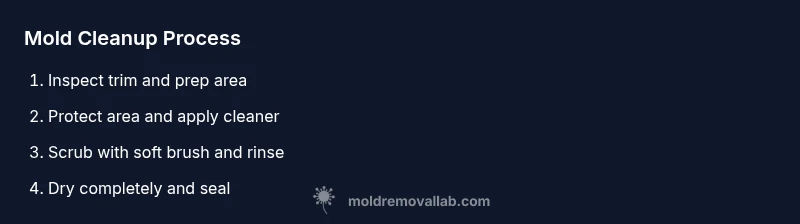
Steps
Estimated time: 1-2 hours
- 1
Inspect the area for growth
Visually examine the shoe mold trim and adjacent surfaces to document the extent of mold and moisture signs. Take photos and note locations that will require treatment or replacement.
Tip: Document before you start cleaning to track progress. - 2
Protect yourself and the space
Put on PPE, seal off the area with plastic sheeting if possible, and remove nearby textiles or items that could absorb mold. Open windows or run a fan to improve ventilation.
Tip: Ventilation reduces inhalation risk during cleaning. - 3
Prepare cleaning solution and test
Mix a mild detergent with water and test on a hidden patch of trim to confirm no finish damage. For heavier growth, prepare a hydrogen peroxide solution.
Tip: Do not mix cleaners; use separate steps for different solutions. - 4
Scrub and rinse the trim
Gently scrub the moldy areas with a soft brush and detergent solution. Rinse with clean water and repeat if necessary. Dry the surface completely.
Tip: Thorough drying prevents regrowth. - 5
Assess after cleaning and seal
If stain or odor remains, treat with a chosen disinfectant (hydrogen peroxide or vinegar) and allow to dry fully. Apply a mold-resistant sealant or paint to the trim.
Tip: Sealing helps prevent future moisture penetration. - 6
Repair or replace damaged trim
If trim is warped, cracked, or deeply discolored, consider removal and replacement with moisture-resistant material. Repaint or re-seal after installation.
Tip: Ensure any new trim is properly measured and installed.
FAQ
Is mold on shoe mold trim dangerous?
Yes, mold on trim can affect indoor air quality and may trigger symptoms for sensitive individuals. If growth is extensive, consider professional assessment.
Mold on trim can affect air quality; use PPE and monitor for symptoms. Seek pro help if growth is large.
Can I clean mold on shoe mold trim with bleach?
Bleach is not ideal for porous trim and may not reach embedded spores. Use hydrogen peroxide or white vinegar as safer alternatives after testing first.
Bleach isn’t recommended for porous trim; try peroxide or vinegar after testing a spot.
Should I replace the trim after mold growth?
If trim is warped or deeply stained and cleaning doesn’t remove the mold, replacement is typically best to prevent recurrence.
Sometimes replacement is the best path when cleaning fails to fully restore the trim.
How long does it take for trim to dry after cleaning?
Drying depends on ventilation and humidity; aim for 24-48 hours in a dry, well-ventilated area.
Expect about a day or two for thorough drying with good airflow.
What preventive measures reduce future mold on shoe mold trim?
Control humidity, fix leaks promptly, improve ventilation, and seal trim after cleaning to reduce future mold growth.
Humidity control and sealing are key to preventing mold on trim.
Watch Video
The Essentials
- Identify mold growth early on shoe mold trim.
- Use PPE and ventilate during cleaning to protect health.
- Choose mild cleaners first; escalate if growth persists.
- Seal or replace trim to prevent recurrence.
- Monitor humidity and leaks to sustain results.