San Diego Mold Removal: A Step-by-Step Home Guide
A practical, step-by-step guide to san diego mold removal for homeowners. Learn containment, cleaning, drying, and prevention to keep homes safe in San Diego's climate.

This guide provides a step-by-step approach to san diego mold removal, focusing on safety, containment, cleaning, drying, and prevention. You'll learn when DIY is appropriate and when to call a pro, with local considerations for Southern California homes. By following these steps, you reduce health risks, minimize property damage, and document progress for records and insurance.
Understanding the San Diego Mold Challenge
San Diego’s climate combines mild temperatures with regular coastal humidity, fog, and occasional rainfall. This combination creates persistent moisture opportunities that mold can exploit behind walls, under sinks, and in crawl spaces. According to Mold Removal Lab, the region’s moisture dynamics require homeowners to address mold growth quickly and strategically, not with a one-size-fits-all approach. For many homes, the path to effective san diego mold removal starts with identifying moisture sources and prioritizing containment, cleanup, and drying. In this guide, we tailor best practices to local conditions and common building types found in Southern California neighborhoods, from stucco homes on windy hillsides to newer, tighter residences in coastal communities. Expect a practical, working method you can apply room by room while tracking progress over time.
Safety, Containment, and PPE
Before you touch any moldy surface, set safety basics. Wear a properly fitted N95 respirator, goggles, gloves, and full-coverage clothing. Use plastic sheeting to contain the area and seal doors and vents to prevent spores from spreading to other rooms. Turn off nearby HVAC systems or run them with high-efficiency particulate air (HEPA) filters to limit circulation. This initial step protects you, your family, and the rest of the house while you work through the remediation process. Remember: containment is not optional—it’s foundational for effective san diego mold removal.
Assessing and Locating Mold Growth
Mold often hides behind drywall, under cabinets, or inside insulation. Begin with a visual survey of obvious sites (bathrooms, kitchens, basements, and laundry rooms) and then probe suspected areas with a moisture meter or hygrometer. Look for staining, musty odors, or warped surfaces. For hidden mold, pay attention to recurring moisture spots after leaks or poor ventilation. Accurate assessment reduces guesswork and guides where to apply cleaning, whether to remove porous materials, and how long the drying phase should last. Keep notes and photos to document the scope of the problem for future reference.
Cleaning vs Salvage: DIY or Hire a Pro
Non-porous surfaces like metal, glass, and cleanable countertops can usually be scrubbed with detergent and water, followed by a rinse and dry. Porous materials such as drywall, insulation, and carpeting that have sustained water damage may require removal and disposal. Drywall and insulation that are heavily contaminated or structurally compromised should be treated as waste rather than cleaned. In some cases, extensive mold on structural components (studs, framing, or wood) requires professional remediation with specialized containment and equipment. The decision to DIY or hire a pro hinges on area size, surface porosity, and potential health risks. When in doubt, err on the side of safety and seek an expert.
Drying, Moisture Control, and Rechecking
After cleaning, the area must dry completely to prevent regrowth. Use dehumidifiers and fans to circulate air and reduce relative humidity to around 40–60 percent, depending on the space. Continuous moisture monitoring is essential—check for damp spots and track RH levels daily for at least 24–48 hours after cleaning. Even after a visible cleaning, hidden pockets of moisture can linger behind walls or under floors. Recheck with moisture meters and inspect for musty odors or new staining. Proper drying is the key to long-term success in san diego mold removal.
Prevention: Long-Term Mold Prevention in San Diego Homes
Once you’ve cleaned and dried the affected area, implement ongoing moisture control to prevent recurrence. Regular attic and crawl space inspections, proper bathroom exhaust venting, and kitchen hood use help reduce humidity. Consider upgrading seals on windows and doors and improving drainage around the building perimeter to prevent water intrusion. Ventilation is particularly important in San Diego’s mild climate, where indoor moisture can accumulate from cooking, showering, and laundry. A proactive maintenance plan will save time, effort, and money in the long run, and it aligns with best practices for san diego mold removal.
Tools & Materials
- N95 respirator(NIOSH-approved, replace if damp; ensure a proper seal)
- Goggles(Splash protection; indirect vent preferred)
- Chemical resistant gloves(Long sleeves; avoid latex if you have sensitivities)
- Coveralls(Protect skin and clothing from contamination)
- Plastic sheeting (6 mil or heavier)(Create containment barrier around the work area)
- Duct tape(Seal seams and containment edges)
- HEPA vacuum with attachments(Prevents redistribution of spores during cleanup)
- Mold-cleaning solution (detergent and water)(Use plain detergent for non-porous surfaces)
- Rubbing alcohol or isopropyl solution(For spot disinfection on non-porous surfaces)
- Scrub brushes and sponges(Non-abrasive for delicate surfaces)
- Bucket and towels(For rinsing and drying)
- Moisture meter/hygrometer(Monitor humidity and surface moisture)
- Dehumidifier(s) and fans(Promote rapid drying; position for optimal air flow)
- Plastic bags labeled for disposal(Seal-and-remove contaminated materials safely)
- Sealant or mold-resistant paint(Apply after remediation to reduce future growth)
Steps
Estimated time: 2-6 hours total (per affected area); longer for extensive or porous material remediation
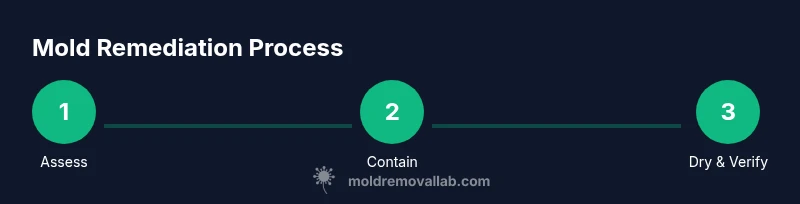
- 1
Prepare and assess
Identify the affected area and gather PPE. Inspect for moisture sources and decide whether DIY is appropriate. Document initial conditions with photos for reference.
Tip: Take preliminary measurements of square footage to plan containment and disposal needs. - 2
Contain the area
Close doors, cover vents, and establish a plastic barrier around the work zone. Use tape to seal the top of the barrier and prevent spores from escaping.
Tip: Avoid creating airtight spaces; ensure ventilation remains possible to prevent breathing in concentrated spores. - 3
Protect and prepare porous materials
If porous materials (drywall, insulation) are contaminated, plan for removal and disposal. Bag waste securely and seal before removal from the area.
Tip: Label waste bags clearly and place them outside the living area to minimize cross-contamination. - 4
Clean non-porous surfaces
Scrub metal, glass, and solid surfaces with detergent and water; rinse and dry thoroughly. Avoid mixing cleaners that could create harmful fumes.
Tip: Use a HEPA-equipped vacuum to capture any residual spores after wiping surfaces. - 5
Address porous materials
If salvage is impossible, remove and discard porous components. If salvage is possible and safe, treat with mold-friendly protocols and dry immediately.
Tip: Porous materials often harbor hidden mold; prioritize removal in suspected areas. - 6
Dry the space completely
Run dehumidifiers and fans to drive down humidity and moisture. Recheck moisture levels using a meter after 24–48 hours.
Tip: Aim for RH below 60% during remediation and below 50% once complete. - 7
Verify and document
Re-inspect for odor, staining, and moisture; document conditions and photos of final results. Consider retesting with a moisture meter to confirm dryness.
Tip: Keep a remediation log with dates, measurements, and outcomes. - 8
Repair and prevent
Repair leaks, improve ventilation, and consider mold-resistant coatings for future protection. Restore the area once it’s fully dry.
Tip: Enhance bathroom ventilation with a vent fan rated for the space and run it during and after use.
FAQ
Is it safe to remove mold myself, or should I hire a pro?
DIY removal can be safe for small, non-porous areas if you follow PPE and containment guidelines. Larger areas, porous materials, or visible growth on structural components should be handled by a licensed professional.
DIY is possible for small spots, but larger or hidden growth should be handled by a professional.
How can I tell if mold is behind walls?
Look for musty odors, damp spots after leaks, staining, or warped walls. Moisture meters can help detect elevated moisture behind surfaces and guide further investigation.
Watch for odors, moisture behind walls, and warped surfaces; testing with a moisture meter can reveal hidden mold.
When should I hire a professional?
Call a professional if mold covers a large area, involves porous or structural materials, or if you have health concerns. Persistent moisture or repeated outbreaks are good reasons to bring in experts.
If the problem is large or persistent, contact a mold remediation professional.
How long does remediation take?
The duration depends on area size and material type. Small DIY jobs may take a few hours, while larger or multi-area projects can span several days with drying periods.
It varies; small jobs may be hours, larger ones days with drying.
Can bleach kill mold on porous surfaces?
Bleach is often ineffective for porous materials because mold spores can remain embedded. For non-porous surfaces, it can help; always ensure ventilation and avoid mixing cleaners.
Bleach works best on non-porous surfaces; mold on porous materials often requires removal.
Will mold come back after cleaning?
Mold can return if moisture sources remain. The key is eliminating humidity, repairing leaks, and maintaining dry conditions. Regular inspections help catch issues early.
If you control moisture and fix leaks, mold is less likely to return, but ongoing vigilance is needed.
Watch Video
The Essentials
- Identify moisture sources before cleaning
- Contain the area to prevent spore spread
- Differentiate between cleanable surfaces and porous materials
- Dry thoroughly and recheck moisture levels
- Plan for prevention to avoid recurrence