How to Remove Mould from Wood: A Practical Home Guide
Learn safe, proven methods to remove mould from wood, dry thoroughly, and prevent regrowth. This Mold Removal Lab guide covers supplies, step-by-step techniques, and prevention tips for homeowners seeking practical remediation.

Remove mould from wood by stopping moisture, wearing PPE, and following a careful cleaning and drying routine. Start with soap and water or hydrogen peroxide, then use a wood-safe cleaner for stubborn patches. Dry wood thoroughly and seal or finish to reduce future growth. Test hidden spots first and ventilate well.
What mould is on wood and why it grows
Wood is a porous, organic material that can support mould growth when moisture remains. Mould on wood is not just an aesthetic problem; it indicates humidity, leaks, or condensation. According to Mold Removal Lab, mould on wood often starts in hidden crevices where humidity is retained, such as near windows, under sinks, or behind furniture. When spores land on damp wood, they germinate and form fuzzy patches that can spread if the area stays moist. The type of mould varies from white and powdery to green or black, and some forms can cause allergies or respiratory irritation. The best way to manage mould on wood is to address the moisture source, remove active growth, and dry the surface thoroughly before applying a finish. If the wood is sealed and finished, mould growth may stay on the surface; if it soaks into the pores, you may need more aggressive cleaning or replacement of damaged boards. This section will walk through practical steps a homeowner can take to remove mould from wood safely while preserving the wood where possible.
Safety first: PPE and when to call a professional
Safety comes first when handling mould. Wear an N95 respirator or equivalent, chemical-resistant gloves, and protective eyewear. Ensure good ventilation by opening windows or using a fan that blows exhaust air outside. If you have severe mould growth, asthma, or allergies, consider hiring a licensed professional. Mold Removal Lab analysis shows that protecting your airways and skin reduces exposure risk dramatically during cleaning and dries the surface more effectively, limiting regrowth and secondary moisture problems. Never rush the drying phase, and avoid disturbing the growth aggressively in the wrong areas, as this can spread spores to other rooms.
Assessing the extent: moisture, wood type, and structure
Before cleaning, assess how extensive the mould is and what kind of wood you’re dealing with. Softwoods and unsealed surfaces absorb moisture more readily, while finished hardwoods resist spillover but may still harbor hidden mould in pores or seams. Check for moisture sources such as leaks, condensation, or humidity above 60-70%. Use a moisture meter if available and trace any staining back to its source. If mould has penetrated deeply into the wood or behind baseboards or into wall cavities, remediation may require removing affected boards or professional assessment. Based on Mold Removal Lab research, effective remediation starts with addressing moisture, identifying affected wood types, and planning a careful cleaning path that minimizes disruption to the surrounding area.
Cleaning options: soap & water, vinegar, hydrogen peroxide
For light to moderate mould, start with a mild cleaning routine. Mix a few drops of mild detergent into warm water and scrub with a stiff-bristled brush. For disinfecting and mould kill, dilute 3% hydrogen peroxide in a spray bottle and apply to the surface, letting it sit for 10 minutes before wiping clean. White vinegar is an effective natural cleaner that can be sprayed on and left for a short period before wiping. Avoid mixing cleaners, especially bleach with ammonia, as fumes can be harmful. Test any cleaner on a hidden area first to confirm it won’t damage the finish. If mould persists after one treatment, repeat after the wood dries and consider a second method or professional help for deeper penetration.
Using cleaners safely on different wood types
Different woods respond differently to cleaners. Softwoods (pine, cedar) can swell with excess moisture and might fracture if over-cleaned. Hardwoods (oak, maple) may resist superficial cleaning but can trap mould in pores. When using bleach on non-porous or sealed wood, a diluted bleach solution can be used sparingly and thoroughly rinsed, but avoid long contact times. For porous woods, hydrogen peroxide and vinegar are safer first lines of action. After cleaning, wipe dry and ensure good air movement to dry all pores and joints. If finish or sealant is damaged, plan to refinish the area to prevent future mould growth.
Drying, sealing, and protective finishes
Drying is the most critical step to prevent regrowth. Increase airflow with fans and dehumidifiers and keep the space well-ventilated for 24-72 hours, depending on humidity and wood type. Once completely dry, consider applying a wood conditioner or sealant to reduce moisture absorption. If the surface will be exposed to humidity, use a finish that resists mould growth. Regular inspections after cleaning help catch early signs of moisture intrusion, and resealing will improve long-term resistance. Remember, the goal is to restore a dry, stable environment where mould cannot thrive.
Mold prevention strategies after removal
Prevention is easier than remediation. Address leaks promptly, improve ventilation in damp rooms, and run a dehumidifier in seasons with high humidity. Use moisture meters in kitchens, bathrooms, basements, and laundry areas to maintain indoor RH (relative humidity) below the recommended threshold. Keep wood surfaces dry, wipe spills promptly, and store items in dry spaces. Regular cleaning with mild cleaners can deter mould spores, and repairing gaps in window frames or exterior clapboard lowers moisture ingress. Mold Removal Lab recommends documenting moisture sources and actions taken to track progress and prevent recurrence.
Common mistakes that waste time and money
Avoid skipping the moisture source fix in hopes mould will disappear on its own. Don’t use aggressive sanding that may release spores into the air or spread them to other surfaces. Never mix cleaners, especially bleach with ammonia or acids, which can create toxic gases. Don’t ignore hidden mould behind walls or under flooring—these areas require careful inspection and possibly professional equipment. Finally, rushing the drying process can trap moisture and encourage regrowth; patience and proper airflow are essential.
Mold remediation decision: when to DIY versus hire a pro
Small, contained patches on easily accessible wood surfaces can often be remediated by a homeowner with proper PPE and ventilation. If mould covers a large area, if it’s growing behind walls, or if you or your household members have respiratory issues, contact a licensed mould remediation specialist. The Mold Removal Lab team emphasizes cautious escalation: start with simple cleaning in a well-ventilated space, and escalate to professional help if the problem persists or recurs after initial remediation.
Tools & Materials
- N95 respirator or equivalent(Protects from airborne spores)
- Protective gloves (nitrile or rubber)(Barrier against cleaning agents)
- Safety goggles(Eye protection against splashes)
- Scrub brush (stiff-bristled)(For stubborn patches)
- Non-abrasive sponge(Gentle cleaning without scratching)
- Buckets and clean water(Rinse and dilute cleaners)
- Mild detergent soap(For initial cleaning)
- White vinegar (5% acidity)(Natural cleaner and mould inhibitor)
- Hydrogen peroxide 3%(Disinfectant and mould killer)
- Wood-safe cleaner (optional)(For tougher patches)
- Dehumidifier or fan(Aids drying and air circulation)
- Moisture meter (optional)(Monitors RH and wood moisture)
Steps
Estimated time: Total time: 2-4 hours of active work, plus 24-72 hours drying
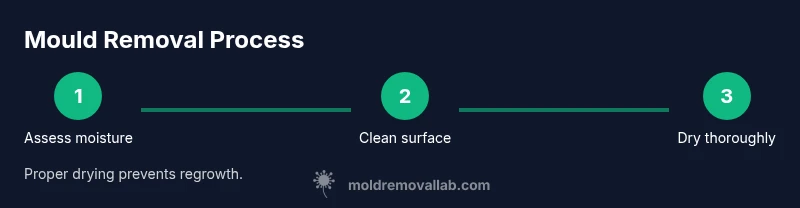
- 1
Prepare the space and PPE
Ventilate the area well. Put on an N95, gloves, and goggles. If mould is in a confined space, isolate the area using plastic sheeting to prevent spores from migrating to other rooms.
Tip: Avoid sweeping or dry brushing; this can aerosolize spores. - 2
Identify moisture sources
Find and fix leaks, condensation points, or high humidity areas before cleaning. Dry surfaces as much as possible to limit regrowth during the process.
Tip: Use a moisture meter to confirm a safe dryness level before continuing. - 3
Clean the mould from surfaces
Start with mild soap and warm water. Scrub gently to remove surface mould, then rinse. Apply 3% hydrogen peroxide to the area and let it sit for 10 minutes before wiping again.
Tip: Test first on hidden area to ensure no finish damage. - 4
Apply a secondary disinfectant
Spray white vinegar on the surface or use a wood-safe cleaner for stubborn patches. Do not mix cleaners; rinse and wipe between products.
Tip: Keep surfaces damp but not soaking wet to avoid wood warping. - 5
Dry thoroughly
Use fans and a dehumidifier to dry wood completely. This step can take 24-72 hours depending on humidity and wood type.
Tip: Do not seal or finish until the wood is fully dry. - 6
Seal and monitor
Once dry, apply a moisture-resistant finish if the wood will be exposed to humidity. Recheck periodically for signs of moisture or new mould growth.
Tip: Maintain regular humidity checks to catch issues early.
FAQ
Can mould on wood be safely removed at home?
Yes for small, contained areas with proper PPE and good ventilation. If growth covers a large area or behind walls, seek a licensed professional.
Yes for small, contained areas with PPE; for large or hidden mould, contact a professional.
What cleaners are best for wood mould?
Soap and water, hydrogen peroxide, and white vinegar are effective. Do not mix cleaners and avoid excessive bleach on porous wood.
Use soap and water, hydrogen peroxide, or vinegar; avoid mixing cleaners and bleach on porous wood.
Should I sand mouldy wood?
Avoid sanding active mould, as it can spread spores. Clean and dry instead; replace boards if mould penetrates deeply.
Don’t sand mouldy wood; it can spread spores. Clean and dry, replace if deeply penetrated.
How long does mould need to dry after cleaning?
Drying time varies with humidity and wood type; with proper airflow, expect drying within 24-72 hours before sealing.
Drying usually takes 1-3 days depending on humidity; ensure complete dryness before finishing.
When should I call a professional?
Call a professional if mould covers a large area, is behind walls, or if occupants have respiratory issues or compromised health.
Hire a pro if mould is extensive or hidden behind walls.
Can mould on wood affect health?
Mould can trigger allergies and respiratory issues in sensitive individuals. Ventilate well and keep children and pets away during cleanup.
Yes, mould can affect health; maintain ventilation and limit exposure during cleanup.
Watch Video
The Essentials
- Stop moisture to prevent regrowth.
- Wear PPE and protect eyes/skin during cleaning.
- Choose wood-safe cleaners and test first.
- Dry thoroughly before finishing or sealing.
- Monitor humidity to prevent future mould.