Remove Mold from Car Interior: A Practical Guide
Learn how to remove mold from car interior safely with a practical, step-by-step method. Tools, surfaces, and prevention tips for homeowners and renters.

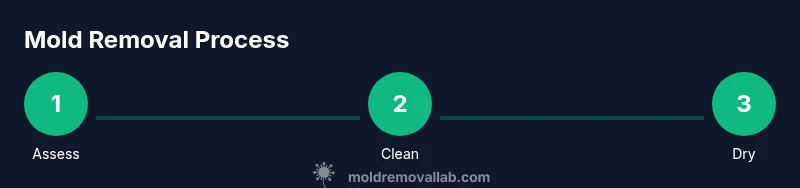
You will learn how to remove mold from car interior by safely cleaning affected fabrics, vinyl, and carpets, drying the space thoroughly, and preventing recurrence. Gather PPE, a vacuum, mild cleaning solutions, brushes, and drying equipment, then follow a clear, step-by-step plan. This approach protects health, preserves upholstery, and reduces mold exposure.
What you will accomplish by removing mold from car interior
According to Mold Removal Lab, removing mold from car interior is about protecting your health, preserving upholstery, and restoring air quality inside the vehicle. In this guide you’ll learn a practical, safety-first approach to identify damp spots, choose appropriate cleaning methods, and verify that areas are completely dry. The goal is to reduce mold spores in the cabin, eliminate musty odors, and prevent future growth by controlling moisture and humidity. You’ll see how to tailor the approach to different surfaces inside a car, from fabric seats to hard plastic dashboards, so every area receives appropriate care. By following these steps, homeowners and renters can regain a comfortable, safe driving environment without unnecessary expense. Remember: mold in a vehicle can spread quickly if left unchecked, so prompt action matters for long-term health and vehicle longevity.
This section also introduces the core principle of moisture control: mold needs warmth and water. Even small leaks, condensation, or high humidity can provide enough moisture for growth. Our guidance emphasizes gentle, thorough cleaning along with practical drying strategies to ensure moisture does not linger in carpets, headliners, or seams. The right tools and protective gear reduce exposure to spores during cleanup, and a clear plan helps you stay organized. The Mold Removal Lab team’s approach combines widely accepted remediation practices with car-specific considerations to deliver reliable, real-world results.
Understanding how mold grows inside vehicles
Mold growth inside a car typically starts with lingering moisture. Rain leaks, humid air from air conditioning, spills, and even damp clothing can provide the moisture mold needs to take hold. In the tight, poorly ventilated space of a vehicle, humidity can remain high after a spill or a long drive, especially if the car is parked in a warm, sunlit spot. Mold can colonize fabric fibers, carpet fibers, and crevices in dashboards and door panels where moisture lurks. Because vehicles are often used daily and stored in garages, small moisture sources accumulate over time. This guide will help you identify common hotspots, such as under seats, in carpet folds, along seams, and inside trunk linings, so you can target those areas with methodical cleaning and thorough drying. Recognizing these patterns is the first step toward effective remediation and ongoing maintenance to prevent recurrence.
Where mold hides in a vehicle
Mold thrives in places that gather moisture and are hard to reach. Common hiding spots include fabric seats and carpets, headliners, seat seams, under floor mats, HVAC vents, and door gaskets. Even the crevices around cup holders, storage compartments, and the trunk lining can harbor mold spores. Upholstery fibers trap fungal spores more easily when damp, while hard plastics and vinyl surfaces can harbor visible colonies if not properly cleaned and dried. A thorough inspection should involve lifting floor mats, pulling back seats if safe to do so, and inspecting under trims. A handheld flashlight helps reveal hidden growth that might not be obvious at first glance. A methodical search reduces the chance of missing active colonies and ensures you address the most affected areas.
Health risks and safety considerations
Mold exposure can affect breathing, especially for sensitive individuals. Working with mold indoors requires personal protective equipment (PPE) such as gloves, a respirator, and eye protection to reduce inhalation of spores and contact with skin. Avoid creating airborne dust by using low agitation during cleaning and by sealing off untreated areas when possible. If anyone in the vehicle has asthma, allergies, or a compromised immune system, consider postponing cleanup or seeking professional help. Always ventilate the space by opening doors and windows, and use a fan to push air outside rather than recirculating it. If you observe thick growth, odorous emissions, or staining that indicates persistent moisture, proceed with extra caution and consider professional remediation when needed.
Preparing your cleaning space and safety gear
Before you start, lay out your PPE and gather your tools. Clear the car interior of loose items and take high-moisture, odor-prone textiles outside if feasible. Wear at minimum nitrile gloves, eye protection, and a properly fitted respirator or mask, especially in enclosed vehicles. Ensure the area is well-ventilated by opening doors and running a fan aimed outward. Light, non-ammonia cleaners are preferred—avoid mixing cleaners as this can release harmful gases. Use a spray bottle for controlled application and a vacuum with a HEPA filter to capture spores. Have a damp cloth handy for spot cleaning and a dry towel for moisture absorption. Plan to work in stages to avoid spreading mold to other areas of the car.
Surface-by-surface cleaning strategies
Different surfaces require different care. For fabric upholstery and carpets, start by vacuuming to remove loose spores, then apply a mild cleaner or a vinegar-water solution and gently scrub with a soft-bristle brush. Rinse with a clean, damp cloth and blot dry. For vinyl and hard plastic surfaces, use a non-abrasive cleaner and a microfiber cloth, followed by thorough drying. Leather requires specialized care—use a leather-safe cleaner and avoid soaking; dry promptly to prevent cracking. In vent areas, avoid soaking the filters; instead, wipe accessible surfaces and allow air to circulate to dry. Always test cleaners on a hidden area first to avoid discoloration. This approach reduces the risk of spreading spores while treating each material appropriately.
Step-by-step cleaning plan (high-level) and why each step matters
A structured approach helps ensure you don’t miss hidden growth or leave moisture behind. Start with containment by clearing the vehicle and opening windows. Vacuum the area to remove loose material. Apply a mild cleaning solution to affected zones and scrub gently. Wipe away residue with a damp cloth and dry thoroughly with towels and a fan. Repeat if you notice remaining mold or odor. Finally, inspect all surfaces for residual dampness and test that humidity inside the car remains low after cleaning. This plan minimizes particle dispersion and helps prevent mold from returning by removing the moisture source and decontaminating the space.
Drying, odor control, and prevention after cleaning
Drying is the linchpin of successful mold remediation in a car. A dehumidifier or a portable fan can help remove residual moisture quickly, especially in humid climates. Keep windows open for several hours after cleaning if weather permits, and use moisture absorbers or desiccants in tight spaces. Odor control is a secondary but important consideration; a mild spray designed for fabrics or activated carbon devices can help. To prevent recurrence, address moisture sources such as leaks, door seals, and clogged drainage paths. Maintain interior humidity levels below the dew point and consider routine checks after wet weather. A proactive maintenance plan reduces the likelihood that mold will reappear.
When to seek professional help and how Mold Removal Lab supports you
If mold growth is extensive, if you encounter persistent odors after cleaning, or if anyone in the household has severe allergies or asthma, professional remediation is advised. Professionals have specialized equipment to safely remove stubborn colonies and to decontaminate HVAC systems. In your decision-making, weigh the cost of DIY remediation against the potential for ongoing health issues or damage to upholstery. The Mold Removal Lab team recommends consulting a licensed mold remediation contractor when growth covers large areas, or when dampness returns after cleaning. A professional assessment can help you avoid repeated cleanups and ensure long-term car interior health.
Tools & Materials
- HEPA vacuum with car upholstery attachment(capture mold spores and dust from car interiors)
- Microfiber towels(lint-free and washable for repeated use)
- Soft-bristle brush(for gentle scrubbing without fraying fabric)
- Spray bottle with mild cleaning solution(soap solution or white vinegar mix)
- White vinegar (household)(natural mold cleaner option)
- Nitrile gloves(protect hands from contaminants)
- Goggles/eye protection(shield eyes from splashes)
- NIOSH-approved respirator or P100 mask(protect lungs from spores)
- Portable fan or dehumidifier(accelerate drying and reduce humidity)
- Isopropyl alcohol (70%)(disinfectant option for hard surfaces)
- Carpet cleaner or upholstery steam cleaner(deep-clean fabric hotspots)
- Moisture meter (optional)(verify drying progress)
Steps
Estimated time: 60-90 minutes
- 1
Prep and protect
Move all items out of the car and put on your PPE. Open doors to ventilate and create a clean work zone before you begin. This limits cross-contamination and minimizes exposure to mold spores.
Tip: Keep a plastic bag handy for contaminated rags and wipes. - 2
Vacuum thoroughly
Use a HEPA-equipped vacuum to remove loose spores from seats, carpets, and mats. Do not skip seams and folds where spores hide. Vacuuming first reduces the amount of mold you'll have to scrub away.
Tip: Vacuum in slow, overlapping passes for best removal. - 3
Apply cleaning solution
Spray a mild cleaner or vinegar solution on affected areas. Avoid soaking fabrics; a light mist is sufficient to dampen the surface without oversaturating it.
Tip: Test cleaner on a hidden area first to check for discoloration. - 4
Gently scrub
Scrub with a soft-bristle brush or cloth to lift mold from fibers. Focus on high-movement areas like seat cushions and under mats, where moisture tends to accumulate.
Tip: Use circular motions and gentle pressure to prevent fabric damage. - 5
Wipe and rinse
Wipe away loosened mold and residue with a damp microfiber cloth. Rinse cloth frequently to prevent re-depositing spores.
Tip: Follow with a dry towel to remove as much moisture as possible. - 6
Dry thoroughly
Use a fan or dehumidifier to dry the car interior completely. Leave doors open if weather allows, and aim for several hours of drying time.
Tip: Moisture should be below the dew point to avoid growth. - 7
Inspect for remaining growth
Carefully re-check the treated areas for any remaining signs of mold or dampness. Repeat cleaning steps as needed in stubborn spots.
Tip: Check hidden spots like under seats and along carpet edges. - 8
Prevent recurrence
Address moisture sources—fix leaks, improve ventilation, and use moisture absorbers. Regular checks after rainy days help catch issues early.
Tip: Consider a brief monthly air-out when the car is in use.
FAQ
What are the first signs of mold in a car?
Common signs include musty odors, visible fuzzy growth, staining, and damp upholstery. If you notice any of these, begin a careful inspection of carpets, seats, and headliners.
Look for musty smells, visible growth, or damp spots as early signs you may have mold in your car.
Is it safe to clean mold in a car myself?
DIY cleaning can be safe for small, contained areas if you use proper PPE and ventilation. For large areas or persistent growth, or if someone in the household has allergies, consider professional help.
Yes, for small spots you can clean yourself with protective gear and good ventilation, but seek help for bigger problems.
Can I use bleach on car fabrics or leather?
Bleach is generally not recommended for car fabrics or leather because it can damage materials and release strong fumes. Safer options include mild cleaners, vinegar solutions, and specialist products designed for automotive interiors.
Bleach can damage upholstery and should generally be avoided; use milder cleaners instead.
How long does it take to remove mold from a car interior?
Removal time varies with the extent of growth and dampness. A small, contained area can be addressed in under an hour, while larger, embedded growth may take several hours including drying time.
It varies by area, from under an hour for small spots to several hours for larger growth plus drying.
When should I call a professional for car mold remediation?
Call a professional when mold covers large areas, smells persist after cleaning, or there are ongoing moisture issues after attempts to remediate. A pro can assess HVAC impacts and prevent relapse.
If growth is extensive or smells persist after DIY cleaning, get a professional assessment.
What ongoing steps help prevent mold in a car?
Keep humidity low, fix leaks promptly, and ensure good airflow. Regularly inspect for damp spots and dry any moisture quickly after rainfall or spills.
Maintain low humidity, fix leaks, and keep air flowing to prevent mold from returning.
Watch Video
The Essentials
- Identify moisture sources and address them promptly.
- Use PPE and proper containment to minimize exposure.
- Tailor cleaning methods to each surface type for effective remediation.
- Dry thoroughly and implement moisture control to prevent recurrence.
- Seek professional help for extensive growth or persistent odors.