How to Get Mold Out of a Car: A Practical Guide
Learn a safe, step-by-step approach to remove car mold, protect occupants, and prevent return. PPE, cleaning methods, thorough drying, and prevention strategies from Mold Removal Lab.

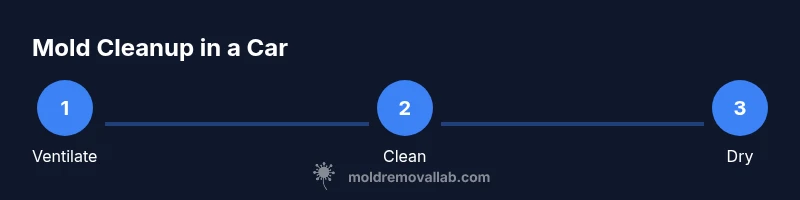
Removing mold from a car starts with a safety-first cleaning, drying, and monitoring process. Begin with ventilation and PPE, inspect both hard surfaces and fabrics, then clean with appropriate solutions, dry thoroughly, and recheck for odors. Follow these practical steps and know when professional remediation is warranted. This plan aligns with Mold Removal Lab guidance and prioritizes health and interior preservation.
Understanding mold in vehicles
If you're wondering how to get mold out of a car, start by understanding why it appears. Mold thrives where moisture and warmth combine, so any car interior that remains damp after rain, spills, or high humidity invites growth. The Mold Removal Lab team found that moisture control and ventilation are the most critical factors in preventing regrowth. This is particularly true in climates with high humidity or after left-open windows during rain. In most cases, mold takes hold on fabrics and in carpet fibers where moisture remains for days. Exposure can trigger allergies or asthma symptoms for sensitive individuals, so addressing it promptly matters for health and comfort. Common sources include leaks, condensation, and humid stored items. Signs include musty odors, visible spots, and damp upholstery.
- Health considerations: mold exposure can irritate airways and skin; limit exposure during cleanup.
- Watch for hidden growth: mold behind panels or under mats may not be immediately visible.
- Mold type varies: some forms are more persistent and require longer treatment.
According to Mold Removal Lab, mold growth in cars is common when moisture persists and ventilation is insufficient. Understanding these basics helps you target moisture sources, choose the right cleaners, and decide when to call a professional.
Safety and PPE
Safety is non-negotiable when tackling car mold cleanup. Wear a properly fitted respirator or NIOSH-approved mask, chemical-resistant gloves, and eye protection to reduce exposure to spores. Keep kids and pets away from the work area. Work in a well-ventilated environment by opening doors and windows or using a fan that directs air outside. If you have asthma or allergies, consider postponing cleanup or requesting help from a professional. PPE is essential because spores can become airborne during scrubbing and removal.
Inspecting the interior and planning
Begin with a careful walk-through: check the seats, carpet, headliner, door panels, and trunk for dampness, discoloration, or a musty smell. Identify moisture sources such as leaks, spill residues, or condensation from humidity. Create a plan to limit cross-contamination by sealing off clean areas and using separate cloths and tools for moldy vs. clean zones. Decide which items can be cleaned and which should be replaced due to deep absorption.
Cleaning hard surfaces: non-porous areas
Hard surfaces (plastics, vinyl, metal) respond well to detergent cleaners or a vinegar solution. Start by vacuuming loose debris with a HEPA-filter vacuum to limit spore dispersion. Wipe surfaces with a microfiber cloth dampened with a mild detergent solution, then rinse and dry. For stubborn spots, apply a small amount of hydrogen peroxide to the area, let it sit for a few minutes, then wipe clean. Avoid saturating electronics or switches; spot-clean around them. Finish by checking for any lingering odors and re-wipe if needed.
Cleaning porous fabrics and upholstery
Car seats, carpets, and headliners are porous and absorb moisture, making them more challenging to treat. Vacuum first to remove loose spores, then treat fabric areas with a mild soap solution or white vinegar. For mold on fabric, avoid soaking; instead, lightly mist and blot. Use a soft-bristled brush to lift matted fibers, then allow fabrics to air-dry completely. If mold returns after cleaning, consider professional remediation or replacement of affected padding.
Removing moldy materials and upholstery
If upholstery contains persistent mold or has absorbed stains, you may need to remove and professionally clean or replace it. Porous padding or foam beneath seats can harbor hidden mold that resists surface cleaning. Use a car-safe cleaner or determined cleaning solvent on non-porous components, but do not force removal of structural parts yourself. When deciding whether to replace materials, consider safety, odor persistence, and the cost-benefit trade-off.
Drying and moisture control strategies
Drying is the most critical step in preventing regrowth. Use fans directed at damp areas and a dehumidifier if available, or place desiccants in the car to absorb moisture. Run the HVAC system on fresh air with the recirculation off to help moisture escape. Check for dampness after 24–48 hours and again after a week; if moisture returns, address the source (leaks, blocked drainage, or lingering condensation). Ensure all materials are fully dry before reinserting seats or interior panels.
When to call a professional remediation service
If mold covers large areas, recurs after cleaning, or you suspect mold behind panels, professional remediation is recommended. A pro can assess hidden moisture, use specialized equipment, and safely remove mold without spreading spores. Early consultation can prevent damage to the car’s interior and protect occupants from health risks. Mold Removal Lab suggests seeking help when growth exceeds surface cleaning capability or reappears within days of treatment.
Preventive maintenance to keep mold away
Prevention matters as much as cleaning. Regularly inspect for leaks, vents, and door seals that let moisture in. Use moisture meters or simple humidity checks in climates prone to dampness. Keep interiors dry after wet trips, remove damp floor mats, and consider a car dehumidifier or desiccant packs during humid months. Schedule seasonal cleaning to address dust and moisture, and re-evaluate air quality if you notice odors returning.
Tools & Materials
- PPE: nitrile gloves(At least two pairs; disposable or reusable)
- PPE: respirator mask or NIOSH-approved respirator(P100 or N95; eye protection recommended)
- Goggles or protective eyewear(Splash protection for eyes)
- Soft-bristled brush(For fabrics and seams)
- Microfiber cleaning cloths(Lint-free, reusable preferred)
- Spray bottle(For controlled application of cleaners)
- Vacuum with HEPA filter(Loosens and captures spores)
- Mild detergent or automotive cleaner(For hard surfaces)
- White vinegar(Non-porous surface treatment option)
- Hydrogen peroxide 3% solution(Mold treatment on hard surfaces (avoid fabric contact))
- Water bucket(For dilution and rinsing)
- Towels, disposable rags, or old blankets(Used to dry and blot; replace when soiled)
- Fan or dehumidifier(Accelerates drying; avoid mold-friendly humidity)
Steps
Estimated time: Estimated total time: 2-4 hours
- 1
Ventilate and protect yourself
Open doors and windows to create cross-ventilation. Put on PPE before touching mold, and clear the area of people and pets. This minimizes exposure and helps moisture move out of the car interior.
Tip: Ventilate for at least 15 minutes before cleaning. - 2
Inspect for moisture and mold extent
Conduct a thorough interior inspection, noting damp spots and odor sources. Mark areas that need targeted cleaning and determine whether fabrics or padding require replacement.
Tip: Document spots with photos for reference. - 3
Vacuum loose debris
Use a HEPA-filter vacuum to remove loose spores from carpets and seats. Do not steam or deep-clean at this stage; you want to avoid pushing moisture deeper into the padding.
Tip: Keep the vacuum head at a slight distance to avoid grinding fibers. - 4
Clean hard surfaces with mild solution
Wipe non-porous surfaces with a mild detergent solution or white vinegar. Rinse with a damp cloth and dry thoroughly to remove residual moisture and spores.
Tip: Never saturate switches or electronics. - 5
Treat fabrics and upholstery
Lightly mist fabric areas with a soap solution or vinegar and blot; do not soak. Use a soft brush to loosen mold fibers and help fibers release.
Tip: Avoid aggressive scrubbing that can fray fibers. - 6
Apply mold-killing solution to persistent spots
For tough stains, apply hydrogen peroxide to the affected area and let sit briefly before blotting away. Avoid applying directly to electronic components or areas with wiring.
Tip: Test a hidden area first to ensure colorfastness. - 7
Dry thoroughly and monitor moisture
Run fans or a dehumidifier to dry spaces quickly. Check moisture levels after 24–48 hours and again after a week to ensure no damp pockets remain.
Tip: Moisture lingering after cleaning signals possible hidden growth. - 8
Reassess and decide on replacement
If odors persist or mold returns despite cleaning, consider replacing affected padding or upholstery. Persistent growth may indicate deeper moisture sources.
Tip: Keep a log of cleaning attempts and results. - 9
Prevent future mold growth
Implement routine inspections, fix leaks promptly, and maintain low interior humidity. A periodic deep-clean helps stop recurrence and protects vehicle health.
Tip: Use desiccants during humid seasons and wipe down damp areas after rain.
FAQ
Is car mold dangerous to health?
Yes, mold exposure can trigger allergies and asthma symptoms in sensitive individuals. It’s important to limit exposure during cleanup and ensure good ventilation. If symptoms persist, consult a healthcare professional.
Mold exposure can irritate lungs and skin, so protect yourself during cleanup and seek help if symptoms occur.
Can I remove all mold myself?
Small, surface mold on non-porous surfaces is often doable with proper PPE and cleaning. Porous materials like soaked upholstery or padding may require replacement or professional remediation if growth is extensive.
You can handle small spots, but large areas or porous materials may need a pro.
Should I use bleach to kill mold in a car?
Bleach is not ideal for fabrics and can damage interior materials. Hydrogen peroxide or vinegar are safer options for many mold tasks on hard surfaces; always avoid mixing cleaners.
Bleach isn’t great for car fabrics; try hydrogen peroxide or vinegar on non-porous areas.
How long does it take to dry after cleanup?
Drying time depends on climate and materials, but expect several hours to days for fabrics. Use fans or a dehumidifier to speed up the process.
Drying usually takes hours, sometimes days for fabrics; keep things dry with airflow.
What if mold returns after cleaning?
Reassess moisture sources and hidden pockets. Odors or recurring growth suggest persistent moisture; consider professional remediation for persistent issues.
If mold comes back, check moisture sources and hidden areas; professional help may be needed.
Do car mold problems require professional remediation?
For extensive growth, mold behind panels, or repeated occurrences, professional remediation is advised. Pros have equipment to assess and safely remove mold without spreading spores.
If it’s extensive or behind panels, a professional is the safer route.
Watch Video
The Essentials
- Ventilation and PPE are essential before cleaning.
- Use surface-appropriate cleaners for hard vs fabric areas.
- Drying thoroughly prevents mold regrowth.
- Inspect for hidden moisture and odors after cleaning.
- Seek professional remediation for extensive or uncertain mold.