Pop Mold Remediation: A Practical Home Guide
Learn practical steps to identify, clean, and prevent pop mold growth in homes. This Mold Removal Lab guide covers safety, moisture control, and when to call pros.

This guide helps you identify, isolate, and safely remove pop mold from damp areas, dry them out, and prevent recurrence. You'll need protective gear, containment for mold spores, and effective cleaning agents; follow step-by-step instructions to clean surfaces, fix moisture, and monitor airflow. This approach emphasizes safety, proper disposal, and documenting results.
What is pop mold and why it matters
According to Mold Removal Lab, pop mold is not a single species but a common term homeowners use for mold growth that appears after moisture intrusion. It often surfaces on walls, ceilings, windowsills, or bathroom tiles when humidity spikes or leaks go unchecked. The term helps homeowners recognize a moisture problem rather than a mysterious invader, and it signals a remediation opportunity rather than a simple cleaning task. The Mold Removal Lab team emphasizes that the most effective response starts with eliminating the moisture source and reducing humidity to prevent regrowth.
Understanding why pop mold forms helps you plan a safer cleanup. Mold thrives where moisture lingers, and even small leaks can create print-slow colonization over days to weeks. By addressing the root cause, you reduce the chance of rebound growth and protect indoor air quality for vulnerable occupants such as children or people with allergies.
Signs and verification of pop mold
Visible mold is often the first clue, but musty smells, peeling paint, or warped surfaces can indicate hidden colonies behind drywall or under flooring. Use a flashlight to inspect corners, behind appliances, and along baseboards. If moisture is present, you’ll see sweating, damp patches, or discoloration. For a more definitive assessment, check for consistent humidity levels above 60% and use a moisture meter to locate persistent damp zones. Mold Removal Lab notes that relying solely on visible growth can miss subsurface colonies, so verify with moisture readings and, if needed, professional testing.
Tools, PPE, and containment you’ll need
Before you touch anything, prepare PPE and containment. Essential items include an N95 or P100 respirator, safety goggles, disposable gloves, and protective coveralls. Use plastic sheeting to seal off the work area and tack down edges with tape to prevent spores from spreading. A HEPA vacuum and microfiber cloths help capture fine particles instead of spreading them. Keep a dedicated bucket and spray bottle for cleaners, and a moisture meter to confirm drying progress. This setup keeps you safer and the home cleaner.
Cleaning methods and safe products
Begin by cleaning visibly affected surfaces with mild soap and water, using a sponge to remove grime without abrading the surface. For tougher areas, use an EPA-registered mold cleaner or 3% hydrogen peroxide on non-porous surfaces. On porous materials, avoid bleach alone as it may not reach hidden molds; instead, apply cleaner, rinse, and dry thoroughly. Always follow label directions, ensure good ventilation, and avoid mixing cleaners. After cleaning, wipe with a clean, dry cloth and proceed to drying.
Moisture control and prevention to stop recurrence
Once surfaces are clean, fix the moisture source—leaks, condensation, or poor ventilation. Improve airflow with exhaust fans, open windows when feasible, and keep indoor humidity below 50-60%. Consider a dehumidifier in damp rooms and schedule regular inspections after heavy rains. Regularly cleaning and drying surfaces, along with moisture monitoring, reduces the risk of new colonies forming. Mold Removal Lab highlights that prevention is simpler and cheaper than repeated remediation.
Do's and Don'ts during remediation
Do wear proper PPE, seal the area, and dispose of contaminated materials in sealed bags. Do not scrub vigorously, as this can release spores into the air. Do not mix cleaning agents; always use compatible products and ventilate the space. Do not ignore lingering odors or damp patches; revisit moisture sources and re-test humidity after cleanup.
When to call a professional
For mold over large areas (commonly more than 10 square feet), or when there is hidden mold behind walls or structural components, contact a licensed mold remediation professional. Persistent moisture problems, sewage contamination, or uncertain structural damage also warrants expert help. A pro can provide containment, specialized equipment, and a structured plan for thorough remediation and prevention.
Documentation and follow-up
Take before-and-after photos, record humidity readings, and keep receipts for cleaning products and any professional services. Schedule a follow-up check after 2-3 weeks to confirm the area remains dry and free from regrowth. Maintaining a small log helps you verify long-term success and demonstrates responsible home maintenance.
Tools & Materials
- N95 respirator or P100 respirator(Fit-tested if possible; replace after each use)
- Safety goggles(Protect eyes from splashes and particles)
- Disposable gloves (nitrile)(Use double gloves for highly contaminated areas if needed)
- Disposable coveralls(Prefer non-porous fabric; or long-sleeve clothes you can discard)
- Plastic sheeting and tape(Seal off the area to prevent spore spread)
- HEPA vacuum(Use with filter; avoid sweeping dry spores)
- Microfiber cleaning cloths(Disposable cloths preferred; replace as needed)
- Bucket and spray bottle(For applying cleaners and rinsing)
- EPA-registered mold cleaner or mild soap(Choose products labeled for mold remediation)
- Hydrogen peroxide (3%)(Useful on non-porous surfaces; test paint first)
- White vinegar(Natural option for mild cases; not universal)
- Moisture meter or hygrometer(Track humidity and drying progress)
- Heavy-duty trash bags(Seal and bag contaminated materials)
Steps
Estimated time: 60-120 minutes
- 1
Identify moisture source and isolate area
Locate leaks or condensation sources and seal the area to prevent spore spread. This reduces the chance of new growth forming while you clean.
Tip: Start with the most contaminated zone first for efficiency. - 2
Set up containment and PPE
Don PPE, line the area with plastic sheeting, and use tape to secure edges. This minimizes cross-contamination and keeps you safe.
Tip: Double-check seals around doors and vents. - 3
Clean visible mold with appropriate cleaner
Wipe surfaces with an EPA-registered cleaner or mild soap solution. Rinse and wipe dry to prevent residual moisture.
Tip: Avoid scrubbing hard on fragile finishes to prevent damage. - 4
Dry the area and reduce humidity
Use fans and a dehumidifier to bring relative humidity below 50-60%. Run until a moisture meter shows dry conditions.
Tip: Drying times vary; monitor readings regularly. - 5
Re-inspect and plan prevention
Check for regrowth in 1-2 weeks and verify moisture sources are resolved. Implement long-term prevention strategies.
Tip: Document moisture fixes and keep a record.
FAQ
What is pop mold and how does it differ from other mold?
Pop mold is a general term for mold growth that appears after moisture events. It is not a species; it indicates a moisture problem that requires remediation.
Pop mold is mold growth that shows up after moisture problems; it's not a species, but a sign you need to remediate the moisture issue.
Is household bleach effective for mold on walls?
Bleach can be less effective on porous surfaces and may not reach hidden mold. Use EPA-registered cleaners and dry the area thoroughly.
Bleach isn't always effective on porous surfaces; use approved cleaners and ensure drying.
How long does it take to dry the cleaned area?
Drying time depends on space size and ventilation. With fans and a dehumidifier, most small areas dry within 24-72 hours.
Drying usually takes 1 to 3 days with proper ventilation.
Is pop mold dangerous to health?
Mold exposure can trigger allergic reactions or irritation in sensitive people. Ventilation and prompt remediation help reduce risk.
Mold can irritate some people; good ventilation helps lower risk.
When should I hire a professional?
Consider a pro if mold covers more than 10 square feet, is behind walls, or if leaks persist after cleanup.
If it’s a large area or hidden, call a professional.
What prevention steps keep mold from returning?
Control moisture, fix leaks, improve ventilation, and monitor humidity to keep mold from returning.
Control moisture and ventilation; that's key to prevention.
What documentation should I save after remediation?
Save before/after photos, humidity readings, product receipts, and notes on repairs for future reference.
Keep photos and humidity readings to track progress.
The Essentials
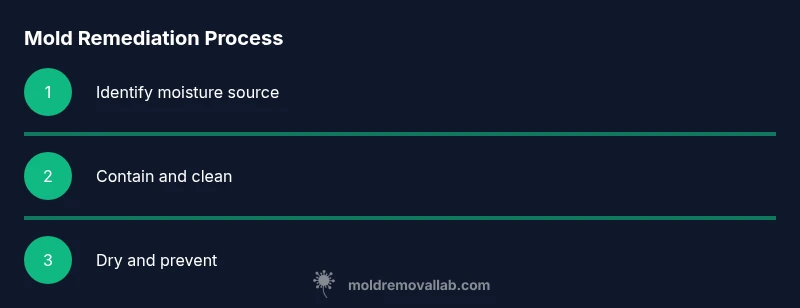
- Identify moisture sources before cleaning.
- Contain and protect the work area.
- Dry thoroughly to prevent regrowth.
- Follow label instructions on cleaners.
- Document results and monitor humidity long-term.