Mould Remediation Near Me: Step-by-Step Guide for Safe Mold Removal
Find local mould remediation guidance for safe mold removal near you. Learn how to assess risk, hire qualified pros, and prevent regrowth with moisture control.

Looking for moulding near me? This practical guide helps homeowners locate qualified mould remediation professionals and manage the process from assessment to prevention. You’ll learn how to verify licenses, compare quotes, and coordinate moisture-control measures, all while protecting your family and home during remediation. Follow these steps to reduce mold risk and keep moisture under control.
Why Local Expertise Matters
Mold thrives where moisture and warmth meet, and local climate strongly shapes how and where it appears inside homes. If you’re searching for moulding near me, you’ll want professionals who understand regional moisture patterns, building ages, and local regulations. Local experts can tailor containment strategies, drying protocols, and moisture monitoring to your house and climate, which speeds the job and reduces the chance of relapse. A nearby technician can respond quickly to leaks, assess adjacent rooms, and coordinate with local suppliers to keep timelines realistic and costs transparent.
According to Mold Removal Lab, local experience matters not just for containment but for prevention. The right team will identify moisture sources—such as hidden leaks, condensation, or humidity spikes—and address them in the remediation plan. They’ll also communicate clearly about the scope, required materials, and safety precautions to keep occupants safe during the process. Because mold often travels through walls and shared spaces, proximity helps ensure everyone involved understands the home’s layout and can implement effective containment measures. In short, choosing a local mould remediation partner increases the likelihood of a thorough, timely job that protects your health and home.
],
blocks contents trimmed to fit
Tools & Materials
- N95 respirators (or better)(Fit-tested if possible; replace when soiled)
- Disposable gloves(Latex-free recommended for sensitive users)
- Safety goggles(Wraparound for splash protection)
- HEPA vacuum cleaner(Use with sealed bag disposal)
- Plastic sheeting and painter’s tape(Create containment barriers)
- EPA-registered mold cleaning solution or soap(Use per label directions)
- Moisture meter / hygrometer(Detect hidden moisture)
- Dehumidifier or air-conditioner with dehumidification mode(Maintain low humidity during drying)
- Waste disposal bags(Seal moldy materials securely)
- Tape measure and notebook(Document moisture and area sizes)
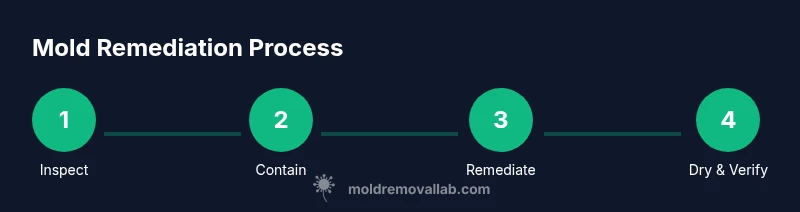
Steps
Estimated time: 4-8 hours
- 1
Inspect moisture sources and mold
Conduct a thorough walk-through to locate active leaks, condensation points, and visible mold. Use a moisture meter to map problem areas and document findings with photos.
Tip: Start with the most severely affected zone to establish priority. - 2
Contain the affected area
Set up physical barriers with plastic sheeting and tape. Create negative pressure and seal doors to prevent spore spread to the rest of the home.
Tip: Keep fans and doors closed to maintain containment. - 3
Request quotes and verify credentials
Ask at least three licensed professionals for scope, timeline, and warranty. Check licenses, insurance, and experience with containment and moisture control.
Tip: Ask for a written warranty and a post-remediation test plan. - 4
Hire a licensed pro and confirm scope
Choose a contractor with proven containment practices and clear work scope. Finalize the remediation plan, responsibilities, and communication protocol.
Tip: Get written approval before any removal begins. - 5
Remove affected materials
Carefully remove porous materials (drywall, insulation) that are mold-damaged. Bag and seal contaminated debris for proper disposal.
Tip: Avoid disturbing mold colonies unnecessarily to prevent aerosolization. - 6
Clean, disinfect, and dry
Clean non-porous surfaces with appropriate solutions and dry the area thoroughly. Use HEPA filtration during cleaning to minimize airborne spores.
Tip: Do not mix cleaning agents—follow label directions. - 7
Re-test and implement prevention
Perform post-remediation moisture tests and visual checks. Address moisture sources (leaks, ventilation) to prevent recurrence.
Tip: Install humidity monitoring and routine inspections.
FAQ
Can I DIY mould remediation near me?
DIY remediation is possible for small, surface mold on non-porous materials if safety guidelines are followed. For larger or porous areas, professional remediation is strongly advised due to health risks.
DIY remediation is possible for small, surface mold on non-porous surfaces, but for larger or porous areas, hire a licensed professional.
What qualifications should I look for in a mould remediation contractor?
Look for licensed, insured contractors with mold experience, containment training, and a clear written scope. Ask for references and a warranty on workmanship.
Choose a licensed, insured pro with mold experience and references.
How long does remediation take?
Remediation duration varies with the area size and moisture-control needs. A typical project can take a few days to several days, including drying and post-remediation testing.
It can take a few days to several days depending on the scope.
Is it necessary to vacate the home during remediation?
Not always. Minor, contained work may proceed with precautions; larger projects may require temporary relocation for health and comfort.
It depends on the project; your contractor will advise.
How can I prevent mold after remediation?
Address moisture sources promptly, keep humidity under control, improve ventilation, and schedule periodic inspections in damp areas.
Moisture control is key to preventing mold return.
Watch Video
The Essentials
- Contain mold to prevent spread
- Verify credentials and scope before hiring
- Address moisture to prevent relapse
- Ensure thorough drying and post-remediation testing