Mold in Water Bottles: Safe Cleaning and Prevention
Learn how mold grows in water bottles, compare safe cleaning methods, and implement prevention strategies for plastic, glass, stainless steel, and silicone bottles. Practical steps, materials, and expert guidance to protect your family’s health.

You’ll learn how to identify mold in a water bottle, safely clean it using household products, and prevent recurrence. Gather a bottle brush, mild dish soap, hot water, white vinegar, and 3% hydrogen peroxide. This guide covers practical, bottle-safe methods for various materials.
What mold in a water bottle is and how it forms
Mold in hydration gear is a collection of fungi that thrives in damp environments. In a water bottle, mold commonly grows when residual liquid or beverage droplets remain after use, lids are closed while still damp, and the bottle is stored in a warm, humid environment. According to Mold Removal Lab, mold growth is driven by moisture, warmth, and nutrient residues from drinks, which provide a food source for spores to colonize interior surfaces. This means even plastic, glass, stainless steel, or silicone bottles can harbor mold if care is neglected. The best defense is routine cleaning and thorough drying after each use. Spores exist in most homes, so consistent habits are essential to minimize risks. Visible discoloration, fuzzy growth, or musty odors are warning signs; treat any sign of mold promptly to reduce exposure, especially for households with children or allergy sufferers. Remember, mold can hide under caps, in straw assemblies, and around threads where liquid can pool.
Signs mold may be present in your bottle
Look for: (1) visible spots or fuzzy growth on the interior walls, (2) persistent musty odor even after rinsing, (3) staining that won’t scrub away, and (4) moisture trapped in seams or lids. If you notice any of these signs, don’t ignore them—addressing mold early prevents spread to other surfaces and reduces health risks. Some bottles have hard-to-reach areas where liquid can stagnate; in those cases, a dedicated bottle brush and a straw brush (if applicable) are essential. If the bottle is discolored or the odor persists after cleaning, consider replacing the bottle to stop mold from returning.
Health implications and who is at risk
Mold exposure can trigger allergic reactions and respiratory symptoms in sensitive individuals. People with asthma, sinusitis, or compromised immune systems may notice more pronounced reactions. In the typical home setting, mold found in a water bottle is unlikely to cause severe illness if addressed quickly, but continued exposure can worsen symptoms or spread to other surfaces. The goal of this guide is to reduce exposure by eliminating the mold reservoir and preventing moisture buildup. If you notice persistent symptoms after using a bottle, stop using it and consult a healthcare professional. Health authorities emphasize moisture control and regular cleaning as the foundation of mold prevention in consumer products.
Cleaning options: safe, household methods
There are several safe, effective methods you can use at home, depending on the bottle material. For most plastics and metals, a simple wash with hot water and mild dish soap is the first line of defense. White vinegar (a 5% acetic solution) works as a natural sanitizer and helps dissolve mineral residues that mold loves. Hydrogen peroxide (3%) is also effective for sanitizing interior surfaces without harsh chemical residues. Bleach can be effective in some situations, but it’s generally not recommended for consumer water bottles due to potential damage to plastic and residual taste. Always ensure the bottle is dishwasher-safe if you plan to use a dishwasher, and never mix cleaning agents. Finally, thoroughly rinse and air-dry completely to prevent quick mold rebound.
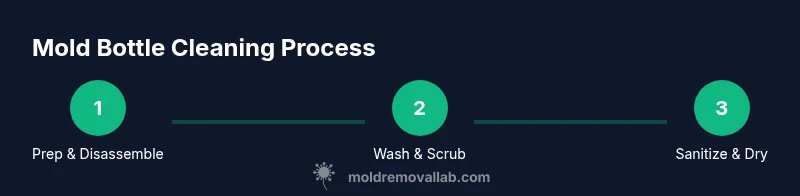
Step-by-step cleaning plan overview
A practical approach involves prep, disassembly, washing, scrubbing, rinsing, sanitizing, and drying. Begin by emptying the bottle and removing the cap, straw, and any silicone components if present. Choose a cleaning agent based on the bottle material, then scrub all interior surfaces with a bottle brush, paying special attention to threads and any crevices. Rinse thoroughly and consider a brief soak in vinegar or hydrogen peroxide to sanitize. Finish with a complete air-dry on a clean rack, ideally with the cap off to allow moisture to escape. This overview sets you up for the detailed steps that follow.
Prevention and storage strategies to minimize mold recurrence
Prevention starts with after-use habits: rinse promptly, use warm soapy water, and dry completely before reassembly. Store bottles with caps loose or removed to facilitate airflow. Periodically sanitize using vinegar or hydrogen peroxide, especially in humid climates or for households with mold-sensitive individuals. If the bottle is used daily, a quick daily rinse and nightly air-dry can dramatically reduce mold risk. For reusable bottles with straw or small parts, inspect fasteners and seals regularly for mold pockets, and replace worn components to maintain a sealed environment free of damp crevices.
Bottle materials and cleaning caveats: plastic, glass, stainless, silicone
Different materials require slightly different care. Plastic bottles are common and usually forgiving but can retain odors and stains; glass resists staining but can crack if heated unevenly. Stainless steel bottles are durable but may have seams where mold hides; silicone nipples and straw components require extra attention. Always follow the manufacturer’s cleaning instructions; avoid high heat if the material is not rated for dishwasher cycles. When in doubt, hand-wash and air-dry to minimize stress on seals and threads.
Tools & Materials
- Bottle brush with narrow neck brush(Splays reaching into hard-to-reach areas)
- Dish soap (mild)(Accepts hot water; avoid harsh degreasers)
- Hot water (not boiling)(Keeps residue loose and speeds cleaning)
- White vinegar (5% acetic)(Natural sanitizer; use for soak if needed)
- Hydrogen peroxide (3%)(Sanitizing option; do not mix with vinegar)
- Clean cloths or paper towels(Dry surfaces after washing)
- Drying rack or clean dish towel(Promotes thorough air-drying)
- Straw brush (if bottle has a straw)(Cleans interior of straw components)
- Optional: dishwasher (if bottle is dishwasher-safe)(Follow manufacturer guidance)
- Timer or clock(Track soak times for vinegar or peroxide)
Steps
Estimated time: 20-40 minutes plus dry time
- 1
Prep and disassemble
Empty the bottle and remove the cap, straw, and any removable seals. This gives full access to all interior surfaces for thorough cleaning. If you’re cleaning soon after use, rinse briefly with warm water to remove residue.
Tip: Set aside components that detach easily so you don’t miss hidden mold pockets. - 2
Rinse with warm water
Rinse all parts under warm running water to loosen debris and biologic residues. This step reduces load on brushes and helps prevent spreading mold spores.
Tip: Avoid hot water on heat-sensitive plastics which could warp seals. - 3
Choose a cleaning agent
Select soap for routine cleaning. For deeper cleaning, use white vinegar or hydrogen peroxide as a sanitizer, depending on bottle material and your preference.
Tip: Never mix vinegar with hydrogen peroxide inside the bottle. - 4
Scrub interior surfaces
Using the bottle brush (and straw brush if present), scrub all interior surfaces, threads, and the cap well. Pay special attention to the areas where liquid pools.
Tip: Angle the bottle to let the bristles reach the bottom and corners. - 5
Rinse thoroughly
Rinse multiple times with clean hot water until no soap or cleaning solution remains. Residue can harbor odors and affect taste.
Tip: Run the bottle under the tap for at least 15-20 seconds to ensure complete clearance. - 6
Sanitize
If using vinegar, soak for 5-10 minutes; if using hydrogen peroxide, a 5-10 minute contact time is enough in most cases. Rinse again after sanitizing to remove any residual smell.
Tip: Do not mix cleaning agents; sanitize one after another with a fresh rinse. - 7
Dry completely and reassemble
Air-dry the bottle and its components completely on a rack with the cap removed or slightly ajar. Reassemble only after every part is fully dry to discourage mold return.
Tip: Store with the cap off in a dry, ventilated area.
FAQ
Is it safe to drink from a bottle after cleaning mold?
If the bottle is thoroughly cleaned, sanitized, and shows no odor or staining, it’s generally safe to reuse. If mold returns, replace the bottle and inspect lids for moisture pockets.
Yes, after thorough cleaning and sanitizing, you can reuse it, but replace the bottle if mold keeps coming back.
Can I use bleach to clean mold from water bottles?
Bleach is not recommended for most consumer bottles because it can degrade plastics, leave residue, and affect taste. Use vinegar or hydrogen peroxide instead, following label directions.
Bleach isn’t usually advised for water bottles; stick with vinegar or hydrogen peroxide and rinse well.
How often should I clean my water bottle to prevent mold?
Rinse with soap and hot water after each use, a deep clean weekly if used daily, and sanitize every 1-2 weeks in humid environments. Adjust based on odor and staining signs.
Clean after every use, deep clean weekly, and sanitize regularly, especially in humid settings.
What about bottles with straw parts or silicone sleeves?
Disassemble and clean all removable parts. Use a straw brush to reach inside; soak sleeves or silicone components if manufacturer-approved. Dry completely before reassembling.
Take apart the straw and sleeves, clean thoroughly, then dry before reassembling.
My bottle still smells moldy after cleaning—what should I do?
Persistent odor may indicate hidden mold pockets. Repeat a deeper cleaning, consider a hydrogen peroxide soak, and ensure complete drying. If odor persists after multiple attempts, replacement is prudent.
If the smell sticks around after cleaning, repeat the sanitize-and-dry steps or replace the bottle.
Are dishwashers safe for cleaning mold from water bottles?
Some bottles are dishwasher-safe; check the manufacturer’s guidelines. Even if safe, ensure the bottle is thoroughly dry after the cycle to prevent mold growth.
Dishwashers can be convenient if the bottle is labeled dishwasher-safe; still, dry thoroughly afterward.
Watch Video
The Essentials
- Identify mold signs early and address promptly
- Choose cleaning methods compatible with bottle material
- Dry completely to prevent regrowth
- Utilize vinegar or hydrogen peroxide safely for sanitation
- Replace bottles if mold recurs after cleaning or if seals are damaged