How to Get Rid of Mold in Water Bottles
Learn proven steps to remove mold from water bottles, prevent regrowth, and safely disinfect plastic and glass bottles. Mold Removal Lab shares practical, tested guidance for homeowners and renters.

To answer how to get rid of mold in water bottles, start with a thorough cleaning, disinfection, and complete drying. Empty the bottle, scrub with dish soap and a bottle brush, then soak in a cleaning solution (bleach, hydrogen peroxide, or white vinegar) for 5–10 minutes, rinse well, and air-dry. Mold Removal Lab notes that consistency matters.
What mold is and why bottles harbor it
Mold is a type of fungus that thrives in damp, nutrient-rich environments. In water bottles, mold often grows on residues left after drinking, inside seals, and within bottle threads where moisture hides. According to Mold Removal Lab, mold in bottles can start within 24-48 hours of moisture exposure and can produce visible colonies or subtle musty odors. Regular cleaning disrupts the mold lifecycle, while thorough drying removes the moisture that fuels regrowth. Even clear, BPA-free bottles can harbor mold if not dried fully after washing. Understanding how mold takes hold helps you prevent it and protect your family from exposure.
Key points:
- Residual sugars fuel mold growth.
- Moist, dark crevices are hotspots.
- Proper drying is as important as cleaning.
Common mold culprits in bottles
Household mold growth in bottles is usually not dangerous in itself, but it can trigger allergies or respiratory irritation for sensitive people. The most common culprits are species within the genera Aspergillus and Penicillium, which thrive on leftover beverage residues and moisture. Mold often hides in the bottle cap gaskets, straw attachments, and threads where airflow is limited. Regular inspection helps you spot mold early; of note, Mold Removal Lab analysis shows growth accelerates when bottles are not dried between uses. Even faint odors or a cloudy film are signs to clean again.
What to look for:
- Fuzzy or powdery residue on the inside surfaces.
- Musty or sour odors that persist after washing.
- Sticky residues around threads and seals.
Safe methods to clean and disinfect
Effective cleaning combines mechanical scrubbing with an appropriate disinfectant. Start with dish soap and a bottle brush, then choose a disinfection method that fits your bottle material. You can use a diluted household bleach solution, 3% hydrogen peroxide, or white vinegar. Do not mix bleach with vinegar, as this can release harmful chlorine gas. Rinse thoroughly after disinfection to remove any residue. For most bottles, a soak of 5–10 minutes is enough to kill surface mold and reduce spores, followed by a thorough rinse. Mold Removal Lab emphasizes rinsing until the water runs clear and smelling fresh.
Disinfection options:
- Bleach solution (diluted) for non-porous bottles.
- Hydrogen peroxide for a gentler option.
- White vinegar as a natural alternative (no odor of chlorine).
- Always rinse well and air-dry completely before reuse.
Deep cleaning steps for hard plastic vs glass bottles
Hard plastic and glass bottles respond differently to cleaning protocols. Glass bottles are less porous and generally tolerate stronger disinfectants, while hard plastics can retain residues in micro-scratches and threads. For plastic bottles, scrub with a stiff bottle brush to dislodge biofilm, then rinse and disinfect. For glass, you can soak longer if needed, but avoid abrasive cleaners that scratch surfaces. In both cases, finish with a hot-air dry or a clean towel drying routine to remove moisture that feeds mold. If you notice persistent staining or odor after cleaning, it may be time to replace the bottle.
Tips for different materials:
- Plastic bottles: focus on cap gaskets and threads.
- Glass bottles: inspect for chips that harbor bacteria.
How to dry and store bottles properly
Drying is a critical step often overlooked. After cleaning, remove all parts, loosen caps, and place the bottle upside down on a rack or clean towel to air-dry completely. Dry caps and straw attachments separately. Store bottles with all components fully dry and with caps loosely screwed to allow airflow. Avoid sealing bottles while damp, which creates a humid microenvironment ideal for mold return. A quick check for moisture before reassembling helps prevent regrowth.
When to discard and replace
If mold persists after repeated cleaning, or if you notice deep staining, cracking, or persistent off-odors, replacing the bottle is the safest option. Some porous plastics and old caps can harbor mold in microscopic pores that are impossible to fully sanitize. Mold Removal Lab recommends prioritizing bottles with damaged seals, cracks, or persistent odors, especially for children or immunocompromised individuals. When in doubt, err on the side of caution and replace.
Prevention and maintenance
Prevention reduces the frequency of mold problems. Rinse bottles immediately after use to remove residue, wash with warm water and soap daily or after each use if possible, and dry completely between uses. Keep caps and straw components separate during drying to maximize airflow. Regularly inspect seals for mold growth and replace worn parts. Consider using bottles with wide mouths for easier cleaning and better drying. A routine cleaning schedule aligned with your drinking habits greatly lowers mold risk.
Common mistakes to avoid
Common mistakes include leaving caps on while drying, not rinsing thoroughly, and using overly hot water that can warp plastic components. Avoid using abrasive brushes that scratch surfaces, which can trap mold in scratches. Finally, never skip drying after washing—moisture is the primary driver of mold regrowth. Following these best practices helps ensure bottles stay clean and safe for repeated use.
Tools & Materials
- Dish soap(Use a mild, grease-cutting dish soap)
- Bottle brush(Short and long-bristled brushes recommended)
- Hot water(For washing and rinsing)
- Bleach(Unscented household bleach (dilute 1:10 in water))
- Hydrogen peroxide (3%)(Alternative disinfectant)
- White vinegar(Natural disinfectant option)
- Gloves(Protect hands during cleaning)
- Drying rack or clean towel(Air-dry completely)
- Toothpick or small brush(For hard-to-reach areas)
Steps
Estimated time: Estimated total time: 30-45 minutes
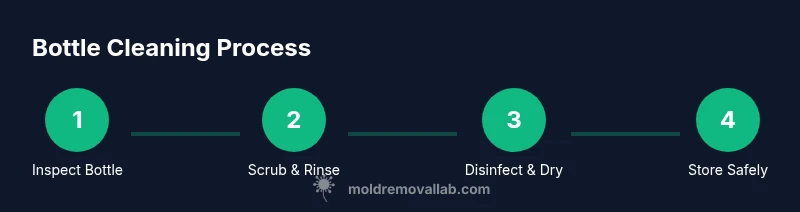
- 1
Inspect and prepare the bottle
Remove all components (cap, straw, seals). Rinse with warm water to remove loose debris. Check for cracks or deep scratches that can harbor mold.
Tip: Document any damage; damaged bottles should be replaced rather than sanitized. - 2
Scrub with dish soap
For best results, disassemble everything and scrub all interior surfaces with a bottle brush and dish soap. Pay attention to threads and gaskets where mold hides.
Tip: Use a new brush if old bristles shed into the bottle contents. - 3
Disinfect using a chosen method
Choose one disinfection method: a diluted bleach solution (for non-porous bottles), 3% hydrogen peroxide, or white vinegar. Soak or fill the bottle and caps, ensuring all surfaces are covered.
Tip: Do not mix bleach with vinegar; this releases harmful gases. - 4
Rinse thoroughly and scrub again
Rinse multiple times with clean hot water to remove residue from cleaning agents. If any odor or film remains, repeat the scrubbing and disinfection step.
Tip: Rinse until the water runs clear to stop chemical residues. - 5
Dry completely and reassemble
Air-dry parts on a clean towel or drying rack in a well-ventilated area. Reassemble only when fully dry to prevent new mold growth.
Tip: Store with loose caps to promote airflow. - 6
Routine prevention
Incorporate daily or weekly washing into your routine and inspect seals regularly to prevent mold from returning.
Tip: Use wide-mouth bottles for easier cleaning and quick drying.
FAQ
Is mold in water bottles dangerous to my health?
Most exposure is limited, but mold can trigger allergies or respiratory irritation in sensitive people. Thorough cleaning and drying reduce risk, and persistent mold warrants bottle replacement.
Mold in water bottles can trigger allergies in sensitive people; clean thoroughly and dry completely, and replace if mold keeps coming back.
Can I use bleach to disinfect water bottles?
Yes, dilute household bleach according to guidelines and rinse well. Never mix bleach with vinegar or ammonia because it creates hazardous gases.
Bleach can be safe when properly diluted and thoroughly rinsed, but never mix with vinegar.
How often should I clean water bottles to prevent mold?
Clean bottles daily or after each use if you drink flavored beverages or leave residues. A quick rinse and dry can prevent mold growth between washes.
Clean daily or after each use, and always dry completely to prevent mold.
What should I do if mold returns after cleaning?
If mold persists after multiple cleanings, inspect for cracks, replace seals, or consider replacing the bottle altogether. Persistent odor is a strong indicator to retire the bottle.
Persistent mold after cleaning usually means replace the bottle or its seals.
Are there safer, natural disinfectants besides bleach?
White vinegar and hydrogen peroxide are common natural options. They can reduce mold but may not be as effective as bleach on heavy biofilms; rinse thoroughly after use.
Vinegar or hydrogen peroxide can help, but rinse well because they may be less effective on heavy mold.
Should I discard a bottle with damaged threads for mold reasons?
Yes. Damaged threads or seals can harbor mold and are difficult to sanitize completely. Replacing the bottle ensures safer reuse.
If threads are damaged, replace the bottle to avoid mold hiding in crevices.
Watch Video
The Essentials
- Clean, disinfect, and dry thoroughly to break mold lifecycle
- Choose a disinfection method compatible with bottle material
- Dry exposure areas completely before reuse
- Regular maintenance prevents mold regrowth
- Replace damaged or mold-persistent bottles