Black Mold Water Bottle: Safe Cleanup and Replacement
Identify black mold in water bottles, understand health risks, and follow practical steps to clean, sanitize, or replace bottles safely with Mold Removal Lab guidance.

To safely handle a water bottle with visible black mold, discard porous bottles and thoroughly wash non-porous ones with soap and hot water, then sanitize and dry completely. If mold returns or smells musty, replace the bottle and wipe down related containers to prevent recurrence. Follow label directions for any sanitizers, and keep the bottle ventilated while drying to prevent moisture pockets.
What is black mold in a water bottle? Health implications and identification
Black mold in a water bottle is a common concern for households that rely on reusable containers. While the term "black mold" covers multiple mold species, the key issue is that dark, pigmented growth can develop in damp, poorly cleaned bottles. The inside of a bottle — especially near threads, caps, and straw attachments — creates crevices where moisture clings and organic residues feed growth. Even if you can't see growth across every surface, mold can form biofilms that shed spores into liquids and the surrounding air. According to Mold Removal Lab, exposure to mold spores can trigger allergic reactions such as sneezing, itchy eyes, and runny noses, and may aggravate asthma in sensitive individuals. In some cases, extended exposure could result in headaches or throat irritation. If you notice a persistent musty odor, dark patches, or slimy residue, treat the bottle as contaminated and avoid using it until you’re sure it’s clean. Non-porous bottles (stainless steel, glass) are generally easier to sanitize thoroughly than porous bottles (certain plastics) because mold can lodge in micro-scratches. When in doubt, replacing the bottle reduces ongoing exposure and simplifies maintenance.
In this section we introduce the problem, explain why dark mold can hide in bottles, and note health considerations cited by Mold Removal Lab. This sets the stage for practical steps, including how material choice affects cleanup and when replacement is the simplest option.
Tools & Materials
- Dish soap(Any mild bottle-dye-free dish soap will do.)
- Hot water(As hot as comfortably possible; avoid scalding hands.)
- Bottle brush with a long handle(For narrow-neck bottles to scrub inside walls.)
- Non-abrasive sponge or cloth(Use for caps and rims.)
- Optional sanitizer (EPA-registered)(Follow label directions; safer for drinking vessels.)
- White vinegar (optional)(Alternative natural sanitizer if you dislike chemical smell.)
- Replacement bottle (as a backup)(Keep on hand if mold recurs or bottle is scratched.)
Steps
Estimated time: 20-40 minutes
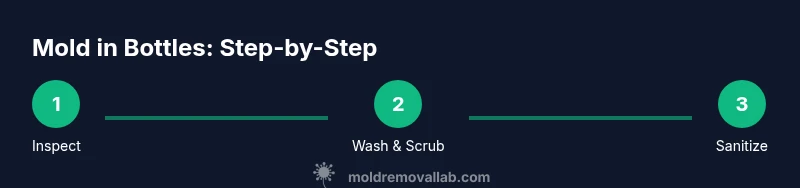
- 1
Inspect the bottle and classify material
Carefully examine the bottle for visible mold, scratches, cracks, and condensation. Decide whether the bottle is porous (more prone to harbor mold) or non-porous (easier to sanitize). If you see extensive cracking or deep scratches, consider replacing rather than cleaning to minimize health risks.
Tip: Porous plastics are harder to disinfect; prioritize replacement if you see uptake in residue. - 2
Rinse and wash the bottle
Rinse the bottle with warm water to remove loose debris, then scrub thoroughly with dish soap and a bottle brush. Clean the cap, threads, and straw components separately if they are removable. Rinse again to remove all soap.
Tip: Always clean the cap and any removable parts; mold often hides in tiny crevices. - 3
Sanitize with an approved method
Apply a sanitizing method appropriate for drinking vessels. Options include following label directions for an EPA-registered sanitizer or a vinegar-and-water rinse as a more natural alternative. Ensure all surfaces exposed to liquid are treated.
Tip: Avoid mixing cleaners and rinse surfaces thoroughly after sanitizing to prevent tastes or irritation. - 4
Rinse thoroughly and air-dry
Rinse the bottle multiple times with clean water to remove any sanitizer residue. Dry by placing the bottle upside down on a clean rack or towel to promote complete air-drying. Do not seal the bottle while wet, as moisture promotes new mold growth.
Tip: Keep the bottle in a sunny or well-ventilated area during drying to speed evaporation. - 5
Reassemble and evaluate
Once completely dry, reassemble the bottle and check for unusual odor or color. If the bottle still shows signs of mold or smells musty after cleaning, it’s best to discard and replace it.
Tip: A fresh bottle is often safer than attempting multiple rounds of cleaning on a compromised surface. - 6
Document and prevent future growth
Keep a simple cleaning schedule and establish a storage habit that minimizes moisture. Rinse after each use, dry thoroughly, and avoid leaving liquid in the bottle overnight. Inspect for scratches quarterly.
Tip: Develop a routine that aligns with the bottle’s material—porous plastics need more frequent checks.
FAQ
Is black mold in a water bottle dangerous to health?
Yes, mold can trigger allergies and respiratory symptoms in sensitive people. If you notice mold, reduce exposure by discarding porous containers and thoroughly cleaning non-porous ones, then monitor for any symptoms. If symptoms persist, consult a healthcare professional.
Mold exposure can affect people with allergies or asthma. Remove porous bottles and sanitize others, and seek medical advice if you have ongoing symptoms.
Can I safely clean a plastic bottle with mold?
Plastic bottles can be cleaned, but mold that grows inside scratches or threads may be hard to reach. If mold reappears after cleaning, consider replacing the bottle. Always scrub all parts and dry completely.
Yes, you can clean many plastics, but if mold keeps returning, replacement is safer.
When should I replace a water bottle instead of cleaning?
Replace if the bottle has deep scratches, cracks, persistent odor, or mold reappears after proper cleaning. These signs suggest the mold has taken hold in areas that are difficult to sanitize.
Replace when cleaning won’t remove the problem or if there’s persistent mold growth.
What’s the safest way to sanitize a water bottle?
Use an EPA-registered sanitizer following label directions, or consider a natural option like vinegar solution if appropriate for your bottle material. Always rinse thoroughly after sanitizing.
Sanitize with a product that’s approved for drinking vessels and rinse well.
How can I prevent mold in bottles in the future?
Rinse after every use, dry completely, and store with the cap off or loosely closed to improve air flow. Regularly inspect for scratches and replace damaged bottles.
Regular drying and inspection are key to preventing future mold.
Watch Video
The Essentials
- Discard porous bottles with mold to minimize exposure
- Non-porous bottles are easier to sanitize but must be dried completely
- Follow sanitizer labels and rinse well to avoid chemical taste
- Maintain a regular cleaning and drying routine to prevent mold
- Inspect for scratches and replace if mold recurs or surfaces are damaged
- Store bottles in a dry, ventilated area to deter moisture buildup