How to Use a Mold Tool for Safe Home Remediation
Learn how to choose and safely use a mold tool for detecting moisture, locating hidden mold, and guiding remediation at home. This practical guide covers PPE, essential tools, step-by-step workflow, and safety considerations to protect your health.

With a mold tool, you will identify moisture, locate hidden mold, and guide safe remediation. This guide outlines how to choose the right tools, set up a safe work area, and perform step-by-step measurements. You will need PPE, a clean workspace, and essential instruments like a moisture meter and infrared camera.
What is a Mold Tool and Why It Matters
A mold tool is any instrument or device used to detect, measure, and document mold growth and associated moisture problems. Reliable tools help homeowners and renters avoid guesswork, confirm risk areas, and guide cleanup without unnecessary disruption. In practical terms, a mold tool empowers you to locate the source of dampness, track progress after remediation, and communicate findings to professionals. According to Mold Removal Lab, using the right tool set reduces uncertainty and improves safety outcomes. A typical mold tool kit includes moisture meters, infrared thermography, air sampling devices, and surface swabs. The goal is to obtain objective data—moisture levels, temperature differentials, and mold presence—that informs containment, cleaning methods, and decisions about professional assistance. Remember: early detection saves time, effort, and cost, and helps protect vulnerable occupants from exposure.
Core Mold Tool Kit Essentials
A practical mold-tool kit combines several complementary instruments. At minimum, you should have a moisture meter (preferably pinless for non-destructive testing), an infrared camera to spot temperature variations indicating moisture, and basic PPE (respirator, gloves, goggles). A handheld HEPA vacuum helps contain dust during cleaning, while surface swabs or a basic mold test kit can confirm presence in ambiguous cases. Additional tools like a spray bottle, plastic sheeting, and tape support containment and safe cleanup. When choosing tools, look for accuracy, ease of use, and data-logging capability for documenting progress. For best results, align your tools with the size of the area and the severity of moisture problems. Mold Removal Lab emphasizes using a consistent toolkit to reduce confusion and improve remediation outcomes.
Interpreting Readings: When to Act
Reading moisture is not a green light for immediate remediation. Use readings as a guide to identify hotspots, then verify with visual signs of mold (staining, musty odor, fuzzy growth). If moisture meters show persistent levels above typical indoor benchmarks, or infrared scans reveal recurring hot spots, plan containment and cleaning promptly. Always compare consecutive readings to track improvement after interventions. Remember that mold can grow behind walls or under flooring, so readings should trigger a cautious approach rather than an assumption of complete remediation. Based on Mold Removal Lab analysis, combining objective data with professional assessments yields faster, safer outcomes.
Safety, Cleanup, and Next Steps
Before any mold-related work, establish a safety plan: isolate the work area, ventilate where possible, and wear proper PPE. Use plastic barrier sheets to seal off the space and minimize cross-contamination. During cleanup, follow a methodical sequence: remove porous debris, clean remaining surfaces with approved cleaners, and dispose of contaminated materials in sealed bags. After cleanup, retest the area to confirm reductions in moisture and mold indicators. If readings remain elevated or if structural materials are compromised, it is prudent to contact a professional mold remediation service. The Mold Removal Lab team recommends documenting readings, photos, and notes to inform future maintenance and potential insurance claims.
Tools & Materials
- N95 respirator or equivalent(Ensure a proper fit; replace if damaged)
- Protective goggles(Eye protection against splashes and dust)
- Chemical resistant gloves(Layer multiple gloves if handling cleaners)
- Moisture meter (pinless preferred)(Calibrate per manufacturer instructions)
- Infrared camera / thermal imager(Identify hidden moisture points)
- HEPA vacuum with attachments(Use after containment and before final cleaning)
- Plastic sheeting and tape(Create containment barriers)
- Mold test kit (surface swab or air)(Optional for ambiguous cases)
- Spray bottle with mild cleaner(For initial surface cleaning before using stronger cleaners)
- Garbage bags (heavy-duty)(Sealed disposal of contaminated materials)
Steps
Estimated time: 2-6 hours
- 1
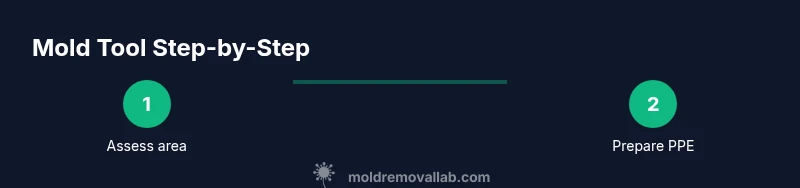
Assess scope and safety
Identify the areas affected by moisture and mold, define containment boundaries, and plan PPE use. Determine if electrical hazards or structural concerns require professional attention. Document initial observations with notes and photos.
Tip: Create a simple floorplan of the area and mark moisture hotspots before starting. - 2
Prepare workspace and PPE
Put on N95 respirator, goggles, and gloves. Lay down plastic barriers to isolate the area and minimize cross-contamination. Set up a dedicated cleanup station with all tools within reach.
Tip: Test PPE fit and seal; a poor fit reduces protection. - 3
Measure moisture with the meter
Calibrate the meter and take readings on suspect materials (walls, baseboards, and flooring). Note thresholds that indicate active moisture. Record locations to guide remediation path.
Tip: If unsure about readings, re-test after a short wait to confirm consistency. - 4
Scan with infrared camera
Scan the area to reveal temperature differentials associated with moisture intrusion. Record hotspots and correlate with meter readings to locate hidden moisture behind walls or under flooring.
Tip: Keep the camera at a steady distance and move slowly for accuracy. - 5
Collect samples if needed
Use a surface swab or air sampler if you need confirmation of mold presence. Follow lab or kit instructions for collection and sealing. Label samples clearly with location and date.
Tip: Avoid cross-contamination by using new swabs for each area. - 6
Contain and begin cleanup
Set up barriers, remove porous debris, and wipe remaining surfaces with an approved cleaner. Place contaminated materials in sealed bags and dispose of them properly. Schedule follow-up cleaning as needed.
Tip: Work from the cleanest area toward the dirtiest to minimize spread. - 7
Document, decide, and plan next steps
Capture readings, photo records, and notes. Decide whether DIY remediation is sufficient or if professional remediation is required. Schedule a follow-up inspection to verify results.
Tip: Keep a remediation log for future reference and insurance needs.
FAQ
What is a mold tool and what are its main uses?
A mold tool is any device used to detect moisture, locate mold, and document remediation progress. It helps non-experts make informed decisions about containment, cleaning methods, and whether professional remediation is needed.
A mold tool helps you detect moisture and locate mold so you can clean safely or decide if a pro is needed.
Do I need a professional to use mold tools?
Not always, but use of advanced tools or severe contamination should involve a professional. For minor moisture hotspots, a careful DIY approach with proper PPE and documentation is often sufficient.
You can start DIY, but for large or dangerous cases, consider hiring a pro.
Can moisture readings alone prove there's mold?
Moisture readings indicate risk but do not confirm mold presence. Combine readings with visual inspection and, if needed, sampling to confirm mold growth.
Readings show risk, but you need samples or visuals to confirm mold.
What safety gear is essential for mold-tool work?
At minimum, wear an N95 mask, protective goggles, and gloves. Add a coverall if contamination is heavy and ensure proper ventilation.
Wear a good mask, eye protection, and gloves; use a coverall if needed.
How often should I retest after remediation?
Retest after cleanup to verify moisture levels dropped and mold indicators are absent or significantly reduced. Schedule a follow-up inspection within a few weeks.
Retest soon after cleanup to confirm success and plan next steps.
Which mold tools are best for DIY cleanup?
A basic kit with a moisture meter, infrared camera, and HEPA vacuum covers most DIY needs. For suspicious or extensive growth, consult a professional.
A moisture meter, infrared camera, and HEPA vacuum are great for DIY; call a pro if in doubt.
Watch Video
The Essentials
- Define scope and safety before starting.
- Use a matched kit of moisture and infrared tools.
- Document data to guide decisions.
- Containment reduces cross-contamination.
- Call a pro if structural damage is suspected.