Mold Removal at Home Depot: A Practical DIY Guide
Learn how to tackle mold removal at Home Depot with practical, safe steps. This guide covers safety, tools, DIY steps, and when to call a pro—backed by Mold Removal Lab insights.

According to Mold Removal Lab, you can tackle small mold growth with consumer products available at Home Depot when you follow proper PPE, containment, and drying steps. This guide covers how to assess scope, choose safe cleaners, and perform removal safely. For hidden or extensive growth, professional help is advised.
Understanding Mold Growth and When DIY Is Appropriate
Mold growth in homes can result from moisture, humidity, and poor ventilation. For many homeowners, small patches on nonporous surfaces—think bathrooms, countertops, or sealed basements—can be addressed with basic, consumer-grade products found at Home Depot. This approach aligns with guidance from Mold Removal Lab, which emphasizes a cautious, methodical process and clear boundaries between DIY tasks and professional remediation. Remember: mold is not just a surface issue. If you notice growth behind walls, under flooring, or spreading rapidly across rooms, do not DIY the remediation. In those cases, professional assessment and removal are essential to avoid structural damage and health risks.
- The key is to start with a scope check: Is the growth confined to a small, visible area on a non-porous surface?
- Are materials salvageable, or must porous items be discarded?
- Is there any persistent moisture source you must fix to prevent recurrence?
This overview helps homeowners decide when to proceed with DIY cleanup and when to seek professional mold remediation services.
Safety First: PPE, Containment, and Ventilation
Mold removal at home depot projects require strict safety protocols. Before you begin, assemble PPE: a N95 respirator or better, chemical-resistant gloves, eye protection, and long sleeves. Contain the work area by closing doors to other rooms and using plastic sheeting or painter’s drop cloths to isolate the space. Ventilation matters: run a HEPA-filtered fan to direct air outward and reduce airborne spores, but avoid blowing air from contaminated areas into clean zones. This step minimizes exposure for you and others in the home and helps prevent cross-contamination. Mold can cause allergic reactions or respiratory symptoms in sensitive individuals, so don’t skip PPE or containment.
- Check local regulations for safe disposal of contaminated materials.
- If anyone in the home has asthma or allergies, consider postponing the work or hiring a pro.
- Wear disposable clothing and seal waste bags tightly after removal.
Declaring Scope: How to Tell if You Should DIY or Hire a Pro
Not all mold scenarios are DIY-friendly. If mold covers more than a few square feet, penetrates porous materials (drywall, insulation, carpet padding), or involves HVAC ducts, professional remediation is recommended. For small patches on non-porous surfaces like ceramic tile or glass, you can usually proceed with DIY methods using products available at Home Depot. Hidden mold behind walls or under flooring requires invasive procedures and proper testing—the kind of work best left to specialists. Remember, a pro can also identify moisture sources and structural damage that DIY inspection may miss.
- Start with a moisture assessment: fix leaks, improve ventilation, and dry the area thoroughly before cleaning.
- If porous materials must be removed, plan for disposal and potential renovations.
- Document the area before you start; photos help when discussing remediation options with a pro.
Tools and Materials You’ll Need (and Where to Find Them)
Gathering the right tools before you begin makes the process smoother. Home Depot carries a range of products suitable for small mold jobs, including EPA-registered cleaners, mold and mildew removers, scrub brushes, disposable rags, and HEPA vacuum attachments. A basic kit should include a spray bottle, disposable gloves, a reusable scrub brush, microfiber cloths, plastic sheeting for containment, and a HEPA-filter vacuum for dry cleanup. Remember to read product labels for safety data, coverage, and any required dwell times. For larger jobs, you may need specialized equipment and services.
- Always choose products with EPA-registration or recognized efficacy claims when possible.
- Store cleaners safely away from children and pets when not in use.
- Keep a small waste bag dedicated to contaminated materials to avoid cross-contamination.
Cleaning Agents You Can Buy at Home Depot
Home Depot offers a variety of cleaning agents that are commonly used for mold and mildew cleanup. Start with non-bleach options for everyday cleaning, such as EPA-registered mold cleaners or fungicidal products designed for household mold. For lighter outbreaks, white vinegar or 3% hydrogen peroxide can be effective on non-porous surfaces when used correctly. When choosing products, avoid mixing cleaners, especially ammonia with bleach, as this can create hazardous fumes. Always follow label directions and ventilate the area well during use. If you’re dealing with porous materials or extensive growth, consider the guidance of Mold Removal Lab and professional remediation.
- Avoid over-wetting fragile materials; moisture can worsen mold problems if not dried promptly.
- Test a small, inconspicuous area first to ensure the cleaner won’t damage the surface.
- Store products in a cool, dry place and discard any contaminated cleaning cloths after use.
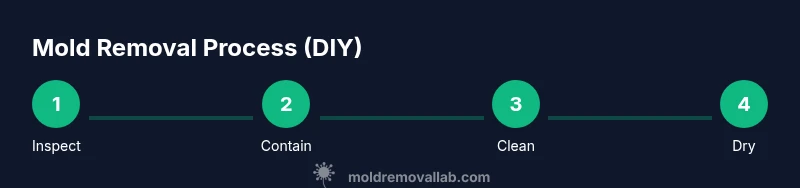
The Step-by-Step DIY Removal Process (High-Level Overview)
DIY mold removal at Home Depot is typically straightforward for small, non-porous areas. You’ll begin with containment, then clean and dry the surface, and finally monitor for returns. This section provides a high-level outline that aligns with the detailed steps in the dedicated Step-by-Step block. If any step feels uncertain, pause and consult a professional. The goal is thorough cleaning without exposing your household to excessive moisture or airborne spores.
- Confirm the scope and fix any moisture source before cleaning.
- Use appropriate cleaners and follow dwell times for best effectiveness.
- Dry the area completely, as residual moisture promotes regrowth.
- Dispose of contaminated materials properly to prevent recontamination.
- Reassess after a few days to ensure the area remains mold-free.
Drying, Venting, and Monitoring After Cleaning
Drying is critical after any mold cleanup. After cleaning, run the ventilation system or a dehumidifier to maintain relative humidity below 50-60%. Use moisture meters if available to verify that the area is dry. Maintain good air circulation for 24-48 hours and re-check the area for any signs of regrowth. If moisture returns or you notice musty odors, re-evaluate sources of moisture and consider professional testing. Ongoing humidity management is essential for long-term mold prevention.
- Keep doors and windows open when weather allows to increase natural ventilation.
- Consider a dehumidifier in damp spaces like basements or bathrooms.
- Monitor for any new stains, discoloration, or odors that indicate recurring mold.
- If odors persist despite drying, seek professional assessment.
Prevention: Keeping Mold from Returning
Prevention is easier than remediation. After mold removal, focus on controlling moisture, maintaining ventilation, and addressing leaks promptly. Regular inspections of bathrooms, kitchens, basements, and laundry areas help catch issues early. Use exhaust fans during and after showers, fix leaky pipes, and ensure proper drainage away from the foundation. A routine cleaning schedule with appropriate products can maintain a healthier environment. Mold Removal Lab emphasizes that long-term success hinges on preventing moisture buildup and monitoring humidity levels in susceptible spaces.
Special Cases: Hidden Mold, HVAC Systems, and When to Call a Pro
Hidden mold behind walls, under flooring, or within HVAC systems requires professional involvement. If you suspect mold in ductwork or if the visible mold area continues to expand after cleaning, contact a qualified contractor. Water damage, paneling, or porous materials like drywall may require removal and replacement. In these scenarios, DIY methods often fall short, and a licensed mold remediation specialist can mitigate structural risks and health concerns while ensuring proper disposal and air-quality control.
Tools & Materials
- N95 respirator or higher(Fit-tested if possible; consider a half-face respirator for larger jobs)
- Chemical-resistant gloves(Long-sleeved, non-porous gloves; avoid latex if you’re sensitive)
- Safety goggles or face shield(Eye protection to guard against splashes)
- Plastic sheeting / painter's tarp(Used to seal off the work area)
- Tape (duct or blue painter’s tape)(Secure containment and seal edges)
- HEPA vacuum cleaner(For dry cleanup and to reduce airborne spores)
- Scrub brushes and microfiber cloths(Non-abrasive for delicate surfaces)
- Spray bottle(Label your cleaners and dwell times)
- Mold cleaner or EPA-registered fungicidal product(EPA-registered products preferred; follow label directions)
- White vinegar or 3% hydrogen peroxide (optional)(For non-porous surfaces as alternative cleaners)
- Disposal bags for contaminated materials(Seal and dispose according to local guidelines)
- Moisture meter or hygrometer (optional)(Helps verify drying progress)
- Dehumidifier (optional)(Maintains low humidity to prevent regrowth)
Steps
Estimated time: 60-120 minutes
- 1
Inspect and isolate the area
Identify all visible mold patches in the workspace and map the contaminated area. Close doors, seal with plastic sheeting, and minimize spread to adjacent rooms. Document the scope with photos before you start cleaning.
Tip: Clear the space from valuables and move pets away from the area. - 2
Put on PPE and set up containment
Put on an N95 mask, eye protection, and gloves. Create a sealed perimeter with plastic sheeting to prevent spores from traveling to other rooms. Ensure good ventilation directed outward.
Tip: Double-check seal at floor edges and doorways to reduce leakage. - 3
Vacuum loose spores with a HEPA unit
Carefully vacuum the area using a HEPA-equipped vacuum to capture loose spores from surfaces. Avoid aggressive scrubbing that could raise more spores into the air. Do not use a standard household vacuum for this step.
Tip: Use short, shallow passes and keep the vacuum nozzle moving. - 4
Apply cleaner to affected surfaces
Spray the cleaner on moldy surfaces according to the product’s label and dwell time. Do not over-wet porous materials; moisture can push spores deeper. Repeat as needed for stubborn patches.
Tip: Always test a small spot first to ensure no surface damage. - 5
Scrub and rinse surfaces
Gently scrub moldy areas with a non-abrasive brush and rinse with clean water if the product allows. Wipe to remove residues and keep the surface dry. Porous materials may require disposal rather than cleaning.
Tip: Use disposable rags for contaminated areas and seal them after use. - 6
Dry the area thoroughly
Ventilate the space with fans or a dehumidifier to reduce humidity quickly. Target humidity below 50-60% and verify with a moisture meter if available. Adequate drying reduces the chance of regrowth.
Tip: Do not reintroduce moisture to the area until completely dry. - 7
Dispose of contaminated materials
Place used rags, disposable gloves, and contaminated porous materials in sealed bags. Seal bags tightly and dispose per local waste guidance. Do not reuse containment materials in other parts of the house.
Tip: Label bags clearly as mold-contaminated waste. - 8
Reassess and monitor area
After cleaning and drying, reassess for any remaining signs of mold. Check again after a few days and keep humidity in check. If you see regrowth, escalate to professional remediation.
Tip: Keep a simple log of humidity and cleaning dates for reference.
FAQ
Is DIY safe for most mold scenarios?
DIY cleanup can be safe for small, localized mold on non-porous surfaces when proper PPE and containment are used. If mold covers larger areas or porous materials, or if moisture sources remain, a professional remediation is advised.
Yes, for small, localized patches you can DIY with safety measures. If it covers a large area or porous materials, consider a professional.
Can Home Depot products alone handle mold removal?
Consumer products available at Home Depot can address small mold issues on non-porous surfaces. For porous materials or hidden mold, products alone may not suffice, and professional help might be needed.
Home Depot products work for small patches on hard surfaces; for porous materials or hidden mold, seek professional help.
What signs indicate hidden mold behind walls?
Persistent musty odor, unexplained staining, and moisture problems near walls can indicate hidden mold behind surfaces. If you suspect hidden mold, limit disturbance and contact a professional for testing and remediation.
A musty smell or unexplained stains near walls can signal hidden mold; consult a pro for testing.
How long does it take for cleaned areas to dry?
Drying time depends on humidity, airflow, and temperature. In general, expect 24-72 hours for surfaces to dry thoroughly after cleaning, with dehumidification speeding up the process.
Most areas dry within a day or two, but keep monitoring humidity to ensure complete drying.
Should I use bleach for mold cleanup?
Bleach can be effective on non-porous surfaces, but it is not a universal solution and can be hazardous if misused. Always follow label directions and avoid mixing with ammonia or other cleaners.
Bleach is sometimes useful on non-porous surfaces, but be careful and follow the label.
When should I call a professional mold remediator?
Call a professional if mold covers a large area, recurs after cleaning, involves porous materials, or if you suspect hidden mold behind walls or in HVAC systems. A pro can assess moisture sources and ensure safe removal and disposal.
If mold is widespread or hidden, or recurs after cleaning, get a professional assessment.
Watch Video
The Essentials
- Assess scope before starting DIY cleanup.
- Use proper PPE and containment to minimize exposure.
- Choose EPA-registered cleaners and avoid mixing chemicals.
- Dry thoroughly to prevent mold return.
- Know when to call a professional for hidden or extensive growth.