Mold Remediation Techniques: A Practical Home Guide
Learn proven mold remediation techniques to safely contain, clean, and prevent mold growth at home. This guide covers detection, containment, material-specific cleaning, drying practices, and prevention strategies for homeowners and renters.

Mastering mold remediation techniques helps homeowners safely identify moisture sources, contain growth, clean moldy surfaces, and prevent regrowth. This guide covers detection basics, containment strategies, material-specific cleaning, drying protocols, and prevention practices, plus safety guidelines on PPE, proper ventilation, and when to call a professional for severe infestations.
Understanding Mold and Why Remediation Techniques Matter
Mold growth is a moisture-driven problem. Understanding how different species colonize materials helps tailor remediation techniques. Most indoor mold problems start with hidden moisture behind walls, under floors, or in crawl spaces. According to Mold Removal Lab, moisture control is the single most important factor in preventing regrowth, because even small leaks can sustain growth for weeks. The Mold Removal Lab team found that addressing the moisture source often stops regrowth faster than aggressive cleaning alone. Remediation techniques must combine moisture control, containment, and material-specific cleaning to protect occupants and indoor air quality.
This approach aligns with the broader aim of keeping homes safe and healthy. When moisture is managed effectively, you reduce mold-friendly conditions, protect building materials, and minimize health risks for residents. The techniques discussed here are designed for homeowners and renters who want practical, actionable steps without unnecessary complexity. The focus is on real-world application, with checks and balances to ensure you aren’t making common mistakes that undermine remediation efforts.
Safety First: Gear and Precautions
Safety is the foundation of any mold remediation effort. Wear an appropriately fitted respirator (N95 or better, with P100 for larger jobs), goggles, and gloves that seal at the wrists. Use disposable coveralls or clothing you can launder after cleanup. Work in a well-ventilated area and consider a HEPA‑filtered vacuum to contain dust. Keep kids and pets away from the work zone. The right PPE minimizes exposure to spores and reduces the risk of allergen or toxin-related symptoms. If you have asthma or a member of your household has compromised health, pause the work and seek professional guidance.
Containment and Cleaning Strategy
Set up barriers with plastic sheeting to isolate the affected area. Seal doorways, vents, and cracks, and, if feasible, create negative pressure with an exhaust fan, directed away from the rest of the home. Carefully remove porous materials that are mold-damaged or contaminated while wearing PPE. Clean nonporous surfaces with detergent and water, rinse, and allow to dry thoroughly. For porous materials that cannot be cleaned, consider safe disposal and replacement to prevent regrowth. Avoid disturbing mold colonies more than necessary to minimize spore release, and plan containment as part of the broader moisture-control strategy.
Surface-Specific Techniques: Materials and Cleaning Agents
Different materials require different remediation approaches. On nonporous surfaces like tile or glass, a detergent solution followed by a disinfectant with EPA registration can be effective. For wood and drywall, focus on removal or encapsulation of contaminated sections and thorough drying. Concrete and masonry can often be cleaned with detergent and rinsed; avoid soaking porous substrates. For fabrics and carpets, extraction or replacement is usually necessary. Avoid mixing cleaning agents and never use chlorine bleach on porous materials, as it can damage the surface and release harmful gases when mixed with cleaners. When unsure, test a small area first and escalate only if necessary.
Drying, Dehumidification, and Preventing Regrowth
Mold growth returns in moist environments. After cleaning, begin drying immediately using dehumidifiers and air movers. Aim to lower humidity to a level that inhibits mold growth and to dry structural materials thoroughly. Regularly monitor moisture with a moisture meter or hygrometer. Address the moisture source long-term: fix leaks, improve drainage, and ensure proper ventilation in bathrooms, kitchens, and basements. Continuous monitoring helps spot regrowth early and allows prompt intervention.
When to Call a Pro and Long-Term Prevention
Not every mold problem is safe to tackle alone. If growth is extensive, hidden behind walls, or involves porous building materials, professional remediation is advised. A qualified mold remediation contractor can perform more thorough containment, controlled demolition, and proper disposal. Long-term prevention includes maintaining low humidity, promptly addressing leaks, cleaning and drying after water events, and using mold‑resistant products where possible. Documenting moisture events and repairs helps support long-term prevention.
Authority Sources
- https://www.epa.gov/mold
- https://www.cdc.gov/mold/dampness_facts.html
- https://www.niehs.nih.gov/health/topics/agents/mold/index.cfm
Tools & Materials
- N95 or P100 respirator(Fit-tested if possible; replace filters as recommended)
- Safety goggles or face shield(Protects eyes from spores and cleaners)
- Disposable coveralls or clothing(Keeps clothing clean and reduces contamination)
- Latex or nitrile gloves(Use double-layer if handling contaminated materials)
- Plastic sheeting (6–10 mil)(To create containment barriers)
- Packing tape and duct tape(Seal containment and seal bags)
- HEPA vacuum(For cleanup dust and spores)
- Detergent and clean water(Baseline cleaning solution)
- EPA-registered disinfectant(Use on nonporous surfaces only)
- Soft brushes, microfiber cloths(Gentle cleaning and removal of residue)
- Nonporous trash bags(Waste disposal)
- Dehumidifier and air movers(Speed up drying and circulation)
- Moisture meter or hygrometer(Track drying progress)
Steps
Estimated time: 4-8 hours for inspection, containment, and cleaning; additional 24-72 hours for thorough drying in larger spaces
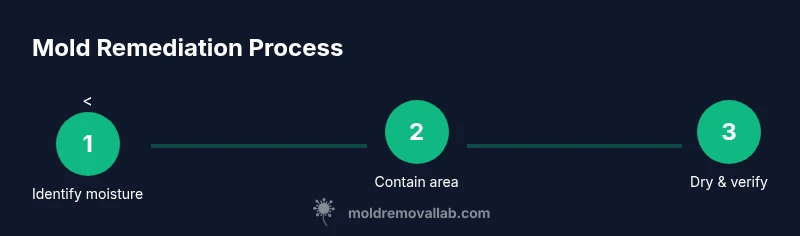
- 1
Identify moisture sources
Locate leaks, moisture behind walls, or in crawl spaces using visual inspection and moisture meters. Document findings with photos and notes to guide repairs before cleaning.
Tip: Address the moisture source first to prevent rapid regrowth. - 2
Contain the work area
Seal off the space with plastic sheeting, doors, and vents. Create negative pressure if possible to prevent spores from escaping to other areas.
Tip: Keep the rest of the home sealed off during work. - 3
Choose cleaning strategy by material
Decide whether to remove contaminated porous materials (drywall, carpet) or clean nonporous surfaces with detergents and disinfectants.
Tip: Do not treat porous materials with disinfectants alone. - 4
Clean and scrub surfaces
Wipe surfaces with detergent and water, use gentle brushes, rinse, and dry promptly. For nonporous surfaces, apply EPA-registered disinfectant per label directions.
Tip: Rinse thoroughly to remove residues that can attract new mold. - 5
Dry thoroughly and verify moisture
Run dehumidifiers and air movers; use a moisture meter to confirm materials are dry before closing the space.
Tip: Continue drying for at least 24–48 hours after cleaning if moisture persists. - 6
Inspect and prevent future growth
Recheck for hidden moisture, reseal areas, and implement ventilation improvements to minimize future mold risk.
Tip: Maintain humidity below the threshold that supports mold growth.
FAQ
What is the first step in mold remediation techniques?
The first step is to locate and fix the moisture source that is sustaining mold growth. Without stopping the moisture, cleaning can be ineffective and regrowth is likely.
Start by finding and fixing the moisture source; this is the foundation for successful remediation.
Can I remove mold myself, or should I hire a pro?
Small, contained mold growth on nonporous surfaces can be addressed by homeowners with proper PPE and cleaning steps. Large infestations, porous materials, or hidden mold behind walls usually require a professional remediation team.
DIY is possible for small, nonporous areas, but large or hidden mold growth should be done by pros.
What cleaning agents are safe for mold cleanup?
Detergent and water are the baseline cleaning agents. For nonporous surfaces, EPA-registered disinfectants can be used. Avoid mixing cleaners and never rely on bleach for porous materials without guidance.
Use detergent and water first; nonporous surfaces may use EPA disinfectants; avoid mixing cleaners.
How long does drying take after remediation?
Drying time varies by area size and humidity. Use dehumidifiers and air movers and monitor with a moisture meter until materials are dry to prevent regrowth.
Drying duration depends on the space; use humidity control and moisture monitoring to confirm dryness.
Is mold remediation covered by insurance?
Coverage depends on your policy and the cause of mold. Some policies cover mold related to covered perils; consult your insurer and review your policy details.
Insurance varies by policy; check with your provider for mold-related coverage.
What are signs of hidden mold behind walls?
Persistent musty odors, damp spots on walls, bubbling paint, or unusual ceiling or drywall staining can indicate hidden mold. If you suspect, pause work and assess moisture sources or contact a professional.
Look for musty odors, damp spots, or staining; if suspected, assess further or call a pro.
The Essentials
- Contain mold growth quickly to limit spread
- Use proper PPE to protect health
- Address moisture sources to prevent recurrence
- Different surfaces require different cleaning approaches
- Drying and monitoring moisture are essential for lasting results