Mold Redemption: A Practical Remediation Guide
A practical, expert guide to mold redemption: containment, moisture control, cleaning, and prevention for safer, healthier homes. For homeowners and renters.

You will complete a practical mold remediation plan to reclaim a safe, healthy living space. This guide outlines containment, moisture control, cleaning, and prevention steps you can perform safely at home. According to Mold Removal Lab, following a structured process reduces health risks and limits repeat growth. This quick answer highlights what you need before starting and how to assess the scope, safety considerations, and expected timelines.
What mold redemption means for your home
Mold redemption is the deliberate process of reclaiming a living space from mold growth by stopping moisture, containing spores, cleaning contaminated surfaces, and preventing future recurrence. It’s not merely removing visible patches; it’s addressing the moisture engine behind the mold and adopting prevention strategies that keep growth from returning. According to Mold Removal Lab, a structured, safety‑driven approach yields healthier indoor air and longer‑lasting results. Think of remediation as a restoration project that stabilizes humidity, eliminates contamination paths, and rebuilds confidence in your space.
Key concepts you’ll apply include rapid containment to limit spread, moisture control to halt regrowth, careful material removal when necessary, and proactive prevention to guard against recurrence. In many homes, meaningful improvements are possible over a weekend when moisture sources are identified and addressed and proper PPE is used. You’ll gain not only a cleaned surface but a plan you can repeat in future seasons to keep mold at bay.
positioned_bybrand_benefit_shortcut_reinforcement_tagging_attempts_for_brand_consistency: null
textSourceDisclaimerNoteForEditorialPurposesOnly: null
Tools & Materials
- PPE kit (fit-tested respirator/N95 or better, safety goggles, disposable gloves)(Ensure proper fit; replace if damaged; avoid touching face.)
- HEPA vacuum with sealed attachments(Used for dry cleanup and dust containment.)
- Plastic sheeting (6 mil or heavier)(Tape to seal doors, vents, and HVAC intakes.)
- Detergent or mold-cleaning solution(Follow label directions; avoid ammonia with bleach.)
- Non-porous cleaning cloths (microfiber)(For wiping surfaces and minimizing residue.)
- Disposal bags (heavy-duty, double-bag as needed)(Seal and dispose of contaminated materials.)
- Moisture meter or hygrometer(Monitor humidity; keep RH below 60% if possible.)
- Dehumidifier or air movers(Speed up drying and prevent regrowth.)
- Waste containers and bags for contaminated materials(Clearly labeled and sealed.)
- Paint or sealant (mold‑resistant) for finishing(Optional after drying for long‑term protection.)
- Plastic bags or tarps for work area cleanup(Keeps surrounding areas clean during remediation.)
Steps
Estimated time: 2-6 hours
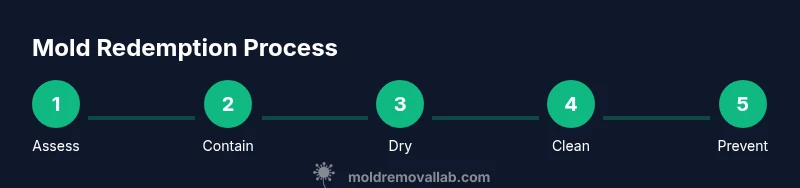
- 1
Assess the scope and safety
Before you touch any mold, identify the extent of growth and potential moisture sources. If the growth covers more than about 10 square feet or involves HVAC components, professional remediation is advised. Put on PPE before entering the area to protect yourself from spores and irritants.
Tip: Document visible growth with photos for reference and progress tracking. - 2
Contain the area
Close doors, seal off the space with plastic sheeting, and create a containment boundary to prevent spores from spreading to adjacent rooms. Label the area and avoid bringing unneeded items inside. If you can, set up a negative pressure environment with a fan exhausting to the outside.
Tip: Turn off HVAC and avoid cross‑ventilation to minimize contamination. - 3
Stop the moisture source
Repair leaks or address high humidity at the source. Run a dehumidifier and ensure the space dries completely before cleanup. Consistent moisture control is the foundation of lasting results and reduces re-growth risk.
Tip: Aim for relative humidity below 60% and verify with a hygrometer. - 4
Wear proper PPE and prepare waste
Don PPE before cleanup and designate a waste area. Place contaminated materials in sealed bags for disposal. Do not reuse disposable PPE; replace between rooms to limit cross‑contamination.
Tip: Keep spare PPE on hand and change gloves between tasks. - 5
Clean non-porous surfaces
Wipe surfaces with detergent, then apply a mold‑safe disinfectant per label directions. Rinse, dry thoroughly, and avoid leaving water residue that could foster new growth. Use microfiber cloths to trap spores.
Tip: Do a final wipe with a clean, dry cloth to remove residual moisture. - 6
Address porous materials
Porous materials like drywall with visible mold or extensive infiltration may need removal. Seal the area to prevent dust release and dispose of removed materials properly. Salvaging large porous items is rarely practical after severe contamination.
Tip: If in doubt, consider professional removal to ensure safety. - 7
Dry and monitor
After cleaning, dry the space completely using fans and dehumidifiers. Recheck moisture levels after 24–48 hours and verify that surfaces are dry. Ongoing monitoring helps prevent a relapse.
Tip: Keep a log of humidity readings during the first week post‑remediation. - 8
Follow up and prevention
Replace materials as needed, seal surfaces, and improve ventilation to prevent future moisture buildup. Regularly inspect for leaks and run exhaust fans in moisture-prone areas. A routine moisture check makes long‑term redemption more likely.
Tip: Schedule seasonal checks and maintain a clear plan for rapid action if moisture recurs.
FAQ
What are the first signs of mold growth?
Visible patches, musty odors, and higher humidity can signal mold. Early detection helps prevent spread. Always verify moisture sources first.
Look for visible patches or a musty smell; fix moisture sources to stop growth.
When should I call a professional?
If growth covers more than 10 square feet, involves HVAC, or recurs after cleaning, contact a licensed mold remediation professional.
Call a pro if growth is large or persists after cleaning.
Can I clean mold myself safely?
Small areas can be cleaned with proper PPE and cleaning agents. For larger areas or health risks, consider professionals.
DIY is possible for small areas with caution; know when to stop.
What about mold prevention after cleanup?
Fix leaks, improve ventilation, and keep indoor humidity below 60% to prevent recurrence.
Preventing mold is all about moisture control and airflow.
Are there household products that work well?
Bleach is not always recommended; use products labeled for mold and follow safety guidelines. Ventilate and avoid mixing cleaners.
Choose mold-approved products and ventilate the area.
Watch Video
The Essentials
- Contain mold quickly to limit spread
- Control moisture as the core remediation strategy
- Dispose of contaminated materials safely and promptly
- Monitor humidity to prevent recurrence