Mold on Sourdough Starter: Safe Remediation Steps Guide
Urgent guide to mold on sourdough starter: identify contamination, discard safely, start fresh, and prevent recurrence with practical steps and safety tips from Mold Removal Lab.

Mold on sourdough starter is a contamination risk and must be treated as unsafe for consumption. Discard the entire starter and any utensils that touched it, then sanitize the jar and surfaces before starting a fresh starter with clean flour and water. Store in a cool, dry place and monitor for any signs of contamination. According to Mold Removal Lab, safety first is non-negotiable with mold in kitchen cultures.
Understanding the Risk of Mold on Sourdough Starter
Mold growing on a sourdough starter is more than a cosmetic issue; it signals potential food safety hazards. Mold can release mycotoxins that resist simple cleaning, and some molds produce odors or textures that indicate spoilage beyond the visible patch. For homeowners and bakers, the right move is conservative: discard the affected starter and all utensils that came into contact with it. Even if the mold seems localized, contamination can spread through flour particles or moisture in the cap. The Mold Removal Lab team emphasizes that safety comes before sentiment when a kitchen culture shows signs of mold. Inspect your environment for humidity, warmth, and poor airflow, all of which encourage fungal growth. Put simply: mold on sourdough starter is a red flag you should not ignore, and acting quickly protects both health and bread quality.
In many cases, the presence of mold means the culture is unsalvageable. Do not attempt to cut away the mold or “save” a portion; mold can extend beyond what’s visible and thrive in the porous network of flour and water. For prevention, remember that sourdough starters thrive in clean, low-h humidity conditions with steady temperatures. Small changes in storage can curb future risks. The Mold Removal Lab analysis highlights that routine sanitation, proactive storage, and strict discard protocols dramatically reduce the chance of mold returning to your kitchen.
Key takeaway: When in doubt, err on the side of safety and start fresh with proper sanitation practices. Rebuilding a starter from scratch using fresh ingredients reduces risk and improves your chances of a robust, mold-free culture.
Immediate Safety Actions
If you spot mold on your sourdough starter, take these steps right away:
- Seal the contaminated container and discard the starter, flour, and any tools that touched it. Do not scrape or salvage moldy material.
- Wash your hands thoroughly and put on clean gloves if available.
- Clean and sanitize all surfaces, jars, and utensils that may have been in contact with the starter using hot water and a mild dish soap, followed by a sanitizing rinse or a quick run through the dishwasher if safe for the container material.
- Let the work area dry completely to prevent residual moisture from inviting new mold.
- Start a new starter with fresh, high-quality flour and clean water, and use a clean jar with a tight lid.
The Mold Removal Lab recommends documenting the incident and reviewing storage conditions to prevent recurrence. Even if you believe mold did not touch every component, safer to discard and renew rather than risk health concerns or off-flavors in bread.
How Mold Develops in Starters and What It Tells You
Mold growth on sourdough starter often points to excess moisture, warmth, or contamination from flour or utensils that briefly introduced spores. Spores can be present in the environment or on packaging, and even small amounts of moisture can enable growth during fermentation cycles. A starter left in a warm room or in a closed container without airflow creates a stable environment for fungi to proliferate. When mold is visible, the safest course is to discard and clean, then rebuild with sterilized equipment. The Mold Removal Lab team notes that prevention hinges on controlling moisture, using clean bowls and spoons, and avoiding cross-contamination from countertops or cutting boards. Keep starters away from heat sources and ensure good airflow in the storage area to minimize mold-friendly conditions.
Additionally, moldy starters can carry odors and flavors that are hard to remove even after cleaning. If you bake with a mold-infected starter, you risk transmitting toxins or off-flavors to your bread. For this reason, many bakers choose to discard promptly and resume with a fresh culture. Mold Detection and prevention are critical components of a reliable sourdough routine.
Step-by-Step: Safe Disposal and Replacement Protocol
Following a mold finding, implement a strict disposal protocol and begin anew with a clean starter. This section guides you through a safe, practical workflow so you can return to baking with confidence.
- Put on gloves and seal the moldy starter container in a plastic bag. Place it in the trash outside the kitchen to avoid spreading mold spores inside.
- Thoroughly wash your hands and sanitize the workspace. Remove any flour residues and wipe down surfaces to remove potential spores.
- Rinse and sanitize all utensils, bowls, and jars that contacted the starter. Use hot water, soap, and a sanitizing rinse (or dishwasher, if safe for the items).
- Prepare a new starter using clean equipment. Use fresh flour and clean water, mixing in a clean jar. Consider starting with a small amount and discarding the first few feedings to ensure the new culture begins cleanly.
- Feed the new starter using a basic 1:1 water-to-flour ratio by weight. Maintain a cool storage environment and avoid sealing it airtight; allow a small amount of gas to escape.
- Observe daily for signs of healthy activity: bubbles, rising volume, and a pleasant, sour aroma. If you notice mold again, halt and reassess your environment and materials.
- Document changes in your routine and sanitation practices. Regularly clean your kitchen surfaces and keep tools dedicated to sourdough sanitation to prevent cross-contamination.
The Mold Removal Lab highlights that starting fresh in a clean environment minimizes risk and helps you regain a mold-free starter.
How to Start a Safe, Robust New Starter
Starting a new starter after mold involves careful selection of ingredients and clean equipment. Use filtered or bottled water if your tap water has noticeable mineral content or chlorine, and choose flour with minimal handling. Mix 1:1 by weight and keep the starter in a clean glass jar with a breathable lid. Maintain consistent temperatures—ideally around 70°F (21°C)—and feed regularly until the culture becomes active. Maintain a routine of discarding a portion before feeding to refresh the starter’s microbial balance. Remember that patience pays off: the new starter may take several days to achieve strong rise and signaled activity, but it will be safer and healthier than attempting to salvage a moldy batch.
Common Mistakes to Avoid
- Ignoring early signs of contamination or storage issues.
- Reusing any equipment that touched moldy starter without proper sanitization.
- Storing starter in humid, warm places that promote mold growth.
- Delaying sanitation after discovering mold, which increases contamination risk.
- Eating bread baked from moldy starter, as toxins can persist in the dough.
Avoid these pitfalls by enforcing strict sanitation, monitoring storage conditions, and using dedicated tools for sourdough activities. The Mold Removal Lab team emphasizes that consistent practices reduce the chance of mold returning to your kitchen culture.
Long-Term Prevention: Safe Storage and Routine Sanitation
To prevent mold on sourdough starters in the long term, implement a hygiene-first routine. Keep your starter in a clean glass jar with a breathable lid, stored in a cool, dry area away from sunlight or heat sources. Wash your hands before handling the starter and sanitize your workspace regularly. Label containers and rotate your starters to avoid stale cultures.
Regularly inspect for signs of mold or off-odors, and adjust your feeding schedule if you live in humid conditions or a warm kitchen. The Mold Removal Lab recommends using a dedicated set of tools for your starter, including measuring spoons and bowls, to prevent cross-contamination from other kitchen tasks. With consistency, your starter should maintain strong activity and flavor.
Verdict: Your Next Best Step
In the face of mold on a sourdough starter, safety overrides sentiment. The Mold Removal Lab recommends discarding moldy cultures, sanitizing thoroughly, and rebuilding with clean materials. By maintaining controlled storage, sanitizing surfaces, and sticking to a disciplined feeding routine, you can prevent mold recurrences and bake with confidence.
Steps
Estimated time: 60 minutes
- 1
Isolate and discard the moldy starter
Put on gloves if available, seal the moldy starter and any contaminated utensils in a bag, and discard it in an outdoor trash can. Do not open it near food prep areas to avoid spreading spores.
Tip: Seal and bag everything to prevent spores from lingering in the kitchen. - 2
Sanitize the workspace
Thoroughly wash hands, sanitize countertops, bowls, and tools that touched the starter using hot water and soap, then a sanitizing rinse or dishwash cycle where safe.
Tip: Let surfaces air-dry completely before using clean equipment. - 3
Prepare clean equipment and ingredients
Rinse and sanitize a clean jar, spoon, and measuring tools. Gather fresh flour and clean water, ensuring there are no signs of previous contamination.
Tip: Use filtered water if your local supply concerns you. - 4
Create a fresh starter
In a clean jar, mix fresh flour and water at a 1:1 ratio by weight. Stir, cover with a breathable lid, and store in a cool, draft-free place.
Tip: Label the jar with start date to track activity. - 5
Begin regular feedings
Feed the new starter daily or as recommended, using equal parts flour and water by weight. Observe for bubbles and rising behavior.
Tip: Discard a portion before each feeding to refresh the culture. - 6
Monitor and adjust storage
Keep the starter in a location away from heat and humidity. If mold signs appear again, halt use and reassess sanitation and ingredients.
Tip: Avoid airtight containers that trap excess moisture; allow some gas to escape.
Diagnosis: Visible mold on sourdough starter
Possible Causes
- highMoisture buildup in storage and warm room temperature
- mediumContaminated flour or utensils introducing spores
- lowImproper sanitation allowing cross-contamination
Fixes
- easyDiscard moldy starter and all touched utensils; sanitize workspace with hot water and soap, then sanitize or run through dishwasher if safe
- easyStart a new starter with clean flour and water in a sanitized jar; label and store in a cool, well-ventilated area
- easyReview and adjust storage conditions (cool, dry, ventilated) and implement a dedicated tool set for sourdough to prevent cross-contamination
- hardIf concerns persist or mold recurs, consult a local food-safety professional for assessment
FAQ
Can a moldy sourdough starter be salvaged by removing the mold and continuing the culture?
No. Mold indicates contamination and can produce toxins. Salvaging is unsafe; discard and start a new starter with clean ingredients and sanitized equipment.
No, mold means the starter is contaminated. Discard it and start fresh with clean tools and ingredients.
Is it safe to bake bread using a starter that shows mold?
No. Baking will not reliably neutralize mold or toxins. Discard the batch and start anew with a clean starter.
No. Mold can persist in the dough; discard and begin again with clean materials.
What environmental factors contribute to mold growth in starters?
Excess moisture, warmth, and poor airflow in the storage area promote mold. Maintaining a cool, dry, well-ventilated space reduces risk.
Moisture and heat with poor airflow invite mold. Keep storage cool and dry.
How long does it take to develop a healthy starter after starting fresh?
A healthy starter often shows active bubbling within a few days, with reliable rise after about a week of proper feedings.
Usually a few days to see activity, about a week for consistent rising.
What should I sanitize after discarding a moldy starter?
Sanitize jars, spoons, bowls, countertops, and any surfaces that touched the moldy starter using hot soap and water, followed by an approved sanitizer.
Wash and sanitize all affected tools and surfaces.
Watch Video
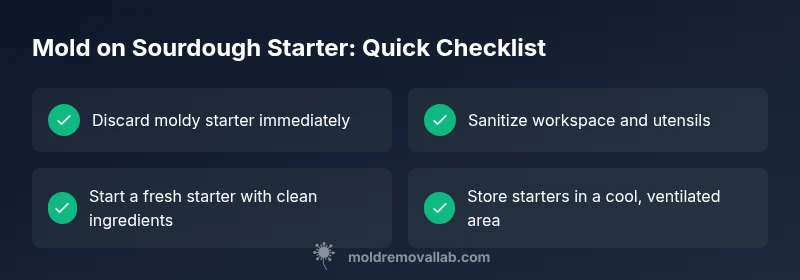
The Essentials
- Discard moldy starter immediately
- Sanitize thoroughly before starting anew
- Start fresh with clean ingredients and equipment
- Control environment to prevent mold recurrence