Mold in Your Car: Practical Cleaning & Prevention Guide
Learn how to identify, clean, and prevent mold in your car. This actionable guide covers safety, tools, a step-by-step cleanup, moisture control, and when to call a professional for car mold remediation.

Goal: If mold is growing in my car, prioritize safety, locate moisture sources, and start deep-cleaning the interior. This guide provides immediate safety steps, the right PPE, a complete tools list, a step-by-step cleaning workflow, prevention tips, and guidance on when to contact a professional. Following these steps helps protect health and prevent recurrence.
Understanding how mold grows in cars
Mold needs moisture, organic matter, and warmth to thrive, and a car provides all three when moisture is trapped inside. If mold is growing in my car, the problem may start from a spill, rain intrusion, or condensation inside the HVAC system. According to Mold Removal Lab, vehicles are particularly vulnerable because fabrics, foam, and carpet fibers absorb moisture and trap spores. A small damp patch can become a colony in days, especially during humid seasons or when the car sits closed with windows up. In practice, you may notice musty odors, visible spots, or black specks on seats, headliners, or floor mats. Early detection matters because mold can worsen respiratory symptoms for sensitive occupants. This guide uses practical steps homeowners and renters can take to reduce exposure and begin effective cleanup.
Common sources of moisture in vehicles
Water intrusion in cars comes from multiple avenues: leaky doors or windows after rain, spilled drinks that aren’t fully dried, and HVAC condensate that pools in ducts or under floor mats. Mold thrives where moisture hides, so the first priority is identifying and stopping leaks. Mold Removal Lab Analysis, 2026 shows that even small, persistent damp patches can sustain mold growth over weeks, especially in climates with high humidity. Carpet fibers and foam padding beneath seats are especially porous, acting like sponges that hold moisture. Even a car that sits unused for a few days during rainy weather can accumulate enough moisture to support a colony. Regular checks—under seats, in trunk corners, and behind door seals—help you catch moisture before mold spreads.
Immediate safety steps when you discover mold in your car
Mold exposure can irritate the eyes, nose, throat, and lungs, so protect yourself before any cleanup. Put on an N95 respirator or better, goggles and gloves. If you or a passenger have asthma or allergies, minimize time in the car during cleanup and consider running a portable fan to increase airflow without circulating spores broadly. Ventilate the vehicle by opening doors and windows and turning on fresh air mode if your HVAC system is clean. Do not mix bleach with ammonia or other cleaners, as this can create hazardous gases. Start by isolating the area—avoid rubbing moldDrying damp fabrics directly with heat, especially on foam padding, which can spread spores. Use a damp cleaning approach rather than soaking, and take breaks to prevent overheating or fatigue during the task.
Tools and materials you'll need for car mold cleanup
Before you begin, assemble the necessary tools and cleaners to avoid cross-contamination: a HEPA-equipped vacuum, microfiber cloths, disposable wipes, spray bottle, car-safe cleaner, mild hydrogen peroxide or enzyme-based disinfectant, non-slip gloves, safety goggles, an N95 or better respirator, disposable coveralls, a moisture meter (optional), and a portable dehumidifier or fans to dry the interior. Keep trash bags handy for disposing contaminated materials. Having the right gear reduces exposure risk and improves cleanup effectiveness. Plan to complete the job in a well-ventilated area if possible, and work patiently to allow cleaners to work without rushing.
Step-by-step workflow overview
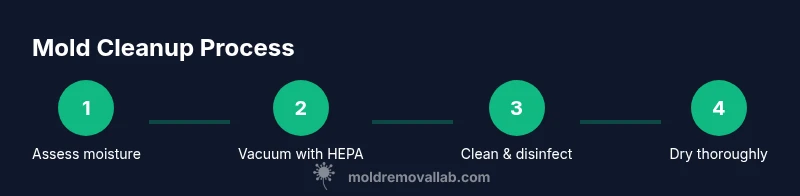
This section outlines a practical, high-level workflow you can follow in your car without specialized equipment. Start by locating all damp areas, then remove loose debris and vacuum with a HEPA filter. Clean affected fabrics and hard surfaces with an appropriate cleaner, disinfect porous materials, and finish with thorough drying. Finally, inspect for lingering odors and hidden mold behind panels or under seats, and set up a long-term moisture-control plan to prevent recurrence. This overview helps readers understand the sequence before diving into detailed steps.
Prevention and long-term maintenance to stop mold from returning
Prevention is easier than remediation. After cleaning, implement a moisture-control routine: fix leaks promptly, dry out the car after rain or car washes, and use seat covers or floor mats that dry quickly. Regularly check for condensation on windows, ensure proper HVAC drainage, and use interior dehumidifiers during humid seasons. Clean sponges and fabrics promptly after spills to prevent mold-friendly conditions. Consider a routine car interior deodorizing schedule using safe products, and monitor for musty smells that suggest ongoing moisture problems. The goal is to keep surfaces dry and inhospitable to mold growth year-round.
When to call a professional and what to expect
If mold covers large areas, penetrates into padding or upholstery, or you notice persistent odors after cleaning, professional remediation is advised. A qualified service can perform a mold assessment, identify hidden growth behind dashboards and upholstery, and use methods like enclosed containment and specialized equipment to remove mold-y spores safely. Expect a written remediation plan, cost estimates, and post-remediation verification. The Mold Removal Lab team recommends seeking professional help when you encounter mold growth beyond simple surface cleaning or when occupants have health concerns; professional services can ensure thorough disinfecting and prevent relapse.
Tools & Materials
- Nitrile gloves(Disposable; choose a snug pair to avoid tearing.)
- N95 respirator or better(Mold-rated PPE for respiratory protection.)
- Safety goggles(Protect eyes from splashes and spores.)
- Disposable coveralls(One-use PPE to prevent transfer of mold.)
- HEPA vacuum cleaner(Essential for removing spores from fabrics and carpets.)
- Microfiber cloths(Soft, lint-free for cleaning surfaces.)
- Disposable wipes(For quick, contained cleanups.)
- Spray bottle(For cleaners and disinfectants.)
- Car-safe cleaner or enzymatic cleaner(Select products designed for automotive interiors.)
- Hydrogen peroxide or enzyme-based disinfectant(Use according to label; avoid bleach on fabrics.)
- Bucket(For mixing cleaners if needed.)
- Towels or rags for drying(Absorb moisture after cleaning.)
- Dehumidifier or portable fans(Help dry the interior thoroughly.)
- Trash bags(Seal contaminated materials before disposal.)
Steps
Estimated time: 1.5–3 hours
- 1
Assess moisture and ventilate
Open doors and windows, run ventilation to reduce indoor humidity, and locate obvious moisture sources (leaks, spills, condensation). This sets the stage for effective cleanup and helps you prioritize areas with the most growth.
Tip: Document damp areas with a phone photo to guide targeted cleaning. - 2
Vacuum with HEPA before cleaning
Vacuum seats, carpets, and floor mats using a HEPA-equipped vacuum to remove loose spores and debris. Do not reuse the same vacuum on non-molded areas without changing the filter to prevent cross-contamination.
Tip: Work in sections to avoid dispersing spores into the cabin. - 3
Clean and disinfect fabrics and surfaces
Apply a car-safe cleaner to affected fabrics and hard surfaces. For fabrics, consider a hydrogen peroxide-based cleaner or enzyme cleaner rather than bleach, which can damage fibers or leave residues. Let surfaces air-dry.
Tip: Always test cleaners on a small inconspicuous area first. - 4
Treat porous padding and hidden areas
If you suspect mold behind seats or under padding, use a disinfectant on accessible areas and allow it to dwell per product directions before drying. For non-removable padding, avoid soaking; use minimal moisture to penetrate crevices.
Tip: Hidden mold requires patience and repeated cleaning if necessary. - 5
Dry thoroughly and monitor moisture
Use a dehumidifier or fans to dry the interior completely. Run the HVAC in fresh-air mode if appropriate to help drying, and check for residual moisture with a gauge or by feeling surfaces.
Tip: Aim for surfaces that feel dry to the touch and show no damp odor. - 6
Deodorize and maintain air quality
After drying, deodorize with baking soda or activated charcoal, and consider air purifiers with activated carbon filters to maintain fresh air. Replace cabin air filters if mold is detected.
Tip: Deodorizing should accompany ongoing moisture control, not replace it. - 7
Inspect and verify cleanup success
Recheck the interior after 24–48 hours for leftover odors, damp spots, or visual signs of mold. If any signs persist, repeat steps or seek professional remediation.
Tip: An inspection helps catch regrowth before it becomes entrenched.
FAQ
Is mold in a car dangerous to health?
Yes, mold exposure can irritate the eyes, nose, throat, and lungs, especially for people with allergies or asthma. Short-term exposure may cause coughing or headaches. Prolonged exposure should be avoided, and proper cleanup reduces health risks.
Mold can irritate respiratory systems; cleaning safely and ventilating helps reduce health risks.
How can I tell if mold has returned after cleaning?
Look for new musty odors, damp spots, or visible mold growth on fabrics, carpets, or under seats. If odors persist after cleaning, recheck hidden areas like behind panels or under padding.
Check for odors and damp spots; if you see new growth, repeat cleaning or call a pro.
Can I use household bleach to treat mold in a car?
Bleach is not ideal for porous automotive fabrics and can damage materials or leave residues. Use car-safe cleaners or enzymatic disinfectants instead.
Bleach isn't recommended for car interiors; choose safer cleaners designed for fabrics.
Should I remove seat covers or carpets to clean mold?
If seat covers or carpets are removable and washable, launder them according to care labels. Non-removable padding may require professional cleaning.
Removable items can be washed; non-removable padding may need professional help.
How long does car mold remediation take?
Time varies with extent of growth—from a few hours for small areas to multiple days for extensive contamination. A professional assessment can give a precise timeline.
It depends on how widespread the mold is; a professional can provide a schedule.
When should I call a professional remediation service?
Seek professional remediation if mold covers large areas, recurs after cleaning, or affects important components like seat padding or HVAC ducts. A pro can safely remove growth and verify the area is mold-free.
Call a professional if growth is extensive or keeps coming back.
Watch Video
The Essentials
- Prioritize safety and moisture control to stop mold growth.
- Use car-safe cleaners and a HEPA vacuum for effective cleanup.
- Dry thoroughly and monitor for signs of recurrence to prevent return.
- Seek professional help when mold covers large areas or recurs after cleaning.