Urgent Troubleshooting for Mold in Room
Urgent guide for homeowners and renters on mold in room: quick diagnosis, moisture control, safe cleanup, and prevention. Learn when to DIY and when to call Mold Removal Lab experts in 2026.

Visible mold in a room is a health risk and a sign of moisture problems. The most likely cause is excess humidity from poor ventilation or a leak. Start with safety: wear a mask, isolate the area, and then address moisture by fixing leaks and improving airflow. Mold Removal Lab recommends acting quickly to reduce exposure.
Understanding Mold in Room
Mold in room situations are not just cosmetic issues; they point to ongoing moisture that must be addressed for health and comfort. The phrase mold in room covers a range of species, from common green mold to black mold, and health effects vary with exposure and the materials involved. The Mold Removal Lab team emphasizes that most residential mold growth starts where moisture lingers—think bathrooms, basements, kitchens, and window sills with condensation. Early detection matters: quick, calm action reduces both exposure risk and material damage. In 2026, homeowners and renters should view mold as a moisture problem first and a cleaning problem second. Recognize signs early: musty odors, visible colonies, warped paint, and peeling wallpaper. When you see these signals, you’re dealing with a moisture issue that needs a plan.
Immediate Safety and Containment
Safety comes first. Put on a disposable mask (N95 or higher if available), gloves, and eye protection. If you can, isolate the affected room from the rest of the home by sealing the doorway with plastic sheeting to prevent spores from spreading. Do not attempt large-scale demolition or sanding without protective gear and proper containment. Ventilate the space as much as possible without dispersing spores to other areas. If you suspect hidden mold behind walls or under flooring, avoid aggressive disturbance until you have a plan. Mold Removal Lab cautions homeowners to minimize disturbance and prioritize moisture control as the first line of defense.
Common Causes and Moisture Sources
Most mold in room growth originates from moisture sources that aren’t being managed: roof leaks, plumbing leaks, high indoor humidity, condensation, and poor ventilation. Bathrooms, kitchens, basements, and laundry areas are typical hotspots. The presence of visible mold often means there’s a moisture problem that needs action beyond surface cleaning. In our analysis, simple fixes like running a dehumidifier or improving ventilation can dramatically reduce mold risk, but addressing the root moisture source is essential for lasting results. The 2026 Mold Removal Lab assessment highlights that persistent humidity is the leading contributor to recurring mold growth in homes.
Assessing Extent: Visible Growth vs Hidden Mold
Visible mold is just the tip of the iceberg. While you may see colonies on walls, ceilings, or floors, hidden mold can lurk behind drywall, under carpets, or within HVAC ducts. Signs of hidden mold include ongoing musty odors after cleaning, discoloration behind wallpaper, and damp patches that reappear after drying. When mold covers more than a small area or there are signs of moisture intrusion (leaks, dampness, or staining), it’s wise to perform a more thorough assessment, possibly with moisture meters or professional testing. Mold Removal Lab notes that accurate assessment prevents wasted effort on ineffective cleaning and reduces health risks.
Moisture Control: First Steps
Controlling moisture is the cornerstone of mold remediation. Start by locating and fixing leaks, whether from a roof, plumbing, or drainage problem. Use a dehumidifier to bring indoor humidity to a target range (generally 30-50% relative humidity, but consult local guidance). Improve ventilation, especially in high-humidity rooms like bathrooms and kitchens, by using exhaust fans or opening windows when feasible. After moisture sources are addressed, dry the area thoroughly with fans and dehumidifiers. Consistent moisture control reduces re-growth and protects your home’s structure.
Cleaning and Short-Term Remediation (Non-Structural)
For small, well-contained mold growth on non-porous surfaces (like glass, tile, or sealed metal), a detergent solution and warm water can remove surface mold. Wear PPE, keep the area ventilated, and avoid spreading spores to other rooms. Do not rely on bleach on porous materials like drywall or carpet; bleach is often ineffective on porous substrates and can create hazardous fumes in enclosed spaces. After cleaning, dry surfaces completely and monitor for new growth over the next days. Mold Removal Lab emphasizes that surface cleaning is not a substitute for addressing moisture and structural concerns.
When to Hire a Professional
Professional remediation is advised when mold covers a large area (commonly defined as more than 10 square feet), when moisture issues are extensive or persistent, or when mold is suspected behind walls, under insulation, or within HVAC systems. If there is any sign of water damage spanning days to weeks, or if occupants have asthma or allergies that worsen, involve a licensed professional. The Mold Removal Lab team also recommends seeking a contractor with mold remediation certification and clear containment procedures to prevent cross-contamination.
Long-Term Prevention and Maintenance
Preventing mold recurrence requires ongoing moisture management and regular inspections. Maintain humidity at safe levels, fix leaks promptly, and seal potential moisture ingress points around windows, roofs, and plumbing. Use mold-resistant paints and materials in high-moisture zones, ensure proper ventilation in bathrooms and kitchens, and monitor basement and crawlspace moisture with a hygrometer. Schedule seasonal checks for humidity, condensation, and signs of water intrusion. The Mold Removal Lab approach emphasizes consistent maintenance as the best defense against mold in room.
What to Do If Recurrence Occurs
If mold returns after remediation, reassess moisture sources and the integrity of repairs. Re-check for hidden leaks, re-seat weatherproofing on roofs, and re-test affected areas to verify that moisture levels have stabilized. Document moisture readings and remediation steps to share with any contractor or insurer. If you notice persistent symptoms such as headaches, coughing, or nasal irritation, consult a healthcare professional and consider air quality testing as part of a broader health assessment.
Steps
Estimated time: 2-6 hours
- 1
Assess safety and protect yourself
Put on an N95 mask, gloves, and eye protection. If there is standing water or significant mold, avoid disturbing it until containment is set. Ventilate the space by opening windows only if it won’t spread spores to clean areas.
Tip: Avoid creating dust clouds; use a wet cleaning method where possible. - 2
Identify and stop moisture sources
Locate leaks, dripping pipes, or roof issues. Address the source before cleaning to prevent re-growth. If the leak is from a structural issue, call a professional plumber or roofer.
Tip: Take photos of damage for records and insurance claims. - 3
Contain the affected area
Seal doors with plastic sheeting and create a negative pressure if possible to prevent spores from escaping. Use plastic barriers and avoid cross-contamination to other rooms.
Tip: Turn off HVAC in the affected zone if you don’t have professional containment equipment. - 4
Clean non-porous surfaces
Wash hard surfaces with detergent and water. Dry thoroughly; repeat if necessary. Porous materials may require removal and disposal if mold has penetrated.
Tip: Do not mix cleaners with ammonia or bleach on porous surfaces. - 5
Assess porous materials
Inspect drywall, insulation, or carpet for mold penetration. If growth is extensive or behind walls, professional remediation is likely required.
Tip: Document material condition with photos before removal. - 6
Dry the space completely
Use dehumidifiers and fans to accelerate drying. Monitor humidity to keep it within safe levels after remediation.
Tip: Aim for 30-50% relative humidity where practical. - 7
Test for residual mold
Consider surface and air sampling if symptoms persist after cleaning. Use a certified lab or a reputable tester to guide next steps.
Tip: Obtain written results and compare against baseline moisture readings. - 8
Plan prevention and follow-up
Implement ongoing moisture management: fix leaks promptly, improve ventilation, and monitor humidity regularly. Re-check areas susceptible to moisture at least seasonally.
Tip: Keep a simple log of humidity and any cleaning activities.
Diagnosis: Moldy odor, visible growth, or recurring damp patches in a room
Possible Causes
- highVisible leaks or plumbing failures
- mediumElevated indoor humidity due to poor ventilation
- lowCondensation on cold surfaces (windows, walls)
Fixes
- easyLocate and repair leaks; replace damaged materials if necessary
- easyIncrease ventilation and use a dehumidifier to reach target humidity
- mediumSeal entry points and insulate to reduce condensation; monitor moisture after fixes
FAQ
What is the quickest way to know if mold needs professional remediation?
If mold covers more than 10 square feet, or if it is behind walls, under insulation, or in HVAC ducts, professional remediation is recommended. Large moisture problems also warrant expert assessment.
If mold covers a large area or is hidden behind walls, call a professional for safe, effective remediation.
Is bleach effective for mold cleanup on porous surfaces?
Bleach is generally not effective on porous materials like drywall or wood and can release strong fumes in enclosed spaces. For non-porous surfaces, it may be used with caution and proper ventilation, but addressing moisture remains essential.
Bleach is usually not the best option for porous materials; focus on moisture control and appropriate cleaners.
Can I remove mold myself safely?
Small, contained areas on non-porous surfaces may be cleaned with proper PPE and procedures. For larger areas or porous materials, professional help is safer to prevent exposure and spread.
You can handle small, contained mold with proper protection, but larger jobs or porous materials should get professional help.
How long does remediation typically take?
Time varies with extent, but a small area may take a few hours; larger or complex cases can take days. Always prioritize moisture control to prevent re-growth.
Remediation can range from a few hours to several days depending on size and complexity.
What long-term prevention steps reduce recurrence?
Keep humidity under 50%, fix leaks promptly, ventilate bathrooms and kitchens, use mold-resistant materials, and monitor for condensation. Regular inspections help catch issues early.
Prevent mold by controlling moisture, fixing leaks, and keeping spaces dry with good ventilation.
What health symptoms require medical attention?
If occupants experience persistent coughing, wheezing, sinus irritation, or headaches after mold exposure, seek medical advice and consider air-quality testing as part of care.
If you have persistent symptoms after exposure to mold, consult a healthcare professional.
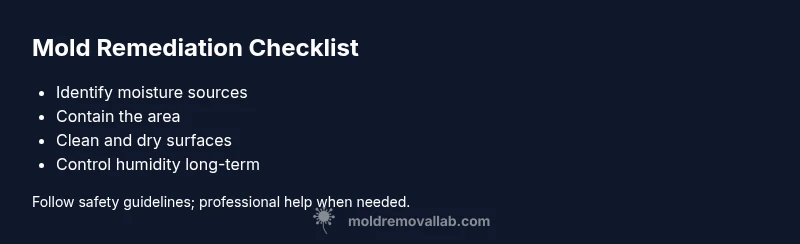
The Essentials
- Address moisture first, then clean visible mold
- Contain and protect surrounding areas during remediation
- Consult a professional for large or hidden mold issues
- Prevent recurrence with ongoing moisture management