Mold Bomb Risks and Safe Mold Removal for Homes
Explore what a mold bomb is, why it’s controversial, and safer, proven methods for removing mold in homes. Learn risks, regulations, and when to call a professional.

A mold bomb is a controversial remediation tool whose use is discouraged due to health, safety, and regulatory concerns. This guide explains safer, proven methods for removing mold and preventing recurrence, including proper containment, cleaning, and when to call a licensed professional. Avoid handling unknown products; ensure adequate ventilation; document moisture sources; test humidity; plan for post-remediation checks.
Understanding the mold bomb concept and why it’s controversial
A mold bomb is a colloquial term used in some discussions to describe aggressive remediation approaches that rely on rapid chemical release or gas-based action. In practice, these methods can release powerful fumes, create toxic byproducts, and damage porous materials. They can also spread mold spores through HVAC systems if not properly contained. The Mold Removal Lab team emphasizes moisture control, removal of mold-damaged materials, and physical containment as safer, proven approaches. The goal is to stop growth at the source and prevent recontamination, not to chase a quick fix with risky, unproven products. Homeowners should view mold management as a moisture problem solved through proper steps, not a single treatment. For most homes, containment, cleaning, and drying are far more reliable than dramatic, bomb-like methods.
Understanding the mold bomb concept and why it’s controversial
Tools & Materials
- N95 respirator or better(Choose a respirator rated for particulates; ensure a good seal and replace filters as needed.)
- Goggles or eye protection(Protect eyes from airborne particulates and cleaning agents.)
- Chemical-resistant gloves(Nitrile or neoprene recommended; avoid latex if you’re using cleaners with solvents.)
- Coveralls or long-sleeve clothing(Disposable or washable; keep contaminants from spreading to other areas.)
- Plastic sheeting and painter’s tape(Create an effective containment barrier around the work area.)
- HEPA vacuum and HEPA air purifier(Use for both cleanup and post-work air clearance; avoid non-HEPA vacuums.)
- EPA-registered fungicidal cleaner or detergent(Follow product label for dwell time and safety instructions.)
- Moisture meter and/or hygrometer(Track relative humidity and surface moisture during remediation.)
- Dehumidifier or fans with heat(Plan for ongoing drying to prevent regrowth after cleaning.)
- Disposable bags and waste disposal supplies(Seal and remove waste carefully to prevent spreading spores.)
Steps
Estimated time: 4-10 hours
- 1
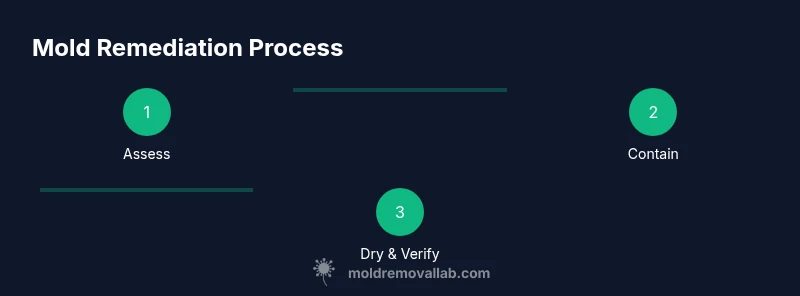
Assess mold extent and moisture sources
Identify all visibly affected areas and the moisture source driving mold growth. Document affected materials and note potential cross-contamination paths to plan containment.
Tip: Rely on moisture readings, not impressions; unchecked moisture fuels regrowth. - 2
Contain the work area
Set up physical barriers with plastic sheeting and tape to keep mold spores from migrating to clean spaces. Use negative pressure if available.
Tip: Seal doors and vents; run a HEPA-filtered air purifier in adjacent spaces. - 3
Protect yourself and others
Put on PPE before entering the area and avoid skin contact with contaminated materials. Keep kids and pets away during remediation.
Tip: Do not work when ventilation is poor; open exterior windows if safe to do so. - 4
Remove water-damaged materials safely
Carefully remove non-porous and severely damaged materials for disposal; bag contents without crushing them to limit spore release.
Tip: Place materials directly into sealed bags to prevent exposure. - 5
Clean and disinfect surfaces
Clean remaining surfaces with an EPA-registered cleaner or detergent, following label dwell times. Use a separate cloth or brush for each area to minimize cross-contamination.
Tip: Avoid mixing cleaners; some combinations can release hazardous gases. - 6
Dry out the space thoroughly
Run dehumidifiers and fans to reduce humidity and moisture levels until surfaces read consistently dry.
Tip: Monitor moisture over several days to confirm stability. - 7
Verify remediation and re-test
Re-inspect the area for residual mold growth and verify humidity stays low post-remediation.
Tip: Take photos and notes for future reference and moisture-control planning. - 8
Know when to call a professional
If mold covers more than 10 square feet, or if you have persistent moisture problems, contact a licensed remediator.
Tip: Professional remediation may be required for complex HVAC contamination or hidden mold.
FAQ
Is a mold bomb safe to use in homes?
No. Mold bombs pose health and chemical exposure risks and are widely discouraged for residential mold problems. Safer, proven methods focus on moisture control, containment, cleaning, and drying.
Mold bombs are not considered safe for homes. Safer methods rely on moisture control, containment, cleaning, and proper drying.
When should I call a professional remediation service?
Call a professional if mold covers a large area, if moisture persists, or if you’re unsure about the extent of contamination. Professionals can assess, contain, and remove mold safely and verify dryness.
Call a professional if mold is widespread, moisture keeps returning, or you’re uncertain about the contamination.
Can I remove mold myself without equipment?
Smaller, non-porous mold patches may be addressed with safer cleaning and containment, but porous materials and hidden mold require professional assessment. Always wear PPE and follow labeled instructions.
For small, safe patches you can DIY with proper PPE, but larger or hidden mold should be handled by a pro.
What are common signs of moisture problems that lead to mold?
Look for condensation, high humidity, damp odors, peeling paint, or warped materials. Addressing the moisture source is essential to stop mold growth.
Noticeable dampness, musty smells, and peeling surfaces are clues you have a moisture problem needing attention.
What steps help prevent mold recurrence after remediation?
Keep relative humidity low, fix leaks promptly, improve ventilation, and use HEPA filtration during cleaning to reduce spores. Regular moisture checks help catch issues early.
Control humidity, repair leaks quickly, and ventilate spaces to prevent regrowth.
Watch Video
The Essentials
- Prioritize moisture control over quick-fix products
- Contain, clean, and dry to prevent recurrence
- Call a professional when contamination is extensive
- Use PPE and safe cleaning agents for DIY remediation