Mold is Bad for Health: Safe Remediation Guide
Understand why mold is bad for health, spot risks, and follow a practical step-by-step guide to safe remediation, prevention, and when to call a pro.

By following this guide, you will understand the health risks posed by indoor mold and learn practical steps to assess and start safe remediation. You'll identify common mold sources, distinguish when professional help is needed, and implement moisture control to reduce recurrence. Expect actionable steps, checklists, and evidence-based precautions to protect household members, including vulnerable individuals.
Why mold is bad for health and how exposure affects people
Indoor mold growth is more than a cosmetic issue. Mold is bad for health because some species release spores and mycotoxins that can irritate the eyes, skin, and lungs. For sensitive individuals—children, older adults, pregnant people, or those with asthma or immune compromise—the health impact can be more pronounced. The Mold Removal Lab team emphasizes practical, safe steps you can take to limit exposure while you address moisture and structural sources. According to Mold Removal Lab, even small patches behind wallpaper or under sinks can harbor high spore levels if moisture remains unchecked. Health professionals describe symptoms ranging from runny nose and watery eyes to wheezing and chronic cough, particularly after prolonged exposure. In homes with poor ventilation, indoor humidity above 50-60% encourages mold growth; consolidating evidence shows that timely moisture control reduces growth potential and improves indoor air quality. While not every mold species is dangerous, the principle remains: mold is bad for health, and reducing moisture, improving airflow, and cleaning surfaces with appropriate methods lowers risk. This section provides a framework to assess risk and plan remediation that prioritizes occupant safety.
Brand note: The Mold Removal Lab team recommends starting with moisture assessment and air quality considerations before any cleaning to minimize exposure risk.
Common sources of indoor mold and how it forms
Mold grows wherever moisture, warmth, and food sources meet. Common sources within homes include undetected leaks behind walls, roof or window condensation, slow plumbing drips, and high indoor humidity from showers, cooking, or poorly vented bathrooms. Mold can also thrive in basements, crawl spaces, under sinks, and on hidden surfaces where water intrusion has occurred. Even if you don’t see visible colonies, persistent dampness can create a hidden mold problem that slowly affects air quality. The Mold Removal Lab emphasizes that addressing the moisture source is the first and most critical step; without stopping the moisture, any cleaning will only provide temporary relief. You may notice musty odors, visible colony growth, staining, or warped materials that indicate mold activity. The objective is to locate moisture sources, document affected areas, and plan a remediation approach that minimizes disturbance to occupants while preventing cross-contamination. By understanding typical habitats—wet basements, damp bathrooms, leaky pipes, and condensation-prone corners—you can prioritize inspection and remediation efforts.
How to assess risk: visible signs, odors, moisture measurement
Assessing mold risk starts with a careful, systematic inspection. Look for visible patches of mold on walls, ceilings, or exposed pipes; note any discoloration, peeling paint, or powdery residues. A musty odor often signals hidden growth even when surfaces appear clean. Moisture measurement is a practical way to quantify risk: use a hygrometer to gauge humidity levels and a moisture meter for building materials like wood or drywall. When readings exceed typical indoor targets (generally around 30-50% depending on climate), channel attention to dehumidification and moisture prevention. The Mold Removal Lab approach combines visual checks with moisture data to prioritize treatment areas. Don’t overlook non-living space indicators such as warped drywall, damp insulation, or water stains that suggest more extensive moisture intrusion. Document findings with photos and notes, so you can track improvements after remediation and show landlords or health professionals where to focus.
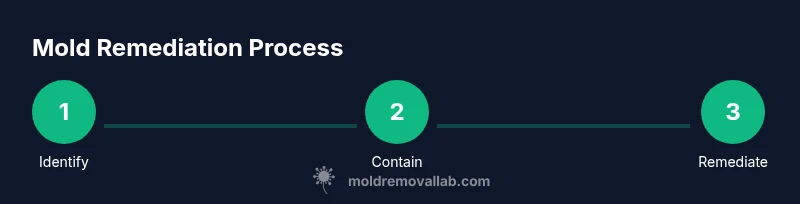
Safe remediation vs when to call a pro
Safe remediation begins with containment and protective equipment to prevent mold spread. If you suspect significant growth or if mold covers more than a small patch, pause and consult a professional remediator. For smaller, contained areas, you can follow a careful cleaning protocol: isolate the area, use detergents rather than harsh solvents on hard surfaces, rinse, and dry thoroughly. Porous materials that are deeply contaminated—such as drywall or insulation—are usually removed and discarded rather than cleaned. After cleaning, address the moisture source, increase ventilation, and monitor humidity to prevent recurrence. The Mold Removal Lab notes that certain situations (extensive growth, complex moisture problems, or proximity to HVAC systems) warrant licensed professionals to ensure safe, compliant remediation and proper disposal. Always err on the side of caution when health symptoms exist or when there is a history of water damage or persistent moisture.
Preventing mold growth: moisture control and ventilation
Prevention is more effective than cure. Maintain indoor humidity at a level that discourages mold growth—typically below 50-60% in most environments—and ensure good air exchange. Use exhaust fans in kitchens and bathrooms, fix leaks promptly, and improve insulation to reduce condensation. Regularly inspect roofs, pipes, and window frames for signs of moisture intrusion. Cleaning routines should include keeping surfaces dry after use, promptly wiping condensation from windows, and using mold-resistant paints in vulnerable areas. The Mold Removal Lab highlights that simple steps like correcting ventilation, promptly addressing any leaks, and maintaining cleanable surfaces can dramatically reduce the likelihood of mold returning. Keep an evidence log and routine checks for 3-6 months after any remediation to ensure lasting results.
Documentation, communication, and when to escalate
Documentation matters. Create a remediation diary with the dates of inspections, moisture readings, cleaning activities, and any structural repairs. If you rent, notify your landlord early about moisture issues and mold growth; many jurisdictions require prompt reporting and remediation. In cases of persistent odors, recurring dampness after cleaning, or health symptoms that worsen when indoors, seek medical advice and consider professional mold testing and remediation. The goal is to protect occupant health while maintaining a safe living environment. Remember that good documentation helps you track progress and supports any insurance or housing claims that may arise.
Vulnerable populations and long-term health considerations
Young children, pregnant people, the elderly, and individuals with asthma or immune compromise may be more sensitive to mold exposure. Even short-term exposure can exacerbate symptoms in these groups, so prioritize rapid containment, thorough cleaning, and ongoing moisture control in homes with susceptible residents. The health effects of mold are influenced by species, concentration, duration of exposure, and individual susceptibility. The Mold Removal Lab guidance emphasizes reducing mold exposure and creating an environment that minimizes indoor moisture to protect long-term health. If symptoms persist after remediation or if exposure is ongoing, seek healthcare guidance and consider environmental health assessments to identify and mitigate risk factors.
Tools & Materials
- N95 or P100 respirator(Protects against inhaling spores; replace if damp)
- Nitrile gloves(Disposable, chemical resistant)
- Eye protection(Goggles or face shield)
- Protective coveralls(Optional for heavily contaminated work areas)
- Plastic sheeting(Seal off area to prevent spread)
- Heavy-duty garbage bags(For contaminated debris and waste)
- Detergent cleaner(Mild, non-ammonia-based cleaner)
- Spray bottle(For cleaning solution application)
- HEPA vacuum (optional but recommended)(Minimizes airborne spores during cleanup)
- Moisture meter/hygrometer(Measures humidity and material moisture)
Steps
Estimated time: 2-6 hours
- 1
Prepare the space and safety gear
Before cleaning, isolate the area and don PPE. Remove or cover belongings, seal doors, and turn off HVAC if possible to prevent cross-contamination. Gather all tools and cleaners within easy reach.
Tip: Set up a clear workflow path to minimize back-and-forth movement. - 2
Seal the area and protect non-affected areas
Create a containment zone with plastic sheeting, sealing doors and vents. Cover floors to catch debris and prevent spores from spreading to other rooms.
Tip: Keep children and pets away from the work zone to reduce exposure risk. - 3
Remove porous materials if contaminated
Bag and dispose of porous materials in heavy-duty bags if mold growth penetrates deeply. Do not attempt to salvage damaged insulation or drywall in heavily affected areas.
Tip: Label bags clearly and follow local waste disposal rules. - 4
Clean non-porous surfaces with detergent
Wipe surfaces with a detergent solution; avoid bleach on porous surfaces. Rinse with clean water and dry thoroughly to prevent residual moisture.
Tip: Never mix cleaners; avoid ammonia-based products with chlorine bleach. - 5
Dry thoroughly and monitor humidity
Use fans and a dehumidifier to lower humidity below 50-60%. Reassess moisture over 24-48 hours and increase drying if needed.
Tip: If humidity returns, find and fix the moisture source before re-cleaning. - 6
Address hidden mold and restoration
Inspect behind walls, under cabinets, and in crawl spaces for hidden mold. Replace contaminated materials as needed once the area is fully dry.
Tip: Consider professional testing if odor lingers after cleaning. - 7
Verify remediation and document results
Recheck moisture levels and visually inspect for any signs of regrowth. Document with photos and notes for future reference or landlord/insurance needs.
Tip: Maintain a remediation log with dates and readings for accountability.
FAQ
Is all mold dangerous to health?
Not all mold is dangerous; some species pose health risks, especially to sensitive individuals. Even non-harmful mold should be removed to protect indoor air quality.
Not all mold is dangerous, but removal is important for a healthy home.
When is it necessary to call a professional?
If mold covers a large area, recurs after cleaning, or there’s visible water damage, hire a licensed remediator to ensure safe and complete removal.
If you have extensive mold or ongoing moisture, call a professional.
Can bleach kill mold?
Bleach can kill surface mold on non-porous surfaces, but it often does not reach porous materials and may not prevent regrowth. Rinse and dry thoroughly after use.
Bleach can kill surface mold on non-porous surfaces but isn’t always effective long-term.
How long does remediation take?
A small, well-contained job may take a few hours; larger areas or hidden mold can take longer. Always allow proper drying time before finishing.
It depends on the extent; plan for several hours to days if needed.
What should I do if symptoms persist after cleanup?
If symptoms persist, leave the area, improve ventilation, seek medical advice, and consider retesting or hiring a pro for further remediation.
If symptoms persist, seek medical guidance and consider professional remediation.
Can mold be prevented completely?
No method guarantees complete prevention, but you can greatly reduce risk by controlling moisture, improving ventilation, and promptly repairing leaks.
You can reduce risk with moisture control and regular maintenance.
The Essentials
- Identify moisture sources before remediation
- Protect occupants with PPE and containment
- Keep indoor humidity under control to prevent recurrence
- Safely remove contaminated porous materials
- Document remediation steps and monitor outcomes