Mold a Rama Remediation: A Practical How-To Guide
A practical home guide to mold a rama remediation: PPE, containment, cleaning, drying, and prevention—based on Mold Removal Lab expertise.

Goal: Learn how to safely identify, contain, and remove mold a rama in a typical home, then dry thoroughly and prevent recurrence. This guide covers PPE, containment, cleaning methods, drying with humidity control, and when to escalate to professional remediation. Follow Mold Removal Lab’s practical steps and checklists to finish with a safer, healthier living space.
What mold a rama is and why it matters
Mold a rama is a term we’ll use in this guide to describe a typical indoor mold scenario homeowners face after hidden moisture leaks or high humidity. While mold a rama isn’t a formal scientific term, understanding it helps anchor practical remediation steps that reduce health risks and structural damage. According to Mold Removal Lab, addressing mold a rama promptly minimizes health hazards for occupants and keeps walls, framing, and insulation in better condition. This section clarifies what this term covers in real-world homes, including common growth patterns on walls, ceilings, basements, and bathrooms. You’ll learn to recognize early signs such as musty odors, visible discoloration, and condensation patterns, and you’ll see why a quick, organized response matters for long-term health and comfort.
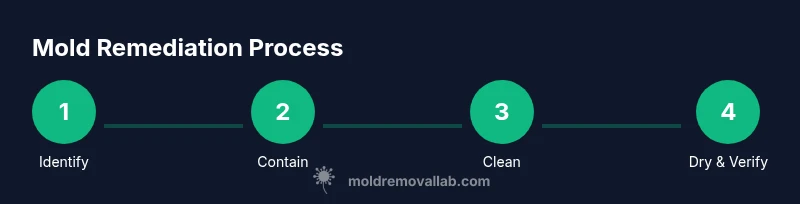
A successful mold a rama response hinges on three core ideas: identify the moisture source, contain the affected area, and begin careful cleaning with appropriate PPE. While the phrase is informal, the actions are firmly grounded in science: moisture control, proper cleaning agents, and thorough drying. Homeowners who treat mold a rama as a signal to inspect for leaks or poor ventilation often prevent repeated growth and expensive restoration later. In this guide, Mold Removal Lab shares a practical, home-friendly approach you can implement without professional help in many cases, provided you follow safety precautions and use the right tools.
To keep the discussion grounded, remember that mold can grow behind drywall, under carpets, or inside insulation where moisture accumulates. The Mold Removal Lab team emphasizes that the fastest path to a safer home is early detection, honest assessment, and disciplined execution of containment and cleaning. The term mold a rama is a reminder to treat any growth as a moisture management issue rather than a simple surface stain. By approaching it with structure and care, you’ll reduce health risks and protect your property values.
Practical takeaway: If you notice persistent dampness, unusual odors, or new discoloration—even if the growth seems small—start a mold a rama remediation plan right away and document the moisture source. This proactive stance aligns with widely recommended mold health and safety practices from reputable sources.
Tools & Materials
- N95 respirator or higher(Ensure a proper fit; replace if damaged or soiled)
- Protective gloves (nitrile or neoprene)(Water-resistant and chemical-resistant gloves recommended)
- Safety goggles or face shield(Protect eyes from droplets during cleaning)
- HEPA vacuum (with certified filters)(Use for cleanup of loose spores; do not use an ordinary vacuum)
- Mold removal solution (EPA-approved cleaner, or 3% hydrogen peroxide)(Non-bleach cleaners for porous surfaces; test color-fastness)
- Spray bottle or pump sprayer(For even application of cleaners)
- Bucket and cleaning rags or disposable wipes(For surface cleaning and disposal)
- Plastic sheeting (6–10 mil) and painter’s tape(To create containment barriers)
- Trash bags (heavy-duty, sealable)(For disposal of contaminated materials)
- Dehumidifier or desiccant (to maintain 30–50% RH)(Optional but helpful for faster drying)
- Moisture meter or hygrometer(Use if available to monitor drying progress)
- Soap or detergent for initial cleaning on non-porous surfaces(May be included with cleaning plan)
Steps
Estimated time: Estimated total time: 8-12 hours (spread over 1–2 days)
- 1
Prepare and protect
Before you begin, remove occupants from the area if possible and close off to avoid cross-contamination. Put on your PPE: an N95 mask, gloves, and eye protection. Do a quick visual survey to note visible mold and the extent of staining, then document with photos for future reference.
Tip: Wear your PPE throughout to prevent inhalation or skin exposure; budget at least 5–10 minutes for donning/doffing safely. - 2
Identify moisture source
Mold a rama growth almost always tracks back to a moisture issue—leaks, condensation, or poor ventilation. Inspect plumbing lines, roof penetrations, and HVAC supply/return ducts. Repairing the moisture problem is essential before cleaning to avoid quick regrowth.
Tip: Check behind appliances and inside wall cavities if you can safely access them; hidden leaks drive regrowth. - 3
Contain the work area
Create a simple containment zone using plastic sheeting and tape to prevent spores from spreading. Seal doorways and vents if feasible. Set up a basic negative-pressure flow by keeping a fan blowing air toward the outside (not into other living spaces).
Tip: Keep the work area slightly negative to minimize air movement of spores into other rooms. - 4
Initial cleaning of non-porous surfaces
For hard, non-porous surfaces like metal and glass, scrub with detergent solution, then rinse and dry. For light mold on painted surfaces, use a cleaner suitable for walls and wipe away before it dries. Wear the PPE during this step and dispose of wipes in sealed bags.
Tip: Avoid over-wetting porous materials that can trap moisture and promote mold growth. - 5
Address porous materials thoughtfully
Porous items such as drywall, insulation, and carpets with deep mold should be treated with caution. Porous materials may require removal and disposal; cleaning might not be effective if mold penetrates deeply. Consider patching after drying to restore a clean surface.
Tip: Do not sand or grind moldy drywall without protection; spores can become airborne. - 6
Drying and moisture control
Post-cleaning, dry the area thoroughly using dehumidifiers and fans directed to move air toward exhaust vents. Maintain humidity below 50% if possible, and monitor progress with a hygrometer. Documentation of RH levels helps evaluate when it’s safe to finish.
Tip: Drying times vary; expect longer periods in humid climates or poorly insulated spaces. - 7
Final inspection and remediation planning
Re-inspect the area for remaining mold, moisture, or musty odors. If growth returns, reassess moisture sources and consider professional remediation for more extensive contamination. Keep records of cleaning, drying, and any repairs for future reference.
Tip: If mold areas exceed 10 square feet or are in HVAC systems, call a pro sooner rather than later. - 8
Restore and monitor
Replace removed materials with properly sealed drywall or insulation, restore ventilation, and resume regular moisture management to prevent a recurrence. Schedule follow-up checks after major weather events or leaks.
Tip: Set a reminder to inspect for moisture monthly for the first year.
FAQ
What does mold a rama mean in practical terms?
In this guide, mold a rama refers to a typical indoor mold scenario caused by moisture issues. The steps focus on safety, containment, cleaning, and drying to prevent recurrence. It’s a practical framing for homeowners to address common growth patterns.
Mold a rama is a common indoor mold scenario. Focus on safety, containment, cleaning, and drying to prevent it from returning.
Is it safe to clean mold myself?
Small, non-porous mold patches can be cleaned safely with proper PPE and cleaners. If mold covers large areas, appears inside insulation, or recurs after cleaning, consider professional remediation.
You can clean small areas safely if you wear PPE and follow steps; large or recurrent mold needs a pro.
What PPE is required for mold cleaning?
At minimum, use an N95 respirator, eye protection, gloves, and a disposable barrier. For larger jobs, consider a P100 respirator or supplied-air system.
Wear an N95 or better, eye protection, gloves, and cover exposed skin when cleaning.
When should I call a professional remediation service?
Call a professional if mold covers more than 10 square feet, is in HVAC systems, or if leaks/errors are persistent after cleaning. Professionals can perform containment and advanced remediation.
If the mold is widespread or keeps coming back, it’s time to bring in pros.
How long does the drying and re-inspection take?
Drying times vary by area size, humidity, and ventilation. Expect 24–72 hours for many small projects; larger jobs may require longer assessment and monitoring.
Drying can take from a day or two to several days, depending on space and humidity.
Can mold cause health problems?
Mold exposure can cause allergic reactions and respiratory symptoms in sensitive individuals. Reducing exposure through containment and cleaning reduces risk.
Mold exposure can affect health, especially for sensitive people—contain and clean to reduce risk.
Watch Video
The Essentials
- Contain mold growth by stopping moisture sources.
- Wear proper PPE and follow containment protocols.
- Clean, then dry thoroughly to prevent recurrence.
- Know when to escalate to professional remediation.