How to Get Out Mold Stains: Safe, Practical Guide
Learn proven methods to remove mold stains from walls, fabrics, and surfaces. Safe, practical steps, when to test for mold, and prevention tips from Mold Removal Lab.

To get out mold stains, start by determining if the stain is surface mold or embedded. For most walls and hard surfaces, apply 3-6% hydrogen peroxide or white distilled vinegar, let sit 10 minutes, scrub with a brush, and rinse. For fabrics, blot, treat with an enzyme cleaner or baking soda paste, air-dry fully, and repeat as needed. Always test a small area first.
Understanding mold stains and moisture
If you're wondering how to get out mold stains, it starts with diagnosing moisture sources and the stain type. Mold stains on walls, ceilings, or hard surfaces are typically a symptom of lingering dampness. In many homes, subtle leaks, high humidity, or condensation create a home for mold spores to flourish. The Mold Removal Lab team emphasizes that successful stain removal relies not just on cleaning the mark itself, but also on addressing the moisture that feeds future growth. Start by locating the moisture source—check plumbing leaks, roof integrity, and ventilation in the affected area. Preventing re-growth is as important as removing the stain, and it often requires improving ventilation, using dehumidifiers, and cleaning regularly with non-toxic cleaners.
According to Mold Removal Lab, treating stains in a dry, well-ventilated environment reduces relapse. If you pinpoint a persistent moisture issue, plan to fix it before repeating cleaning steps on the stain. This approach prevents a cycle of cleaning and re-staining that can undermine confidence in DIY methods and prolong exposure risk.
Surface vs embedded stains: how to assess
Mold stains can sit on the surface or become embedded in porous materials. Surface stains are usually treatable with surface cleaners, scrubbing, and rinsing, while embedded stains may require deeper cleaning, restraint with moisture, or replacement of the affected material. To determine which type you’re dealing with, perform a simple test: lightly scratch the edge of the stain with a cotton swab or coin. If color rises with gentle pressure, the stain is more embedded and may require more intensive treatment or replacement. For hard surfaces like tile or painted walls, surface stains respond quickly to cleaners, but porous materials like drywall or wood may need longer drying times between cleanings. addressing both the visible stain and the source moisture is essential to prevent reappearance.
Cleaning methods by surface type
Hard, non-porous surfaces (tile, glass, sealed countertops) usually respond best to hydrogen peroxide or white vinegar. Apply 3-6% hydrogen peroxide or undiluted white vinegar, let sit for 10 minutes, then scrub with a soft-bristled brush and rinse with water. For painted walls, first test a hidden area to ensure the cleaner won’t remove paint. For damp bathroom tiles, a paste of baking soda and water can help lift stains without harsh chemicals. On concrete or masonry, use a diluted peroxide solution and rinse thoroughly to avoid residues that can attract more dirt.
Porous surfaces (drywall, wood, fabric) require different tactics. Treating stains on porous materials often involves drying thoroughly after cleaning, and sometimes removing the affected layer if the stain is deeply ingrained. Enzyme-based cleaners can be effective on fabrics, while baking soda paste can lift many surface stains on fabrics and carpets. Always air-dry treated areas completely before returning them to use, and keep humidity levels low during the drying process to prevent re-growth.
Fabrics, upholstery, and porous materials
Fabrics and upholstery are more challenging because mold can embed into fibers. For fabrics, blot the stain with a clean cloth to lift moisture, then apply an enzyme cleaner or a baking soda paste. Gently scrub with a soft brush, then rinse or blot with clean water. After cleaning, allow the fabric to air-dry completely in a well-ventilated area. Avoid heat or direct sunlight until the fabric is fully dry, as heat can set stains permanently. For carpets or cushions, use a carpet cleaner or a gentle enzyme formula and then thoroughly dry with fans or dehumidifiers. Always spot-test on a hidden area before treating broader sections to ensure colorfastness and fabric integrity.
On wood or composite surfaces, avoid soaking the material. Use mild cleaners and dry immediately to protect finishes. If a stain persists after cleaning, repeat the process once or twice, or consider professional remediation for stubborn cases.
Safety steps and patch testing
Safety first: wear gloves and eye protection when handling cleaners, especially hydrogen peroxide and vinegar. Always open windows or run a fan to improve ventilation. Before applying any cleaner widely, perform a patch test in an inconspicuous area to check for adverse reactions or color changes. If you notice paint peeling or wood warp, stop and reassess the approach. Avoid mixing cleaners in a single container, as combining chemicals can release harmful gases. If you’re cleaning a mold problem that covers a large area or involves HVAC ducts, consult a professional rather than proceeding DIY.
Aftercare, prevention, and monitoring
After stain removal, dry the area completely to prevent regrowth. Maintain a humidity level below 50% when possible, use exhaust fans in bathrooms and kitchens, and address recurring moisture issues. Regular cleaning with non-toxic cleaners helps keep surfaces less susceptible to future stains. If you’re cleaning in a moisture-prone area like basements or showers, consider sealants for porous surfaces where appropriate and inspect for hidden moisture sources behind walls or under cabinets. Mold staining often signals a moisture issue; monitoring humidity with a hygrometer can help you take proactive steps.
When to call a professional
If mold growth covers a large area (greater than 10 square feet), if you notice persistent staining after multiple cleanings, or if you have health concerns (asthma, allergies), seek professional remediation. A Mold Removal Lab expert can assess moisture sources, perform professional mold testing if needed, and advise on safe, long-term solutions that reduce re-growth risk. DIY methods are useful for minor stains, but professional guidance is essential when the mold issue is widespread or could affect indoor air quality.
Tools & Materials
- Hydrogen peroxide 3% solution(Common household grade; test on a hidden area first)
- White distilled vinegar (5% acidity)(Do not mix with bleach)
- Baking soda(Create a paste for fabrics or mild scrubbing)
- Enzyme-based stain cleaner(Optional for fabrics and upholstery)
- Mild dish soap(For gentle surface cleaning)
- Soft-bristled brush or old toothbrush(For gentler scrubbing)
- Spray bottle(For even application)
- Microfiber cloths(Lint-free wiping)
- Gloves (nitrile)(Protect skin from cleaners)
- Mask or respirator(Protect breathing zone when cleaning mold)
- Fan or dehumidifier(Speed up drying and prevent regrowth)
- Patch test area(Hidden area to test for colorfastness)
Steps
Estimated time: 1-2 hours (plus 24-48 hours drying for fabrics)
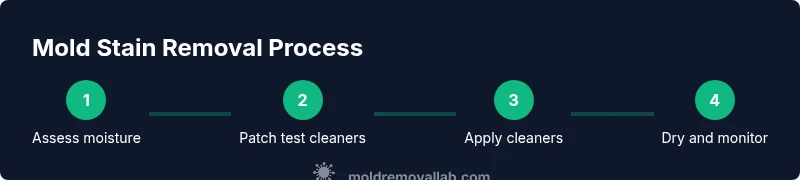
- 1
Prepare and safety-check
Put on gloves and a mask. Ventilate the area by opening windows or using a fan. Gather all cleaning supplies before you start to avoid mid-task trips.
Tip: Ventilation reduces inhalation risk and speeds drying. - 2
Patch test on inconspicuous area
Apply a small amount of cleaner to a hidden spot and wait 5-10 minutes to observe any color change or material damage. Do not proceed if you see adverse effects.
Tip: If color fades or material warps, skip that cleaner for this surface. - 3
Treat hard surfaces with peroxide or vinegar
For surface stains on walls or tile, spray 3-6% hydrogen peroxide or apply undiluted vinegar. Let stand for 10 minutes to penetrate the stain, then scrub gently and rinse.
Tip: Do not mix cleaners; move from cleaner A to B only if the area is thoroughly rinsed. - 4
Scrub and rinse; repeat as needed
Scrub with a soft-bristled brush, wipe with a clean cloth, and rinse. Repeat if stains persist but avoid over-wetting the surface.
Tip: Limit moisture exposure to avoid damage to paints or finishes. - 5
Handle fabrics and porous materials
Blot stains on fabrics, apply enzyme cleaner or baking soda paste, scrub gently, and rinse or blot. Air-dry completely in a well-ventilated area.
Tip: Avoid heat until fully dry to prevent setting any remaining stain. - 6
Dry thoroughly and inspect
Use a fan or dehumidifier to accelerate drying. Inspect the area over the next few days for any signs of re-growth and repeat treatment if necessary.
Tip: Keep indoor humidity low to prevent recurrence. - 7
When to escalate
If stains persist after 2-3 rounds on porous materials or if mold covers a large area, consult a pro for remediation and moisture assessment.
Tip: Professional help can address moisture sources beyond the stain.
FAQ
What is the difference between surface mold stains and embedded mold stains?
Surface stains sit on top of materials and are usually removable with cleaners and scrubbing. Embedded stains penetrate fibers or porous substrates and may require deeper cleaning or replacement. Always assess moisture sources to prevent re-growth.
Surface stains sit on the surface and are easier to clean. Embedded stains require deeper cleaning and may need material replacement.
Can I use bleach to remove mold stains?
Bleach can lighten stains on non-porous surfaces but is not ideal for porous materials and colored fabrics. It can damage finishes and release harsh fumes, so use more gentle cleaners first and avoid mixing with vinegar.
Bleach isn’t ideal for porous or colored materials and can be risky to use around mold.
Is hydrogen peroxide safe for mold stain removal?
Yes, hydrogen peroxide is a common, safer option for many mold stains on hard surfaces. Use it at 3% concentration, test first, and avoid over-wetting sensitive materials.
Hydrogen peroxide is a common safe option when used carefully and tested first.
How long should I wait after applying cleaner before inspecting the stain?
A typical wait time is 5-10 minutes to let the cleaner penetrate, then scrub and rinse. Reassess after drying to determine if a second treatment is needed.
Wait 5-10 minutes, then scrub and rinse; recheck after drying.
When should I call a professional?
Call a professional if the area is large (greater than 10 square feet), if mold keeps returning after multiple cleanings, or if you have health issues that could be aggravated by mold exposure.
Call a professional for large areas or if mold keeps coming back.
Can mold stains reappear after cleaning?
Yes, if moisture remains or humidity is high. Address the moisture issue and ensure thorough drying to reduce the chance of recurrence.
Yes—moisture and humidity drive re-growth, so fix the moisture source.
Watch Video
The Essentials
- Identify moisture sources before cleaning.
- Differentiate surface vs embedded stains for targeted treatment.
- Patch test everything to avoid damage.
- Dry thoroughly to prevent regrowth.
- Call a pro for large areas or persistent stains.